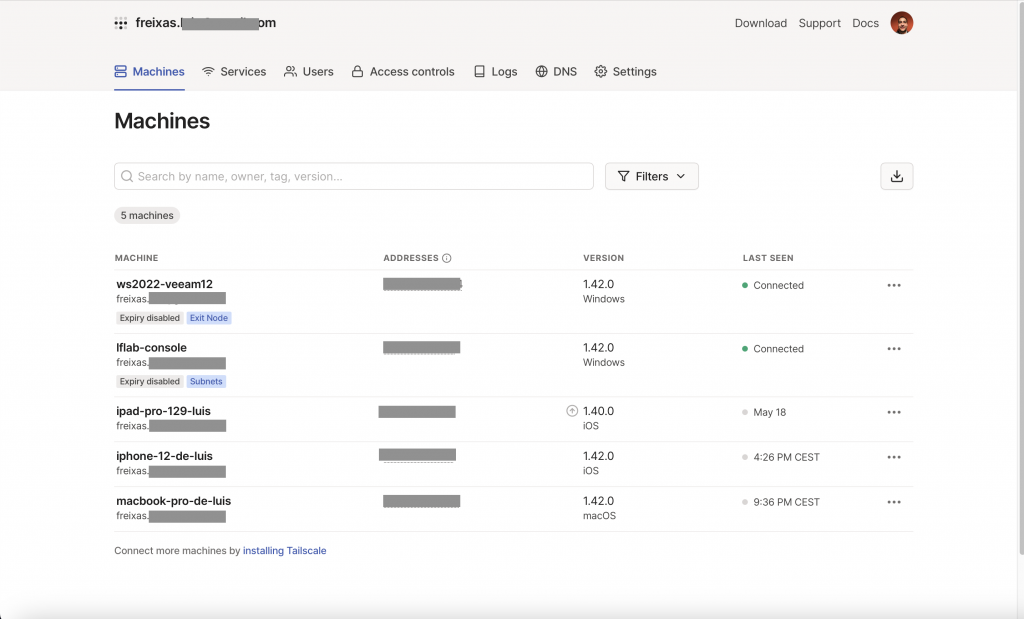
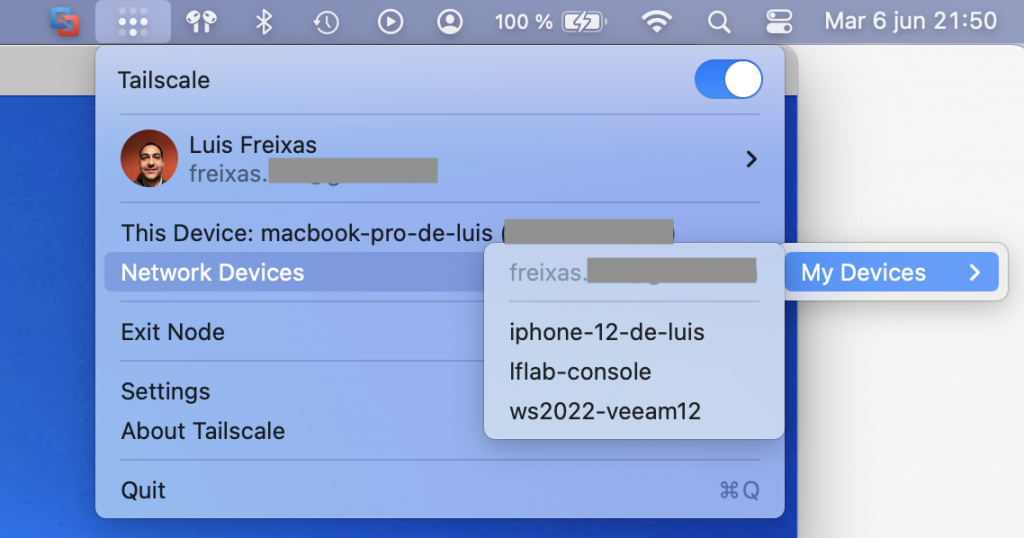
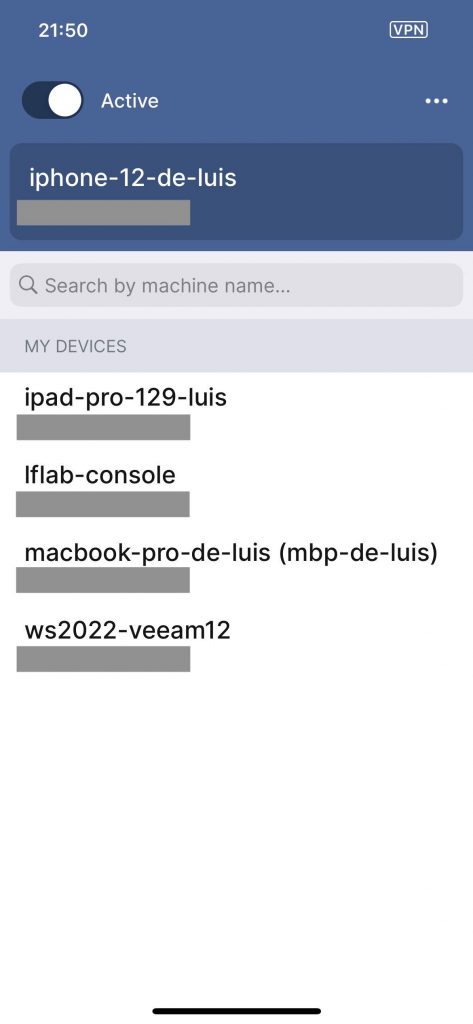
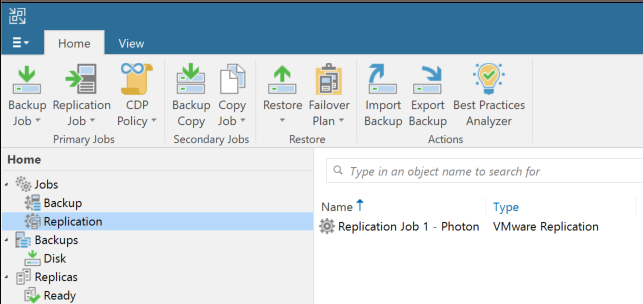
Hi everyone! I wanted to write today about a tool that happily surprised me and now has made my life easier, related to VPN and connectivity, its called Tailscale
The main slogan says :
Secure remote access to shared resources
Tailscale connects your team’s devices and development environments for easy access to remote resources.
I’ll try to put it on my own words, in my use case, I’ve been using it at the beginning to connect to my Home Lab remotely from my house to my “Jump Station” over RDP, then, I started to use some advanced features:
VPN Access to a single client
VPN to Remote Site, to access other devices not capable to install the Client
Proxy / Traffic router when Im out of the house or in a untrusted network
Web central console for configurations, users creation and management.
Easy to use client for Linux, Windows, Android, OSX, iOS, etc.
The client is very neat, clean and easy to use, also the documentation is great! Im gong to post a few screenshots and will make a future entry with an example setup.
The “Free” version comes with great features to start using it, as I said, in my case, at my home lab,
One of the positive things for me, is that I dont need to setup a firewall + opening ports for connecting from / to my hose / homelab, the Iphone / Ipad client works “like a champ” and I can access all I need, and secure my traffic navigating from my home when needed.
In the previous post, we saw how to create a replica in Veeam B&R v12. Now I’ll briefly show you how to bring that replica into production if needed, and we’ll discuss a few use cases.
Let’s go!
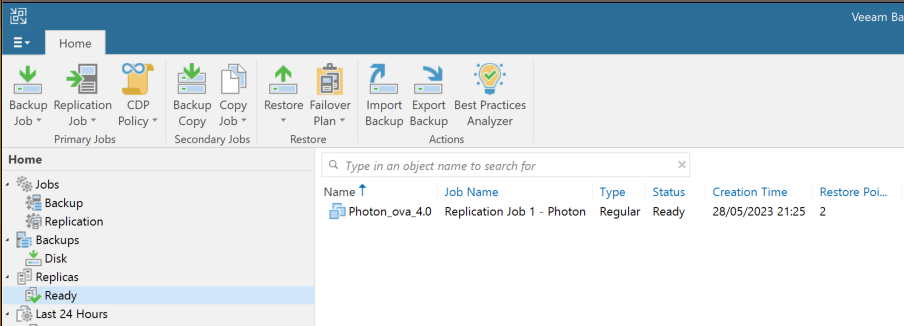
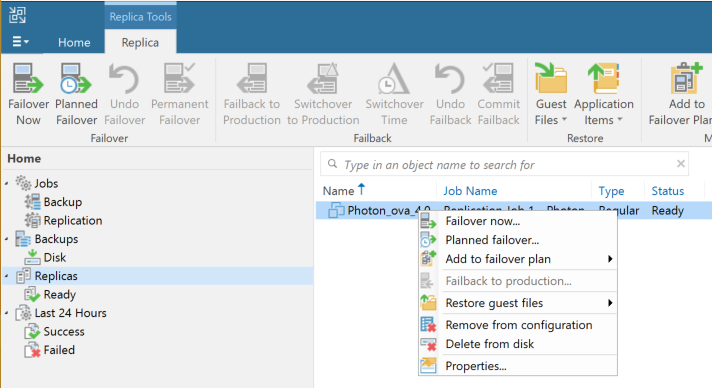
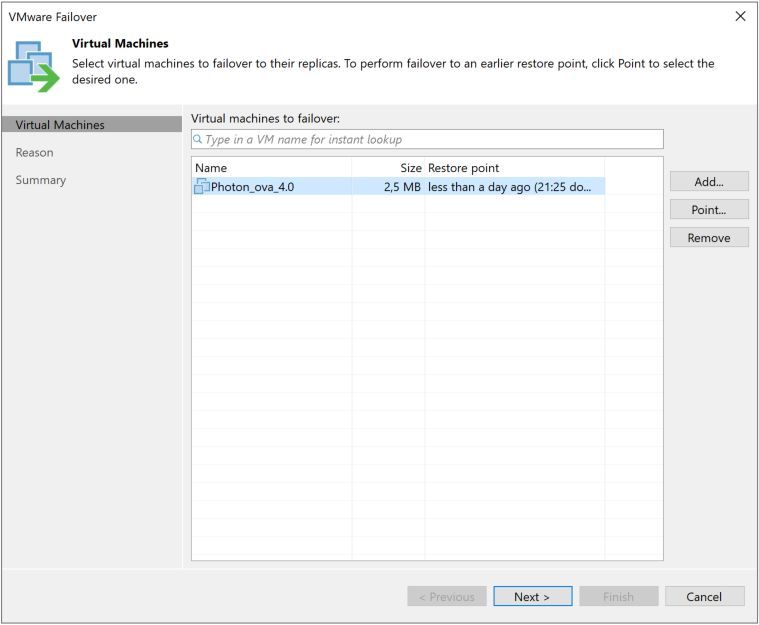
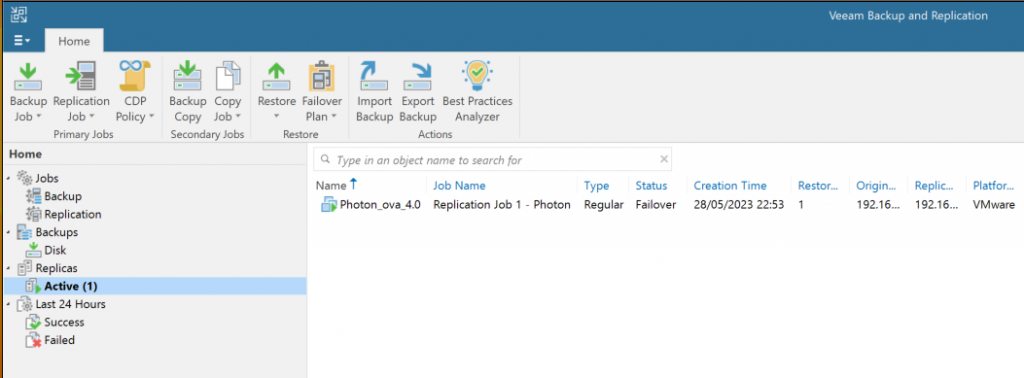
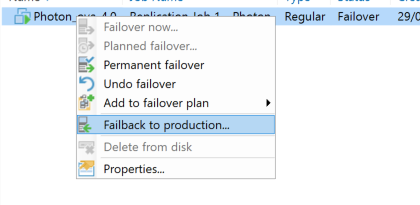
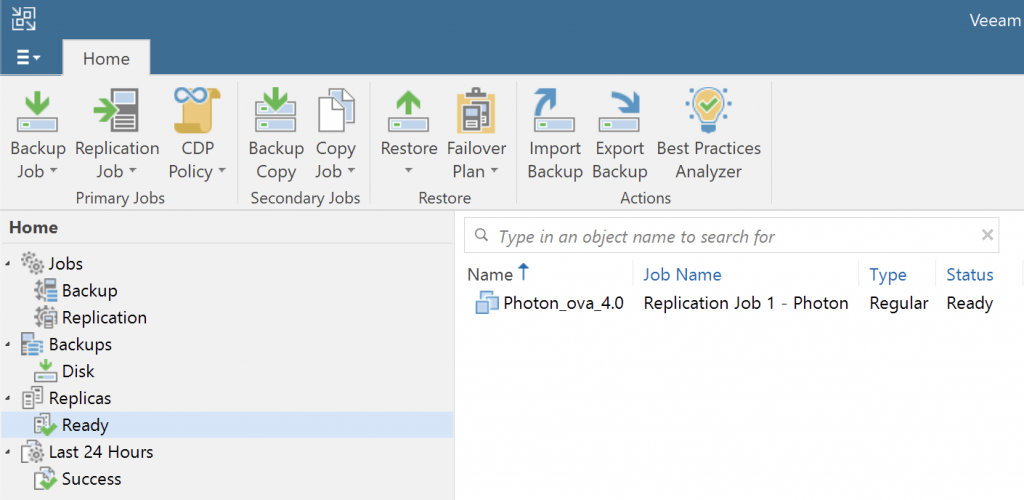
In the Veeam B&R v12 console, we can see the replication job.Under Replicas, we have one ready to use or start.Right-click the replica you want, and you’ll see these options:
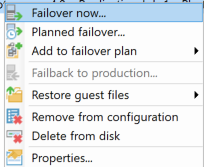
Let’s briefly explain the two features I use most. Failover now ->: Veeam starts the replica on the host we configured. This is the usual option if production is lost or stopped. Planned failover ->: Safely shuts down the source and starts the replica without data loss, although there is an outage while the source powers off and the replica powers on. You can use it to test replicas or run a VM on another host if you don’t have vMotion or something similar.
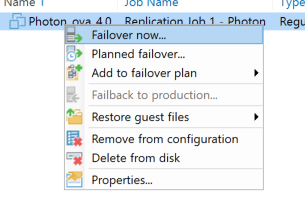
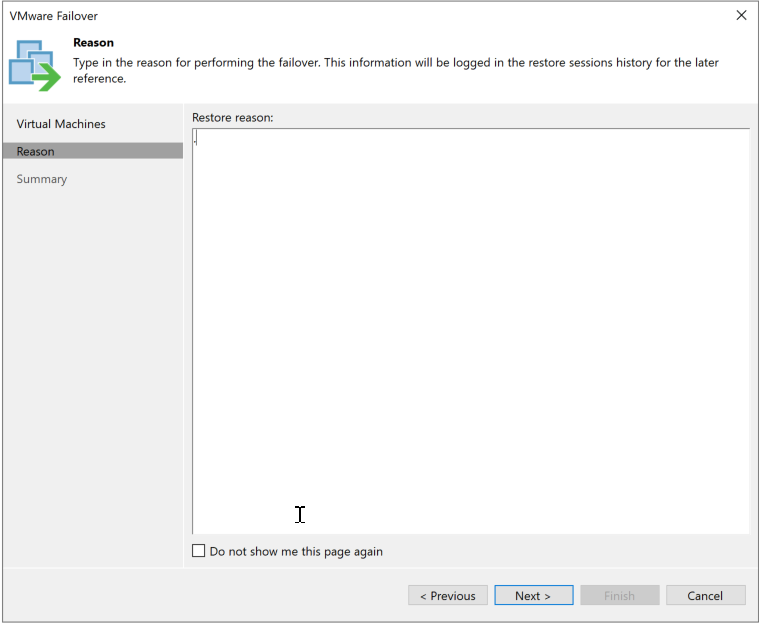
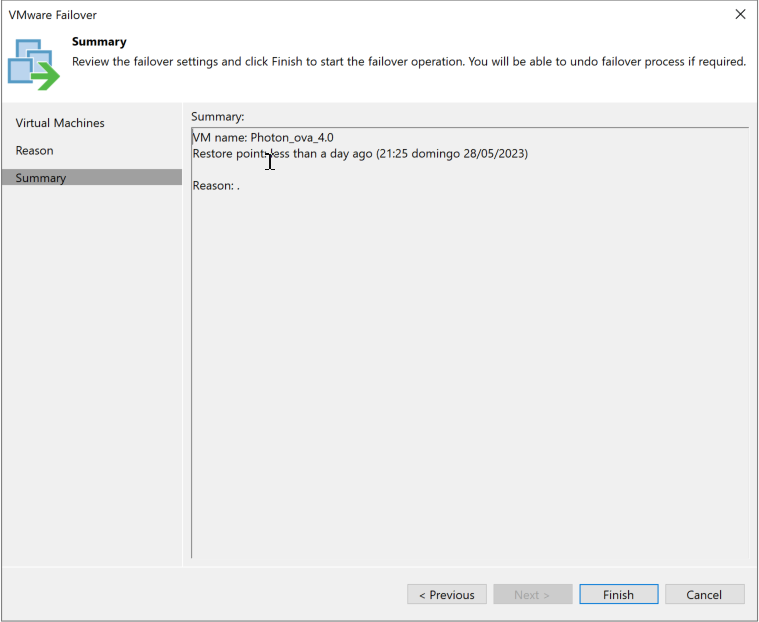
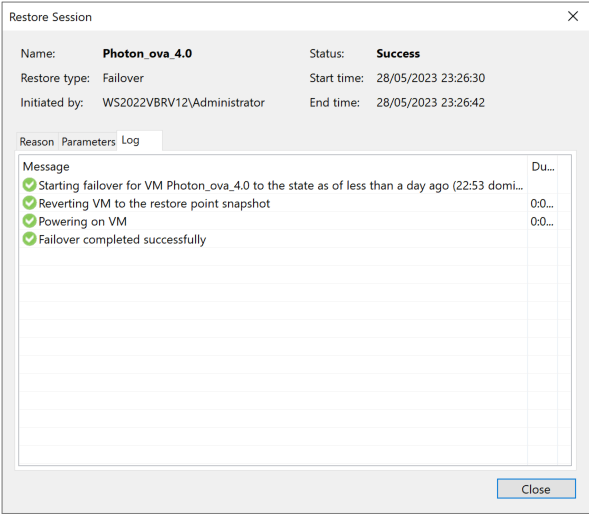
In our example, we’ll simulate a production outage, so choose “Failover now” and continue.
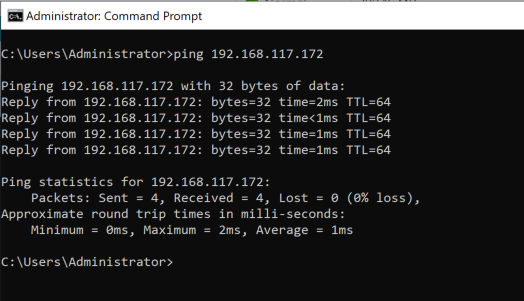
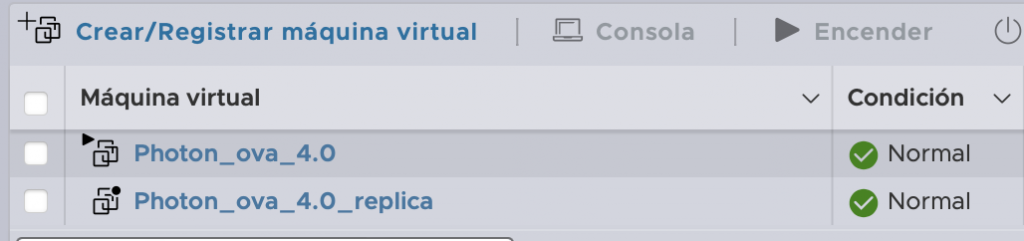
Here we can see the replica VM, Photon_ova_4.0_replica, is powered on.And we can reach the machine with a PING!
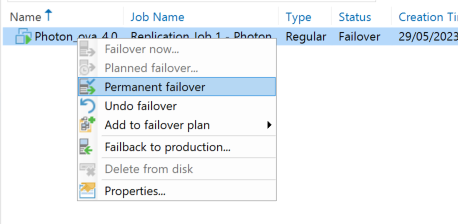
Once the machine is running as a replica, these are the final options: Permanent failover: the replica remains as the VM. Undo failover: discard all changes made to the replica and power it off. Failback to production: copy changes made to the replica back to the production VM, then power off the replica and start the “original.”
If we lost the source machine or its storage, Permanent Failover is the better option. If we only lost connectivity to the storage array, we can use Failback to Production once connectivity is restored, copy over the changes, and continue as usual.
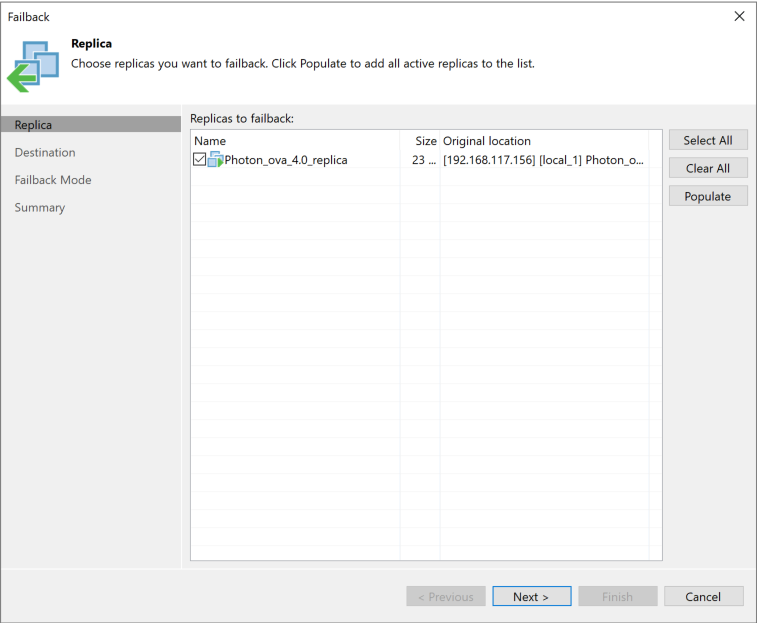
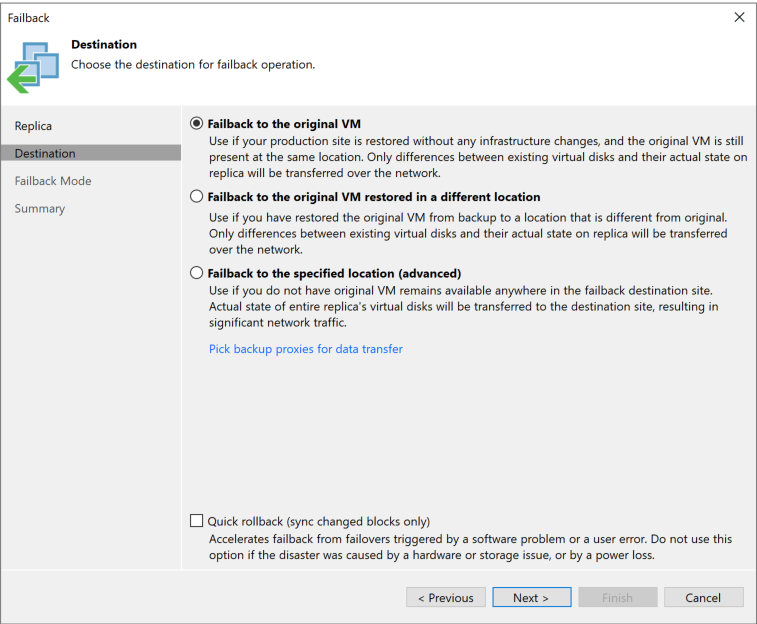
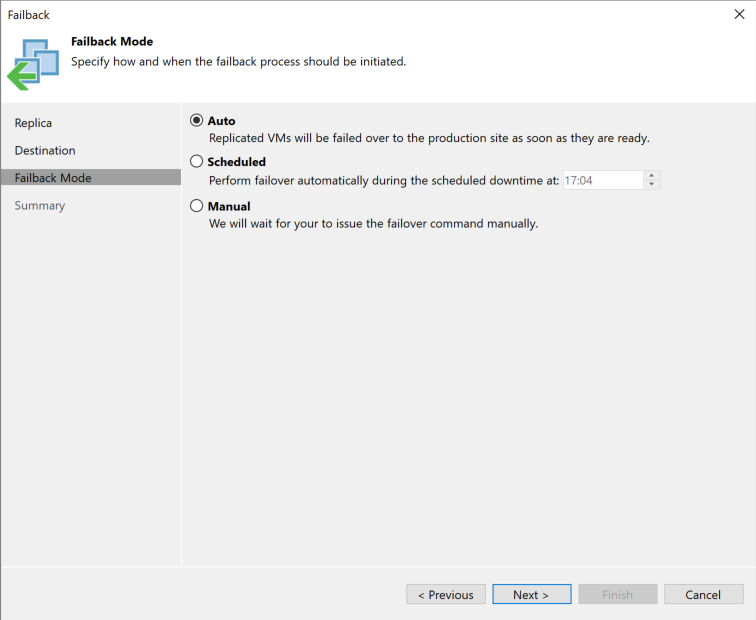
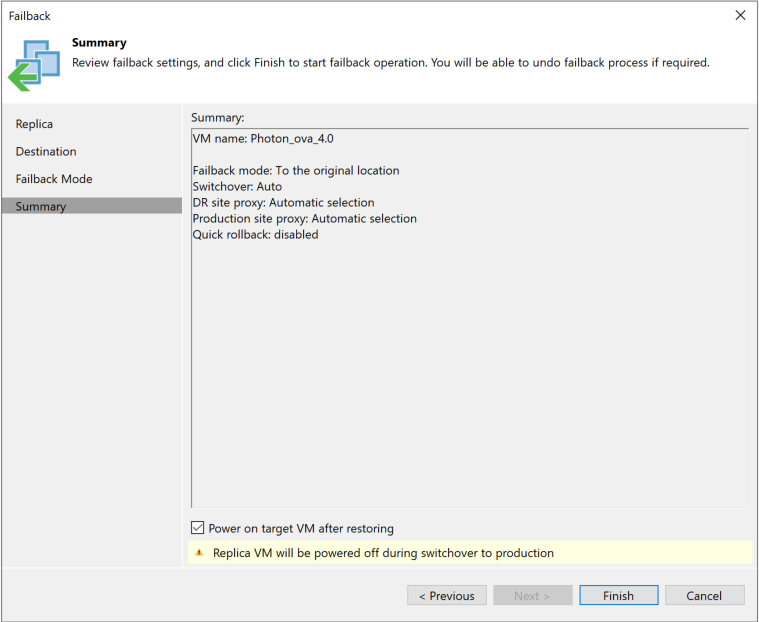
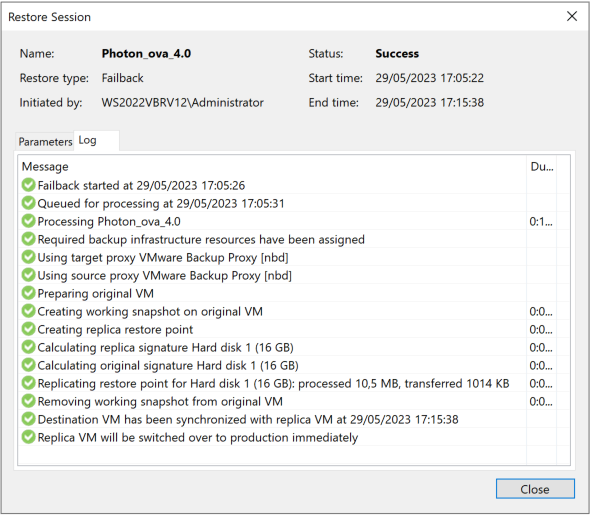
Let’s run Failback to Production to restore the original setup, copy changes from the replica back to production, and resume normal operations.
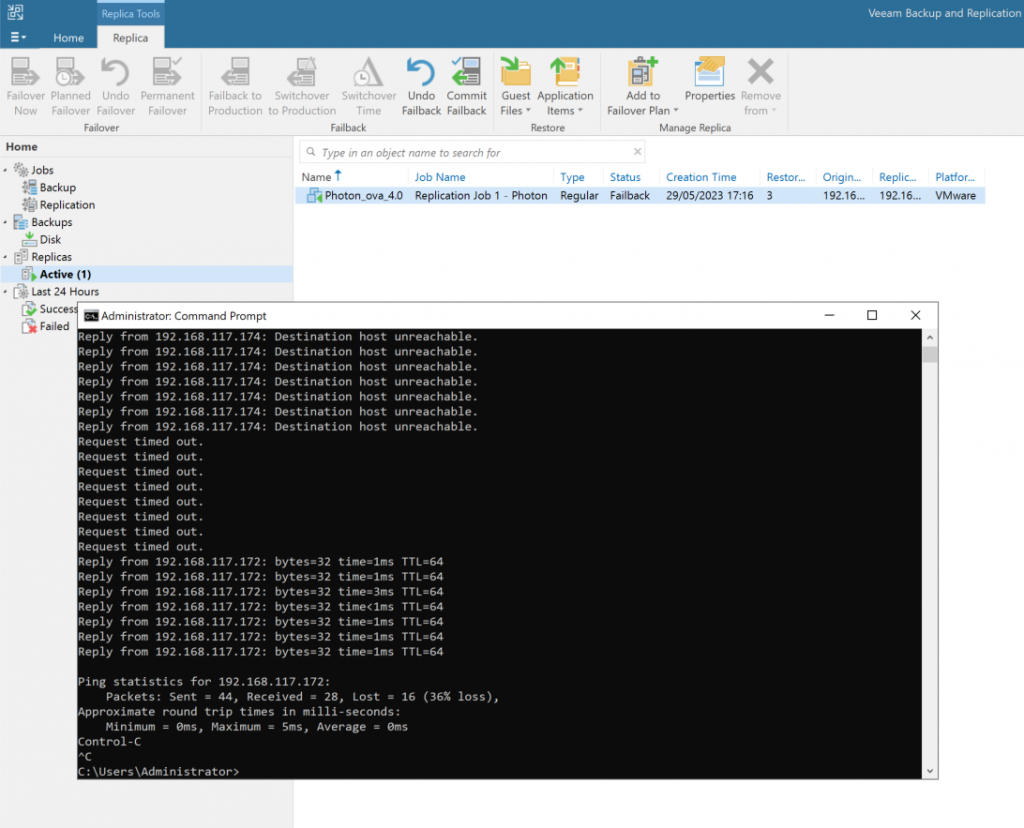
NOTE: I selected the option to power on the destination after the data transfer.Here we can see the transition: the original machine was unreachable and is now back online.
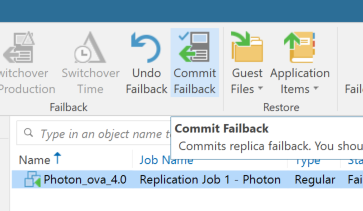
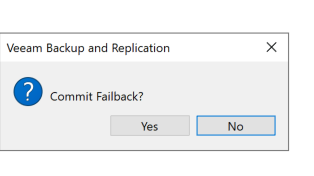
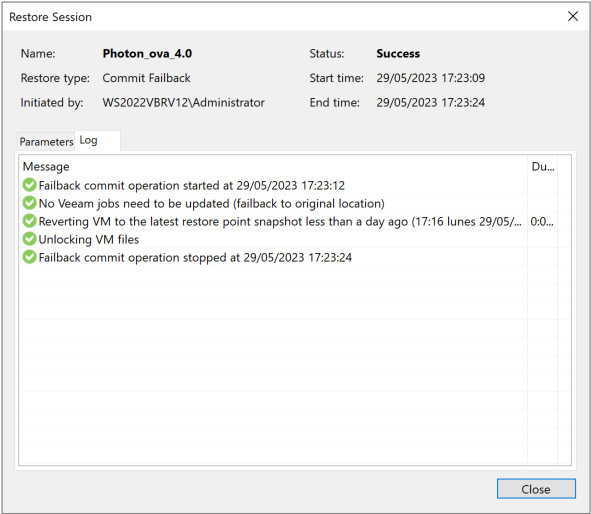
As a final step, after failing back the replica to production, we need to commit the operation. This completes the process, applies all changes, and returns the machines to their production and replica states.
Join us for this session with Jose Maria, Senior Systems Engineer at Veeam. We’ll focus on protecting Kubernetes workloads with Kasten 10, along with a brief introduction to the community and a demo!
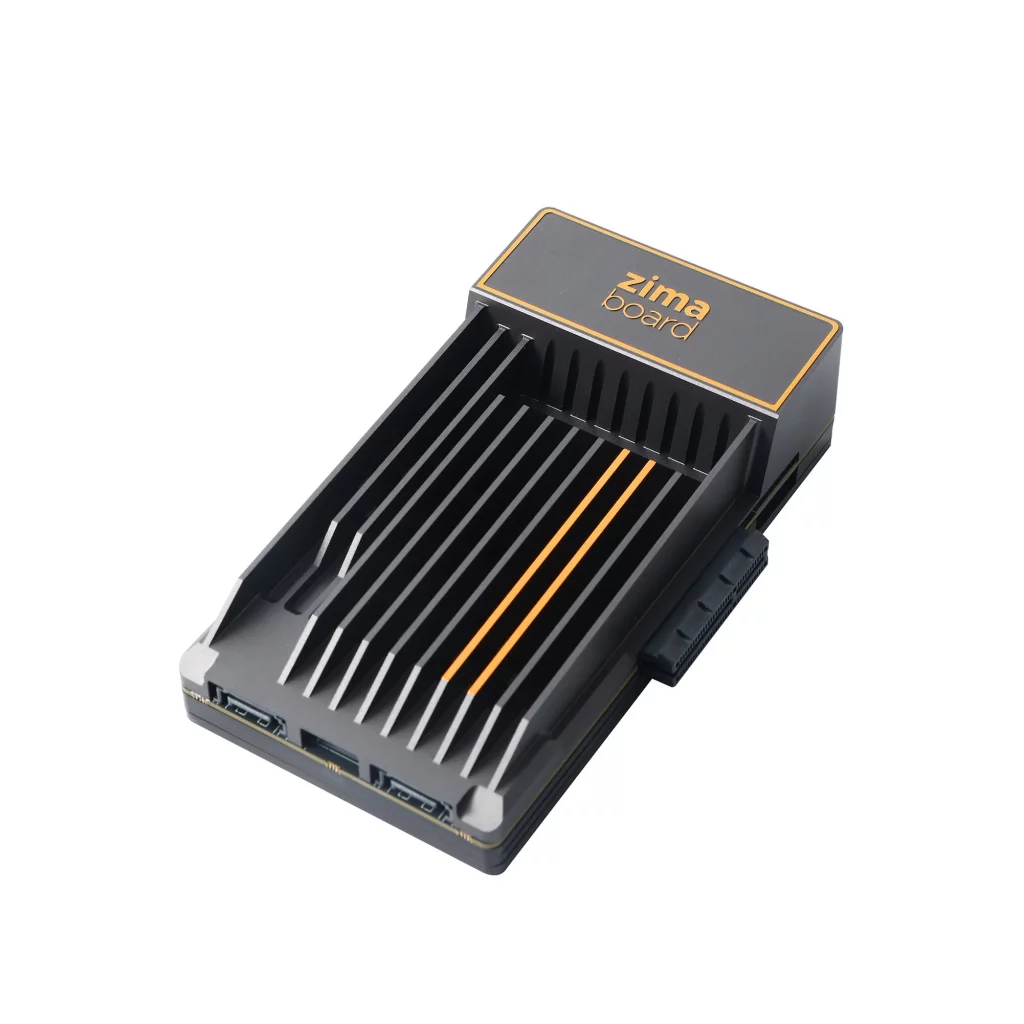
Let’s take a look at a “toy” that caught my attention and that I wanted to test to improve or expand my homelab!
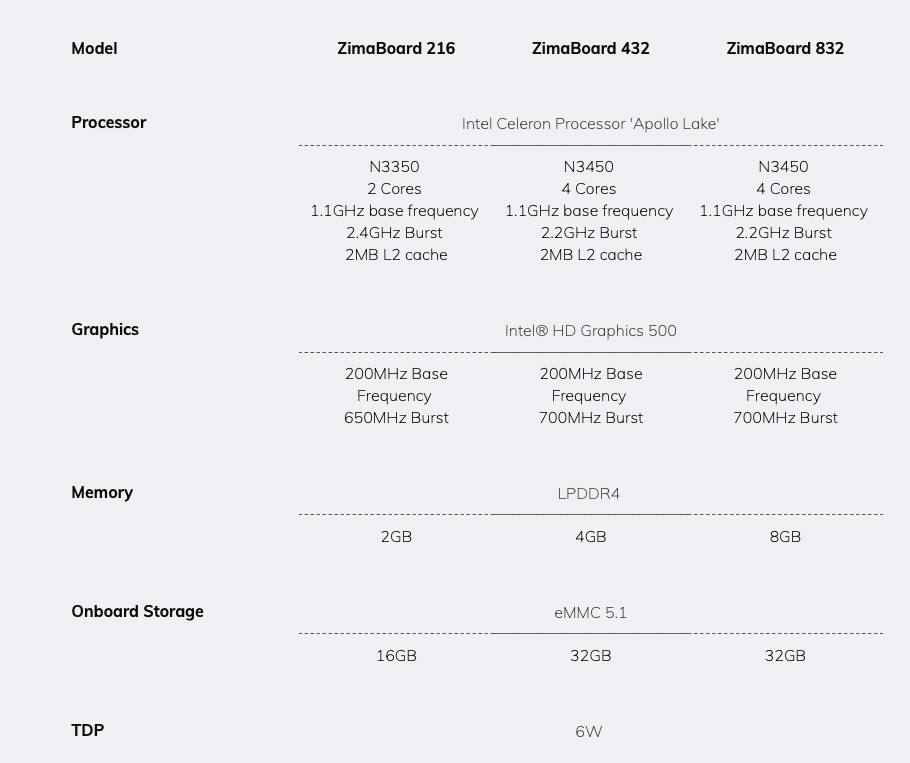
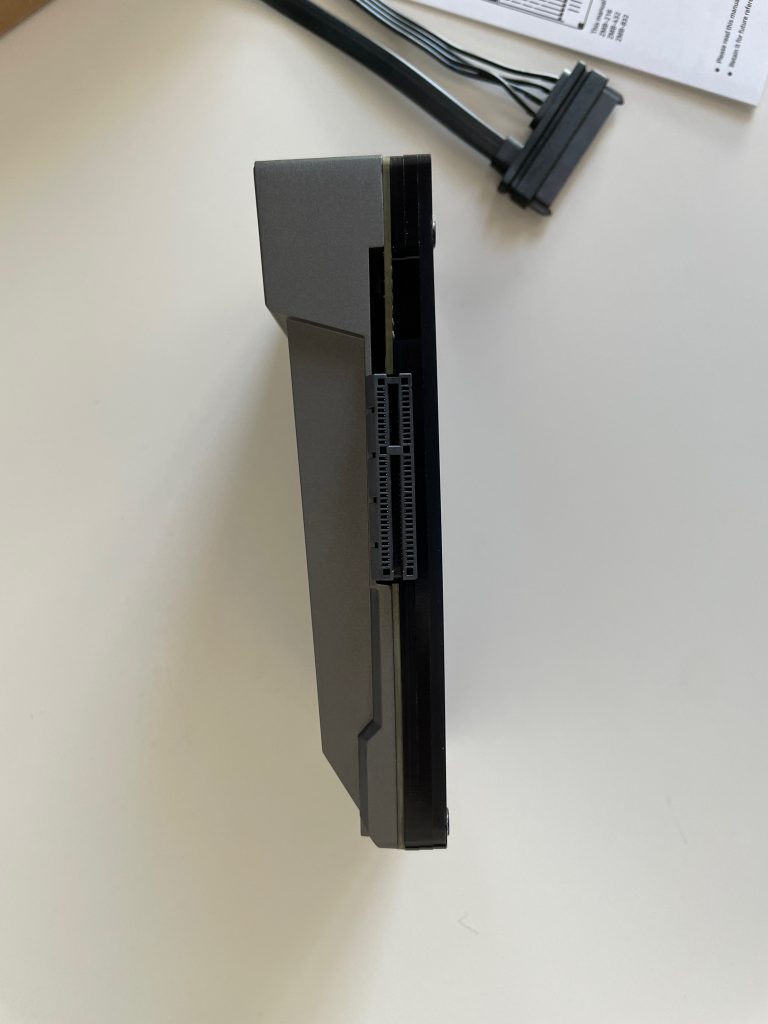
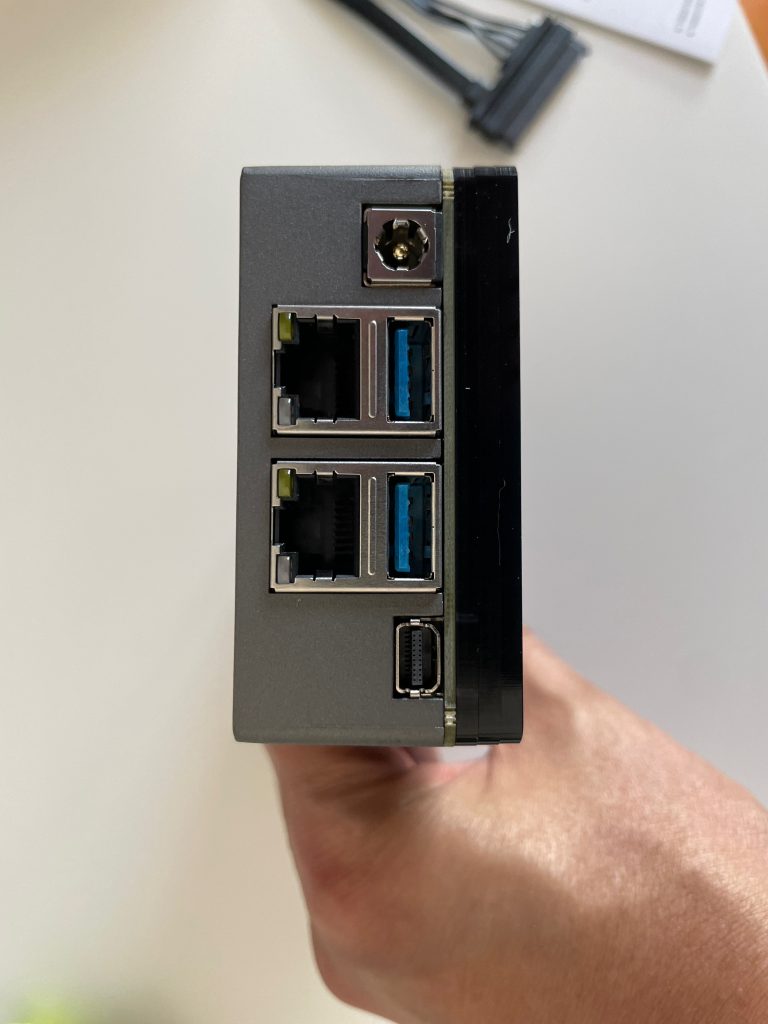
This little device comes in several configurations. I have the top model, with a quad-core Celeron, 8 GB of RAM, and 32 GB of onboard storage! It’s a great fit for my homelab!
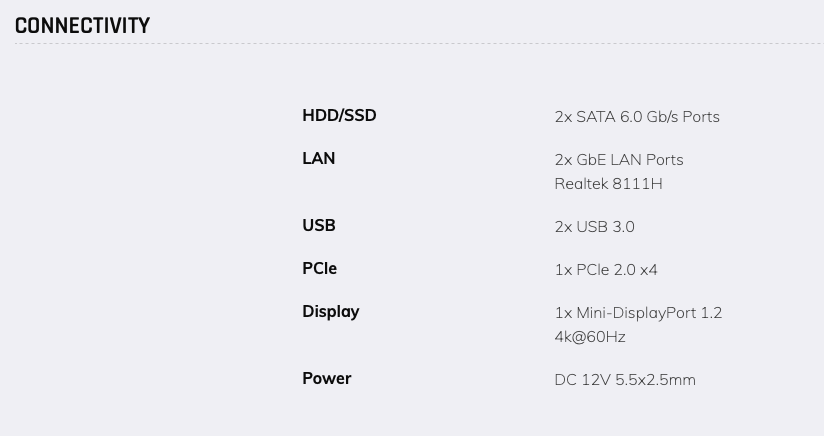
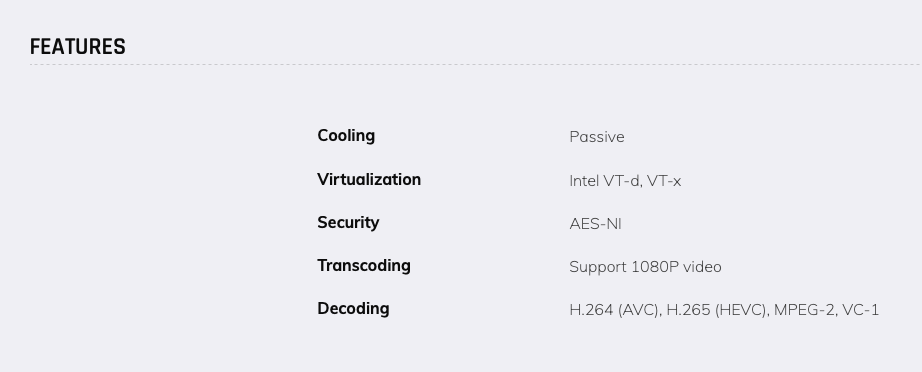
It comes with built-in connectivity, making it flexible for many uses! It’s great to have two network cards and two SATA ports! PCIe (x4), USB 3.0, and a heatsink make it quiet and low-power! NAS, firewall, server, and more. The possibilities are endless!
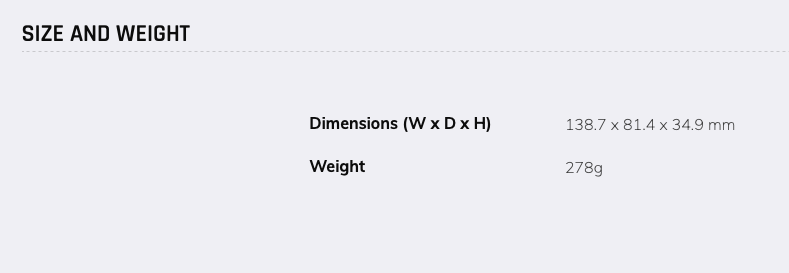
You’ll see in the specifications that it’s small and powerful!
The price is great: $120, $160, or $200.
Given everything it includes, I think it’s a great device and wanted to share it with you.
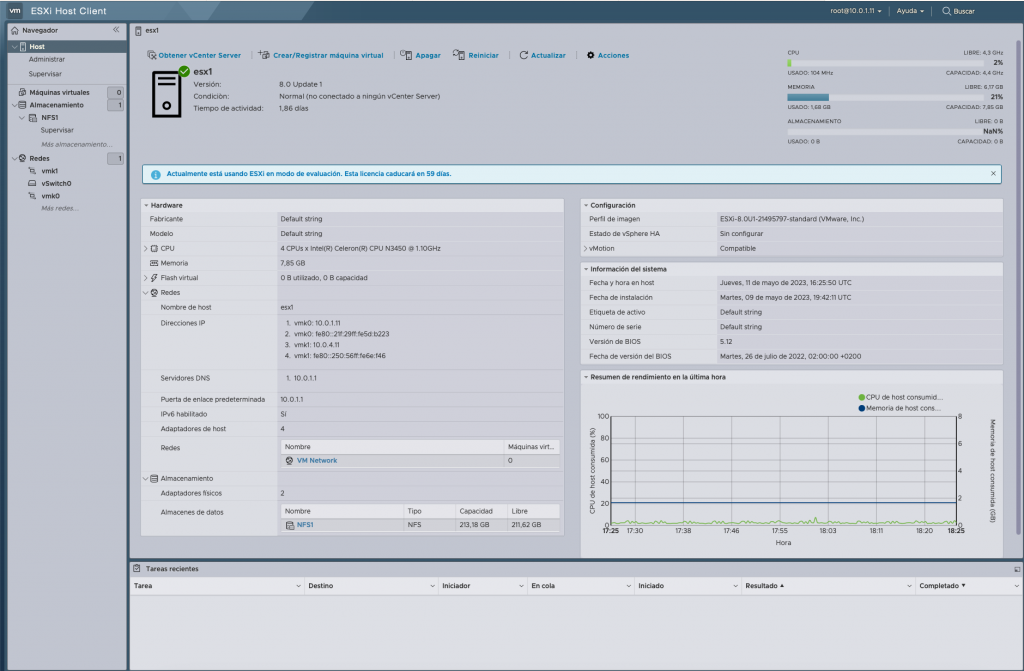
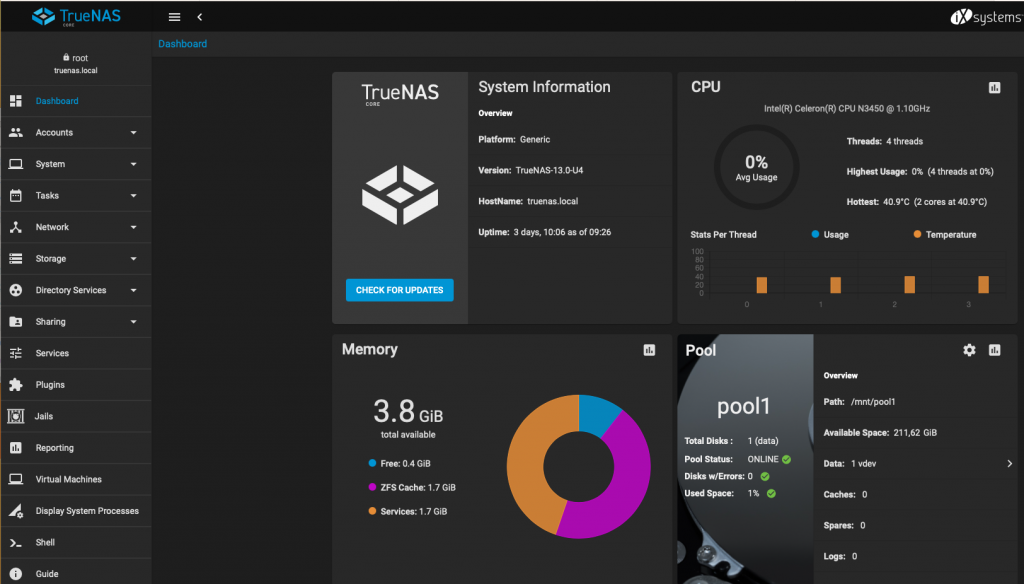
Here’s a screenshot of the two ways I’m using these little devices:
ESXi 8 (with a network card added to the PCIe x4 slot)TrueNAS with SATA disks connected directly to the ZimaBoard
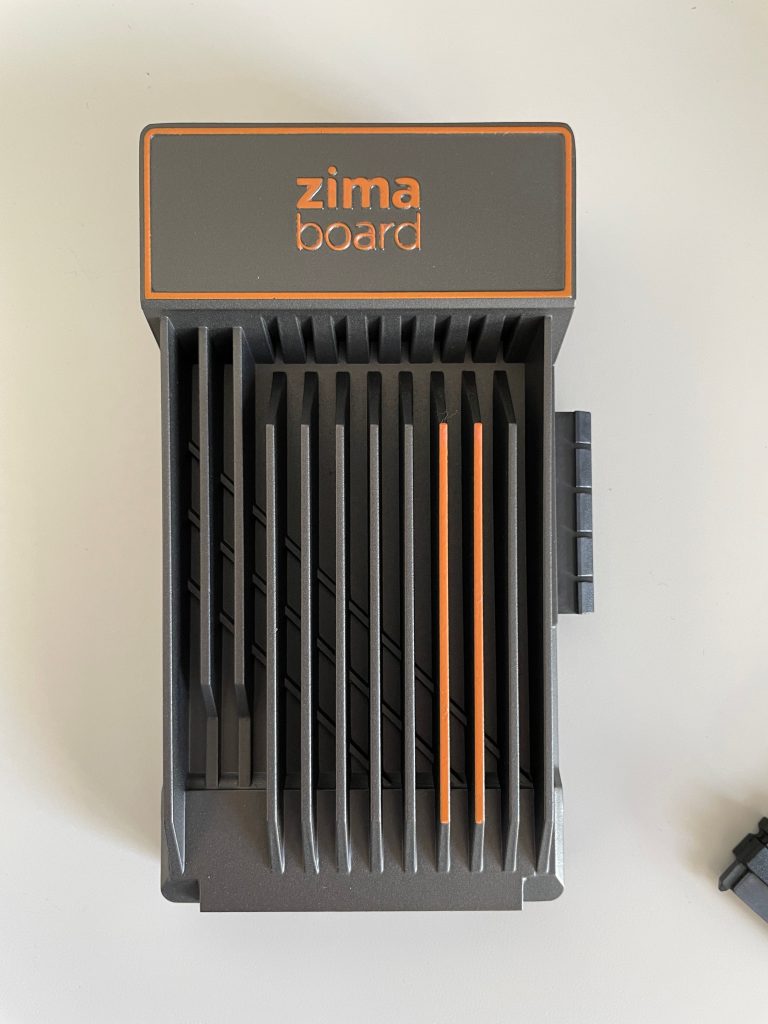
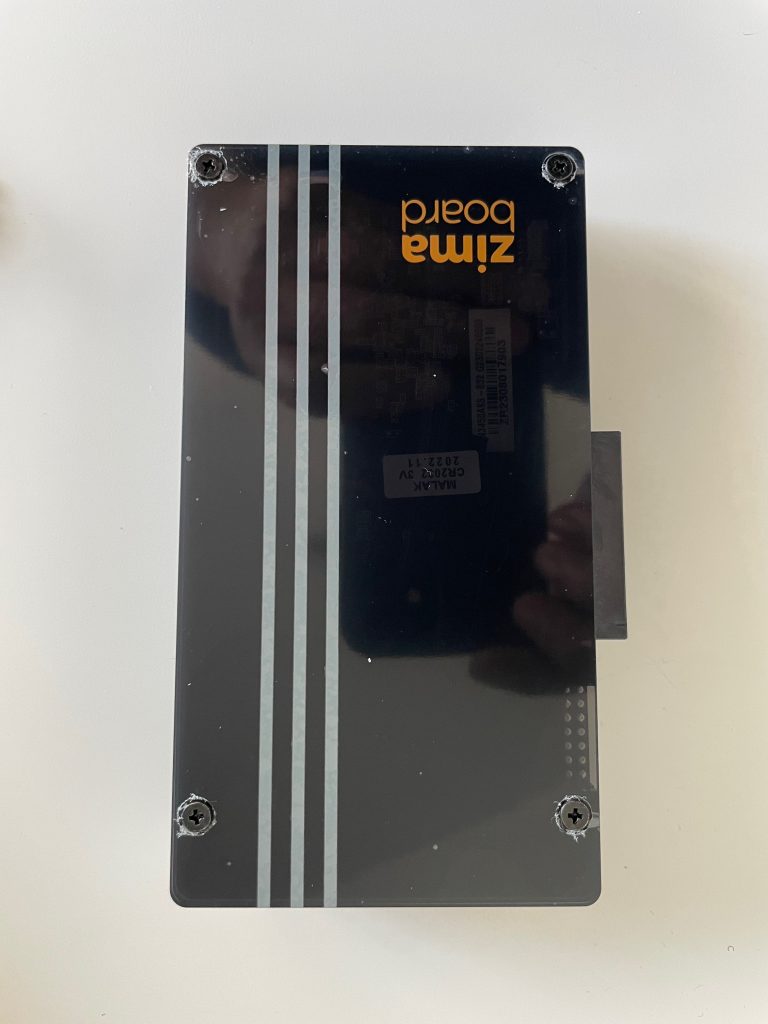
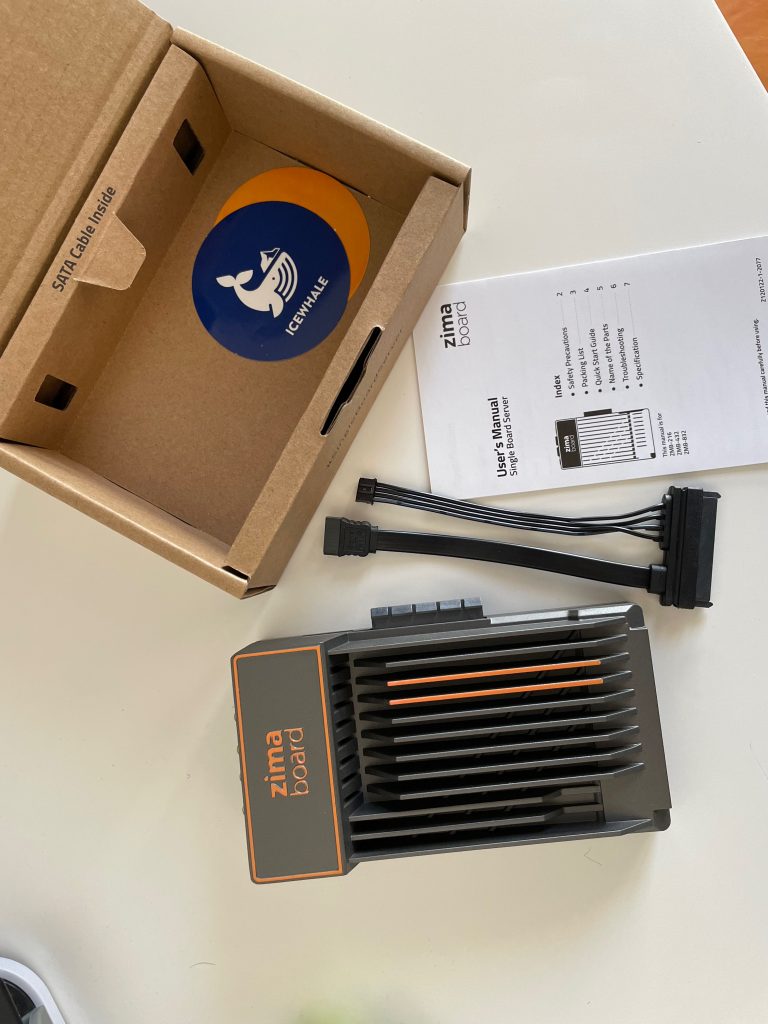
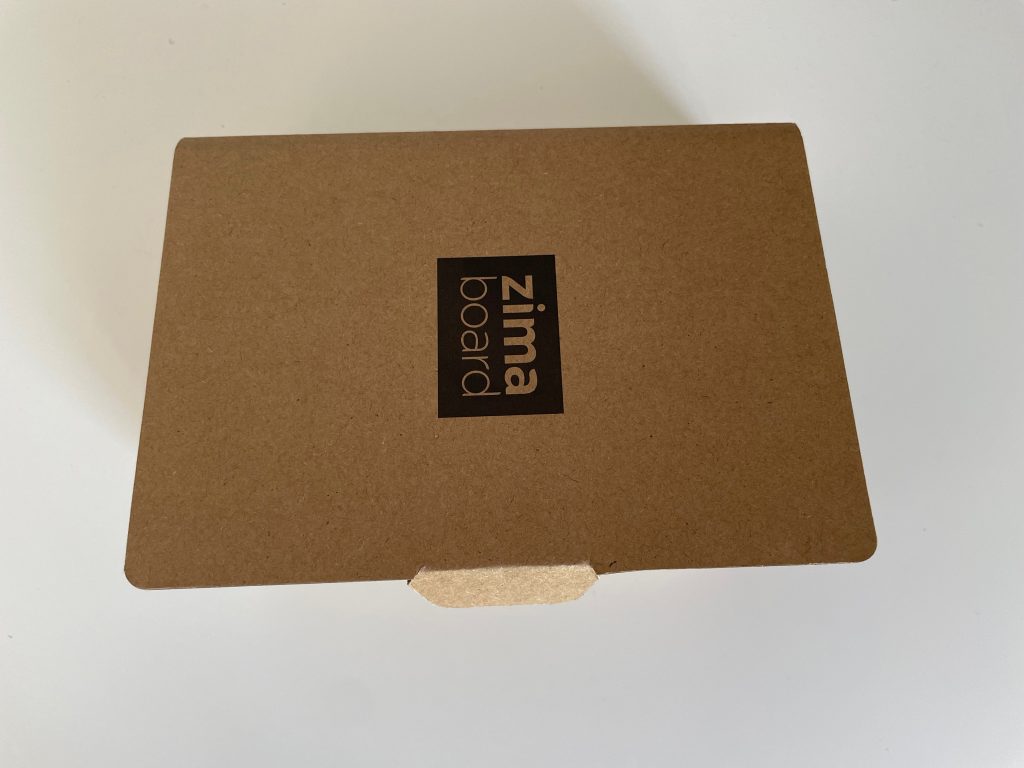
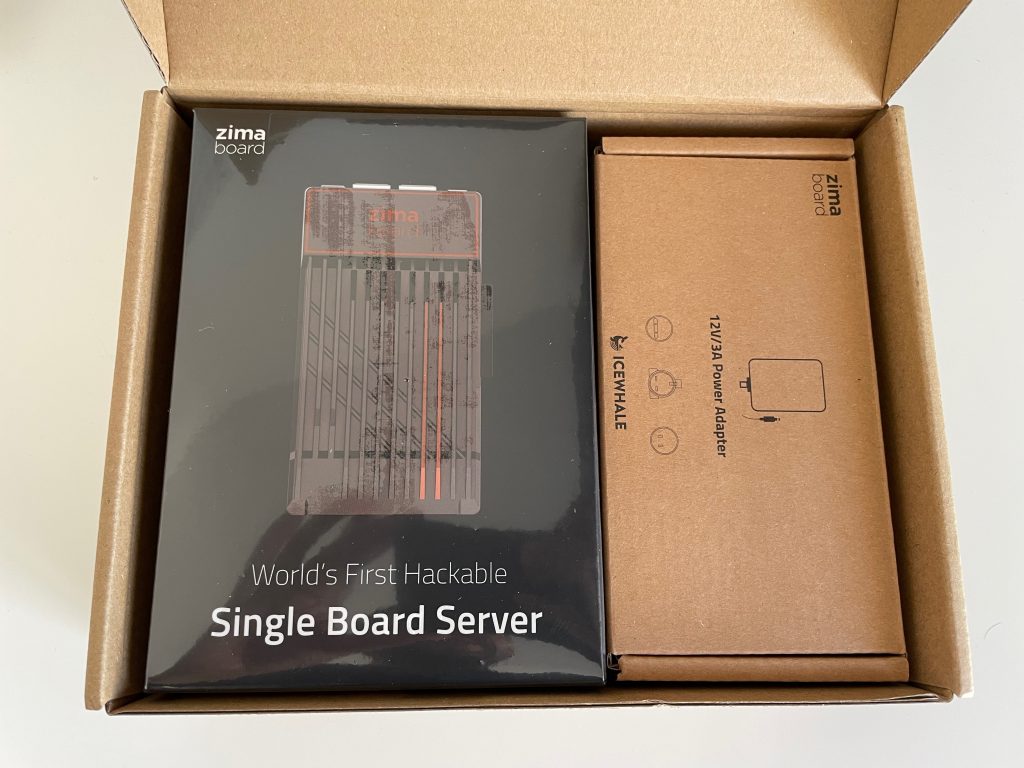
Here are a few photos of the product right out of the box! It comes with a SATA + power cable for one disk and a power supply with plugs for different countries. Manual and stickers!!!!
We’ll keep playing with these “toys.” Having a low-power server with enough power to run our labs, home pfSense firewalls, and more… is fantastic!
Forget noisy servers, big PCs, or mini-computers with CPUs that don’t always offer the versatility of an Intel Celeron Apollo Lake x86 processor!
One great feature in Veeam Backup & Replication is the ability to create replicas: copies of virtual machines at a particular point in time, ready to be started when needed.
Replication is useful for security, disaster recovery, and testing our machines.
In this short post, we’ll focus on creating a replication job.
Let’s get started:
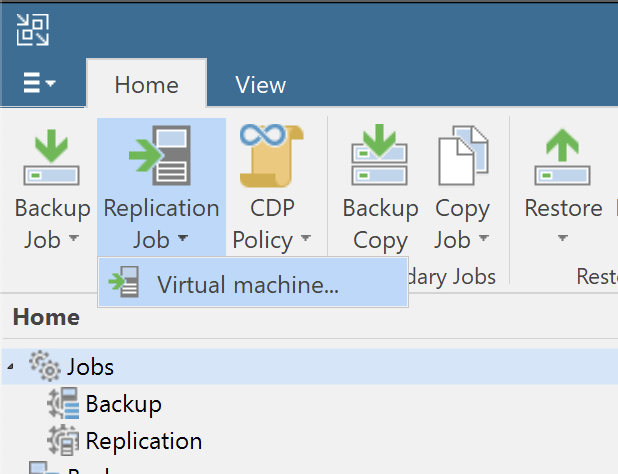
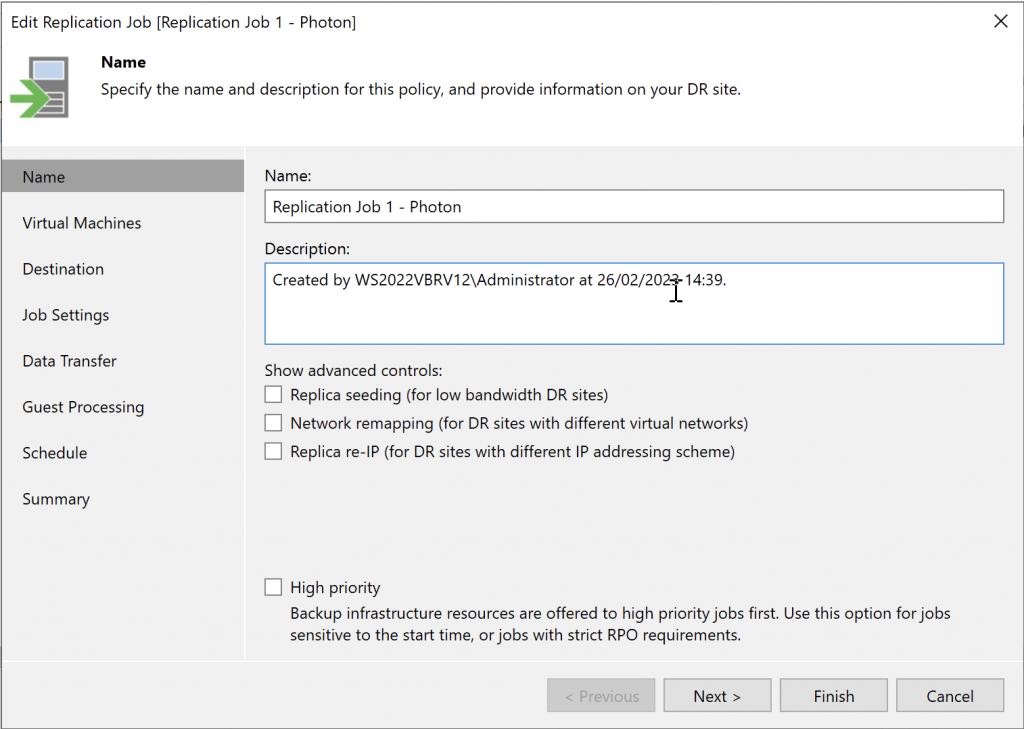
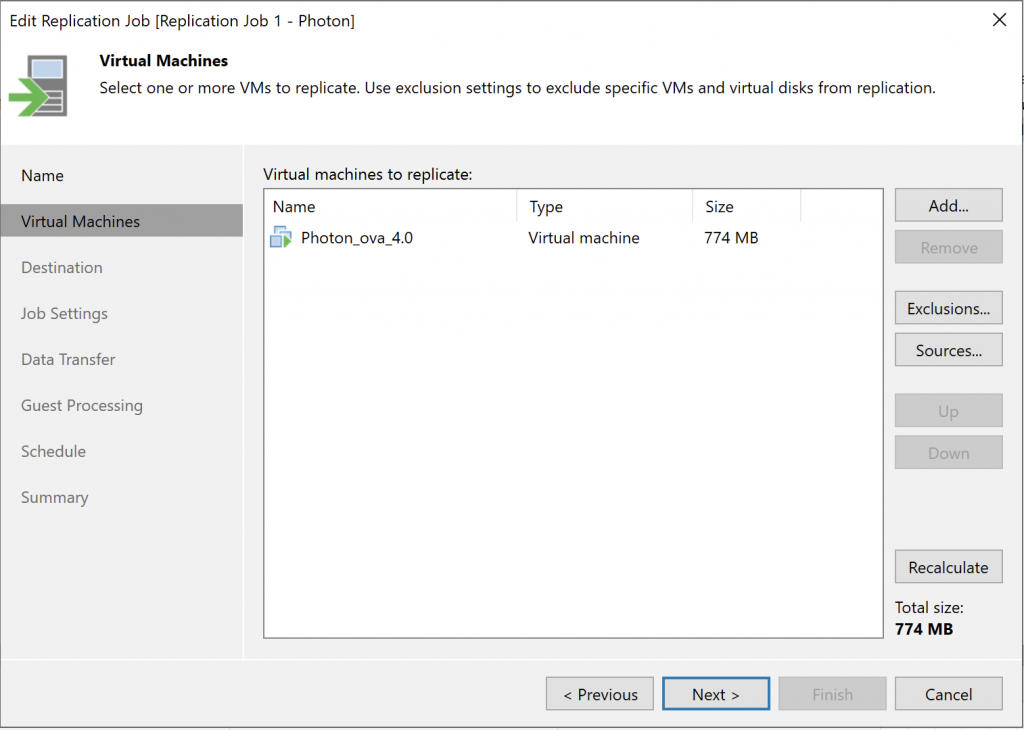
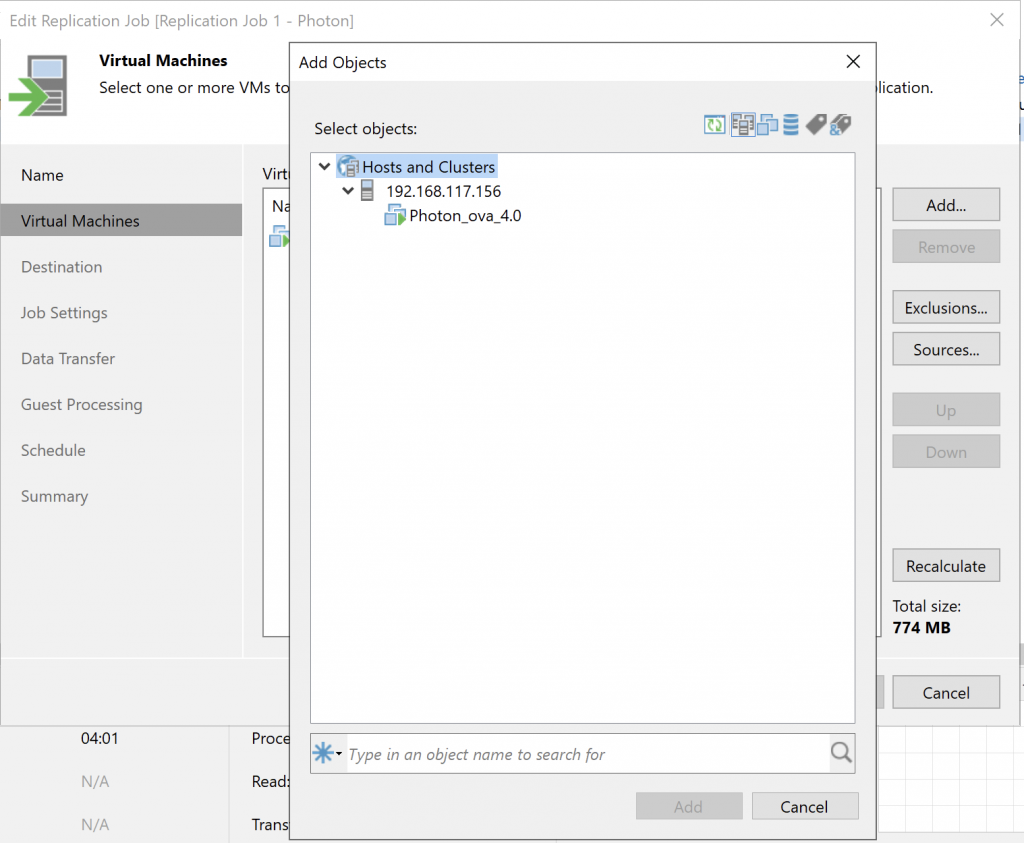
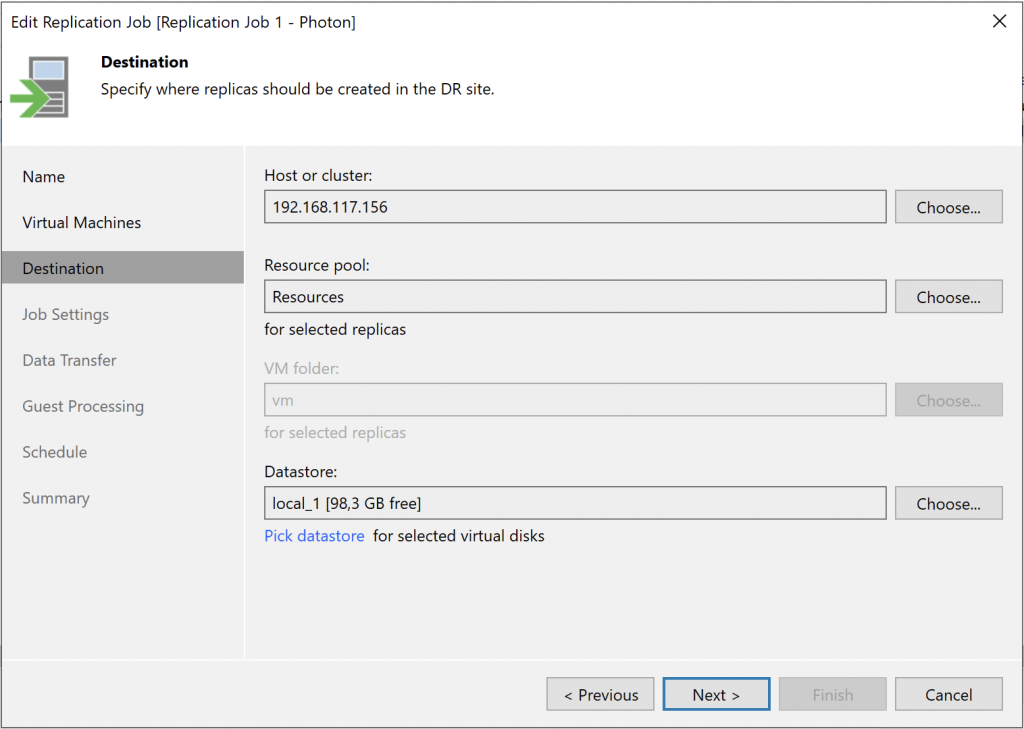
In the VBR v12 console, select the replication option.Enter the initial job details.Select the machine or machines to replicate. We won’t go into detail here, but you can see the exclusions and different sources available.In our case, we’ll select our test VM.Where do we want to host the replica? Which datastore should store it?
As you can see, because this is a copy of a VM, it needs to be associated with all of these resources so it can start.
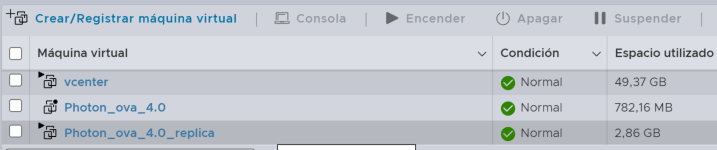
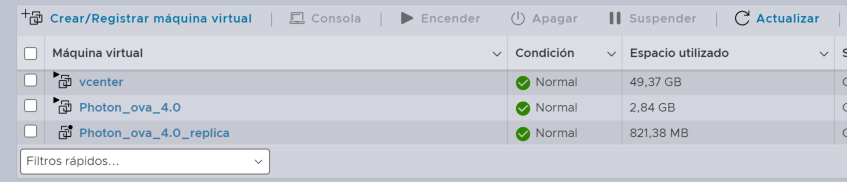
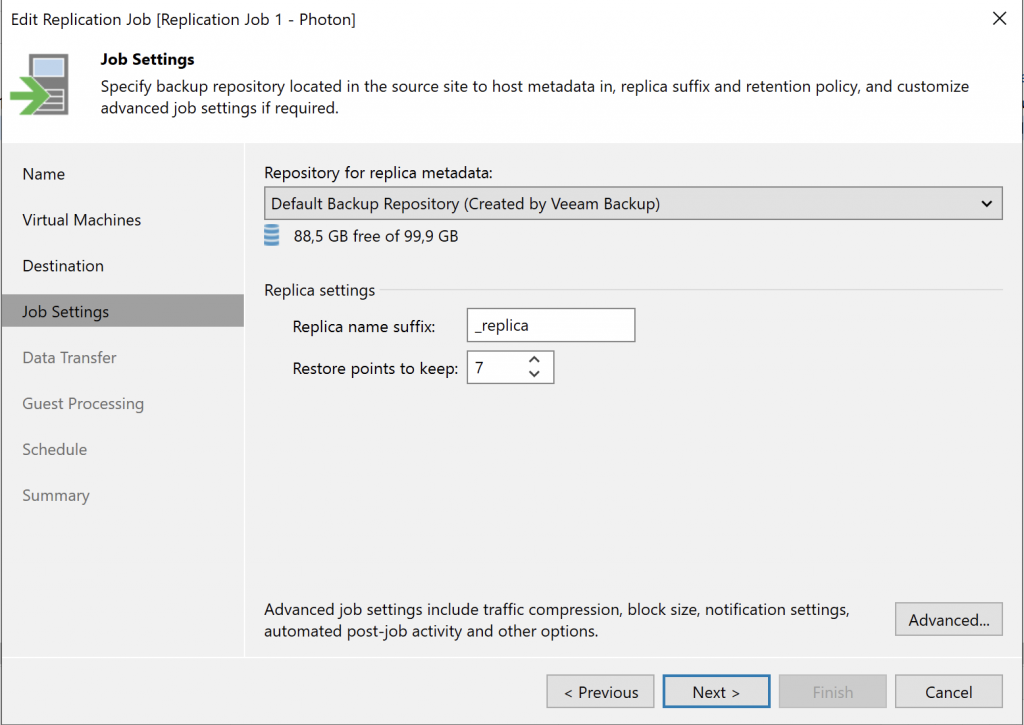
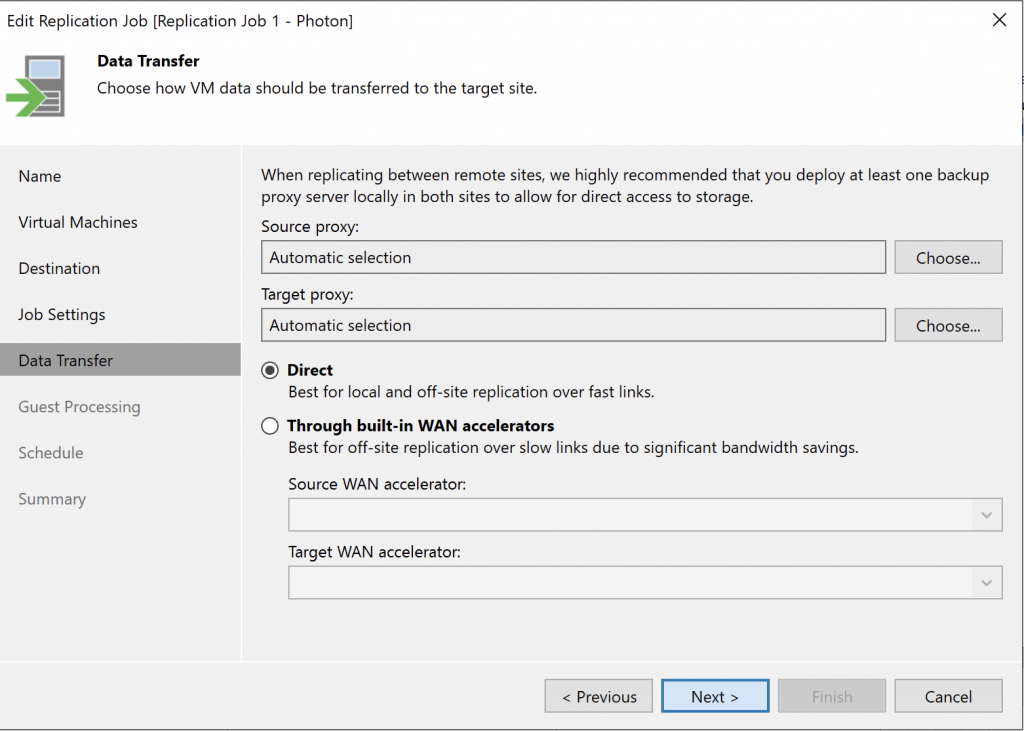
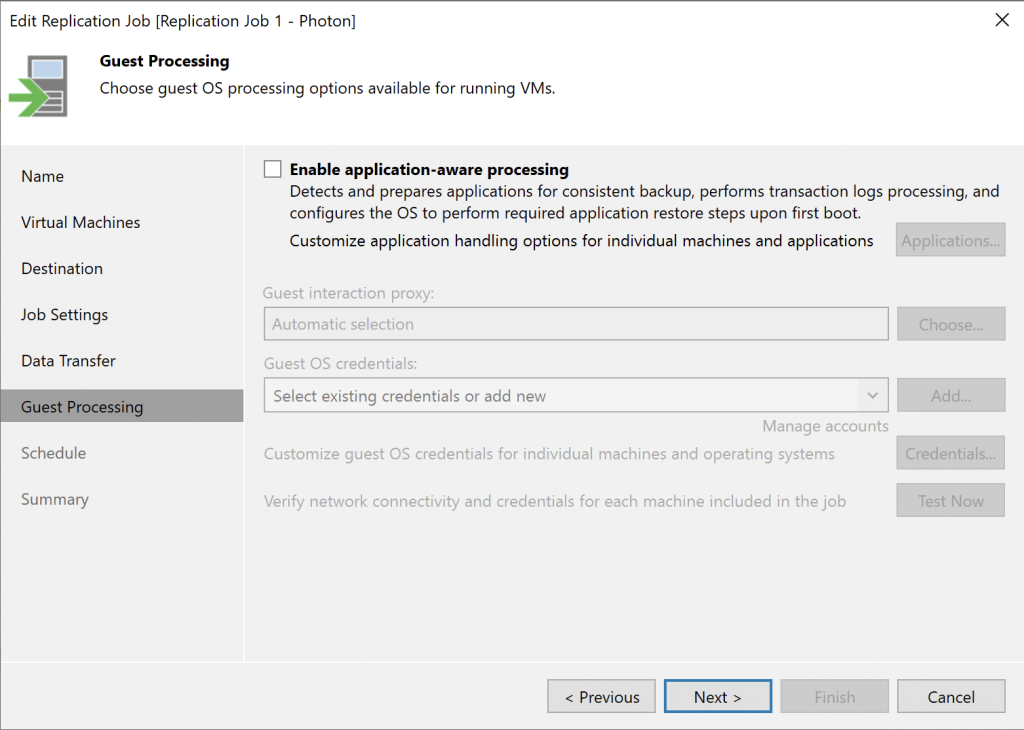
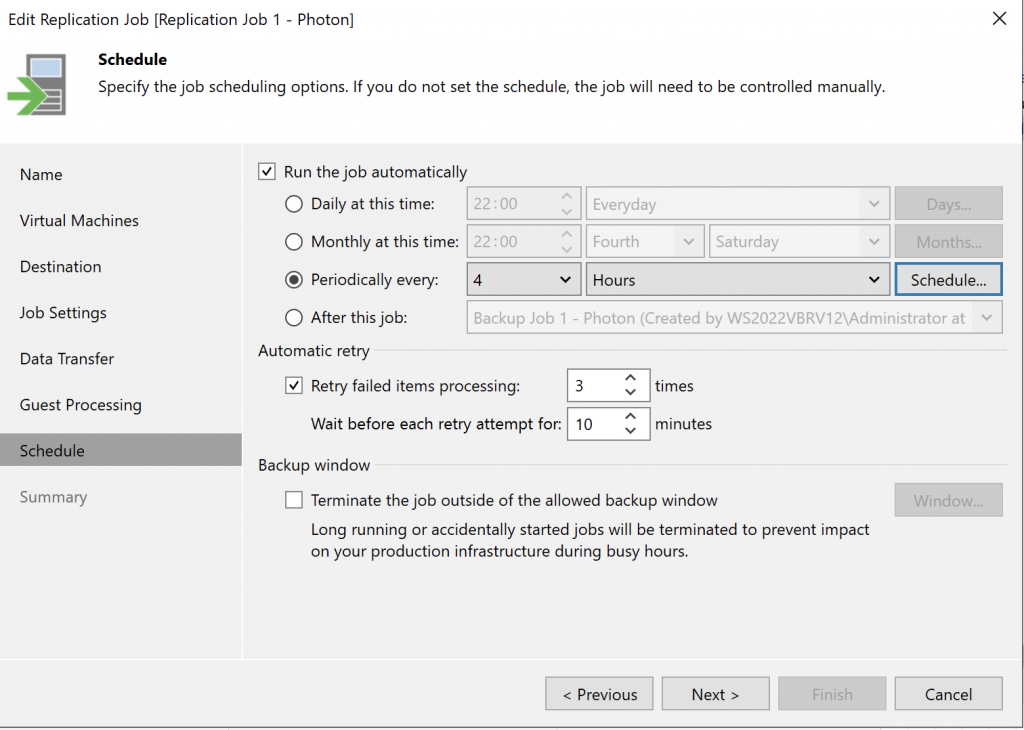
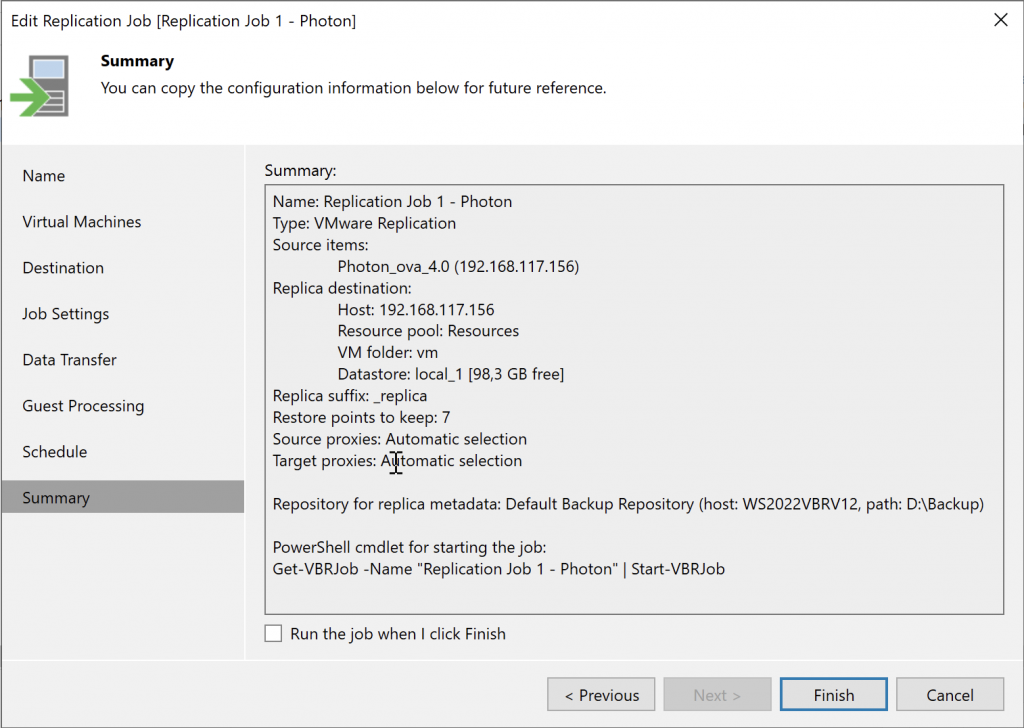
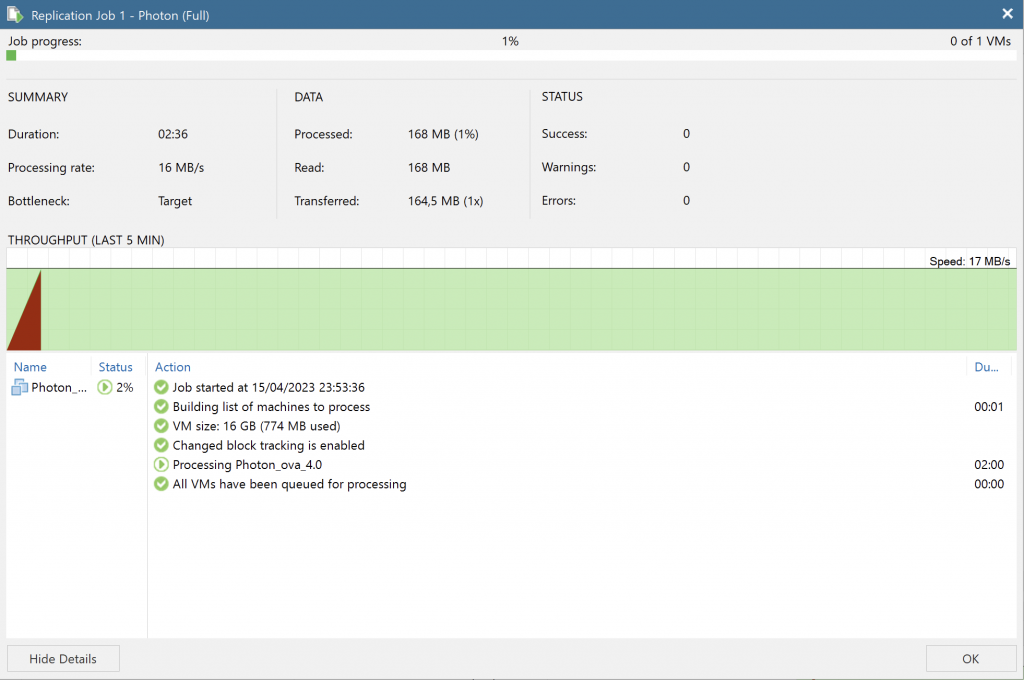
Where should we store the replica metadata? In our case, we’ll leave the default.If we were replicating to a remote site, we’d configure it here. In our case, it’s local.Application-aware processing tells the OS to prepare for the snapshot, helping avoid potential application errors, such as with SQL.How often should the replica run? For this example, I set it to run every four hours.Here’s the summary. Everything looks good.Our job has been created.Let’s run it and see what it does.Done! The replica is listed in the menu on the left.If we open the vSphere host, we can see it. It’s an identical VM, but powered off!
One final note: although replicas are very useful and incremental, they should never be confused with backups.
For me, a replica is protection against disasters and a useful ally when migrating or moving VMs within a virtualized environment.
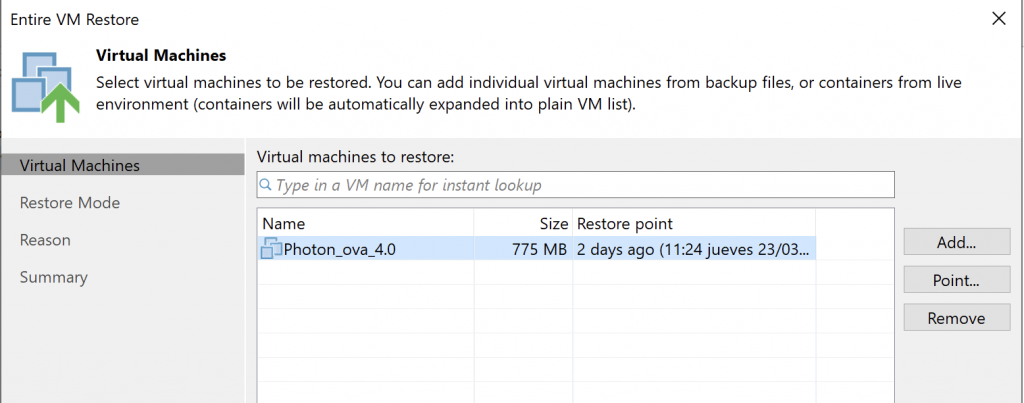
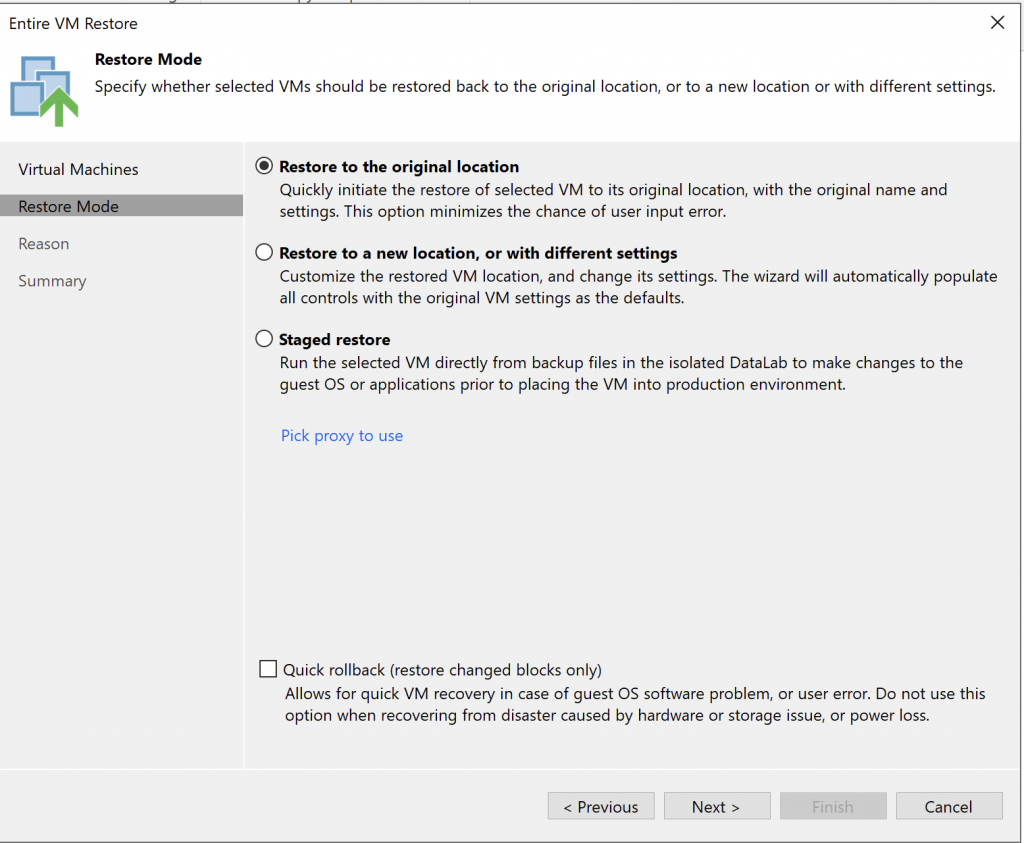
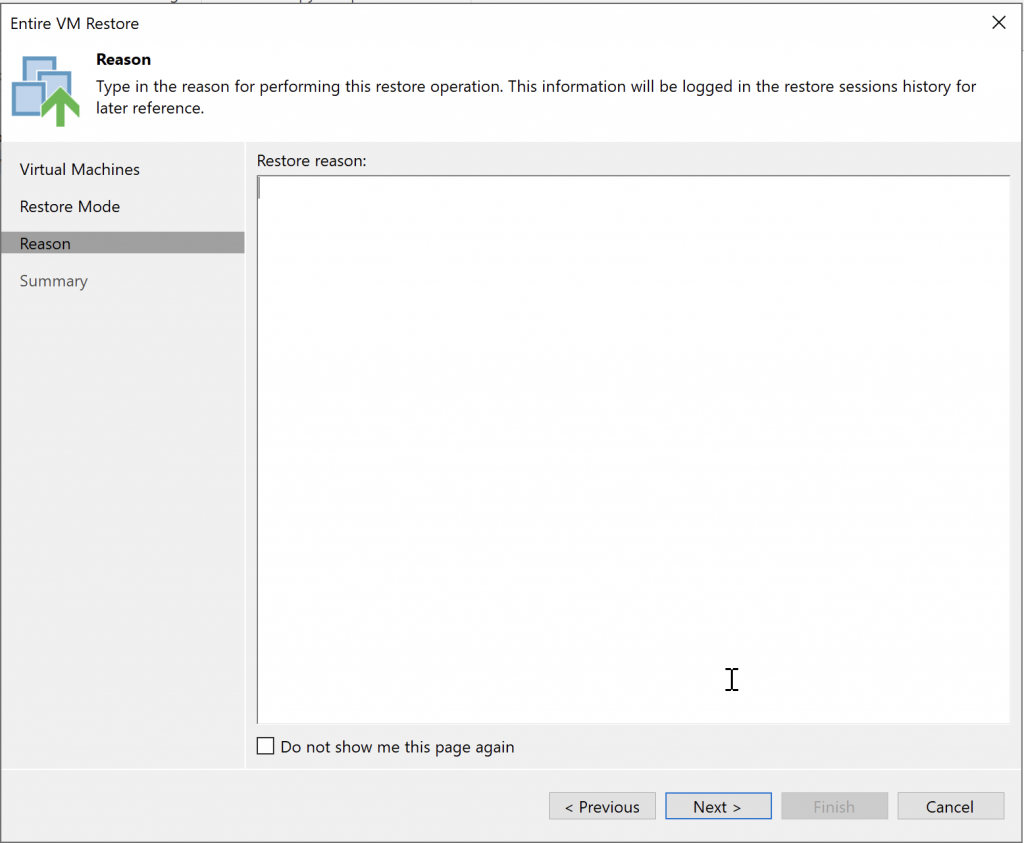
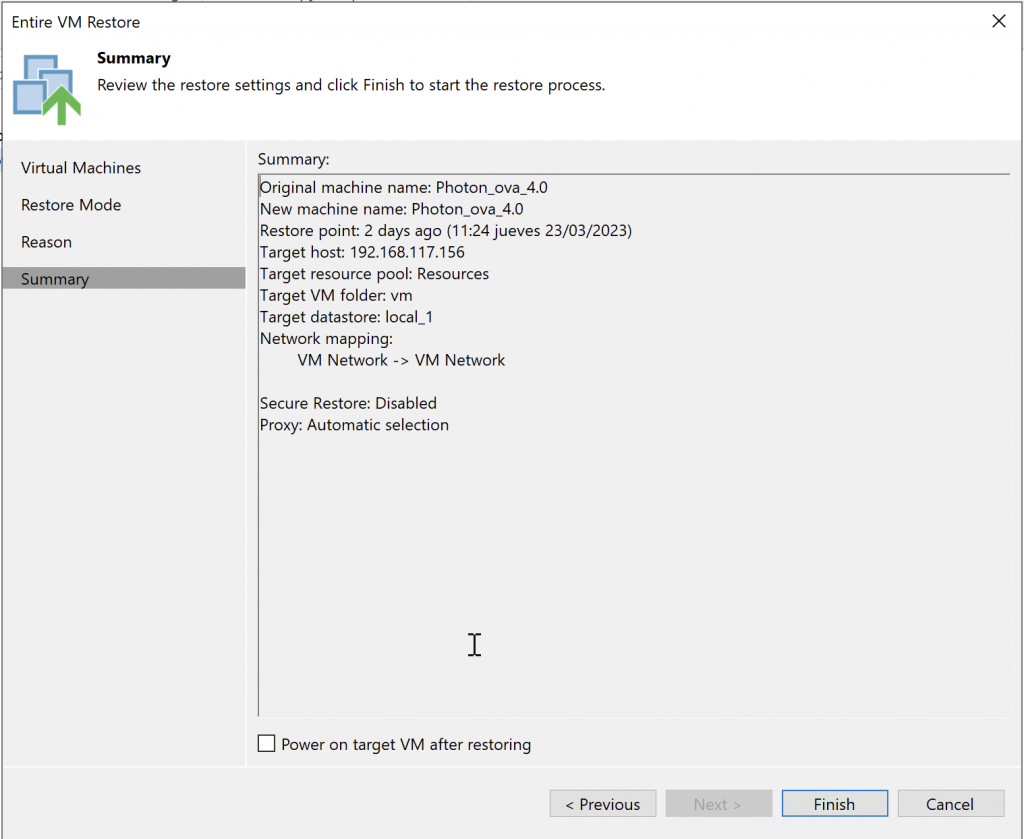
Now that we’ve completed our first backup, let’s look at how to restore the data (files) and the entire virtual machine.
We’ll go through the recovery steps and options with screenshots.
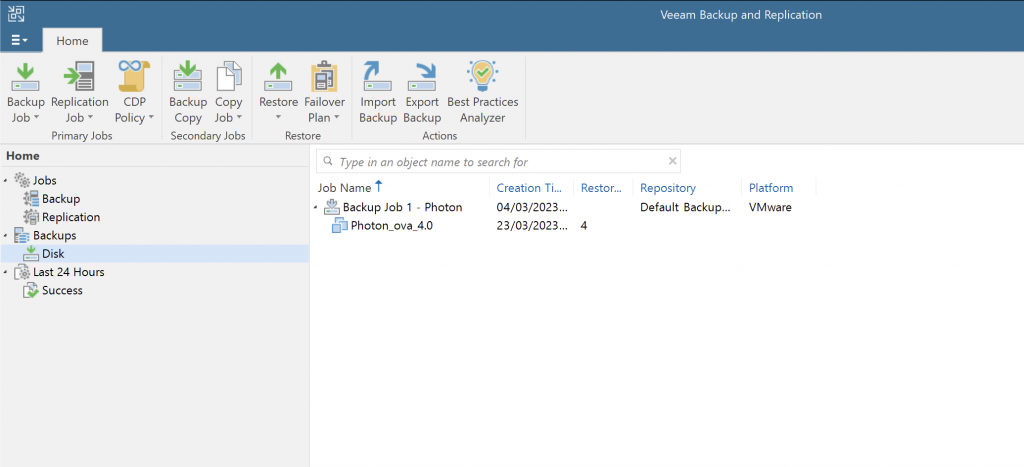
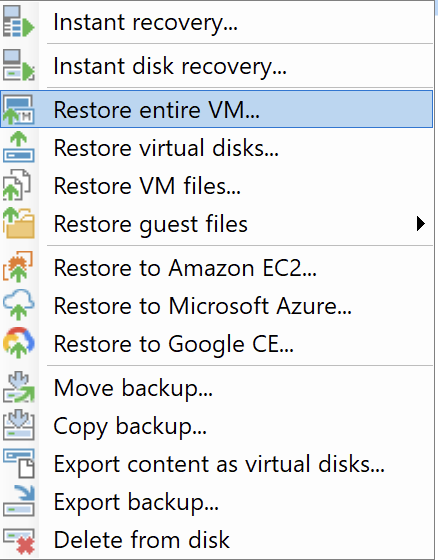
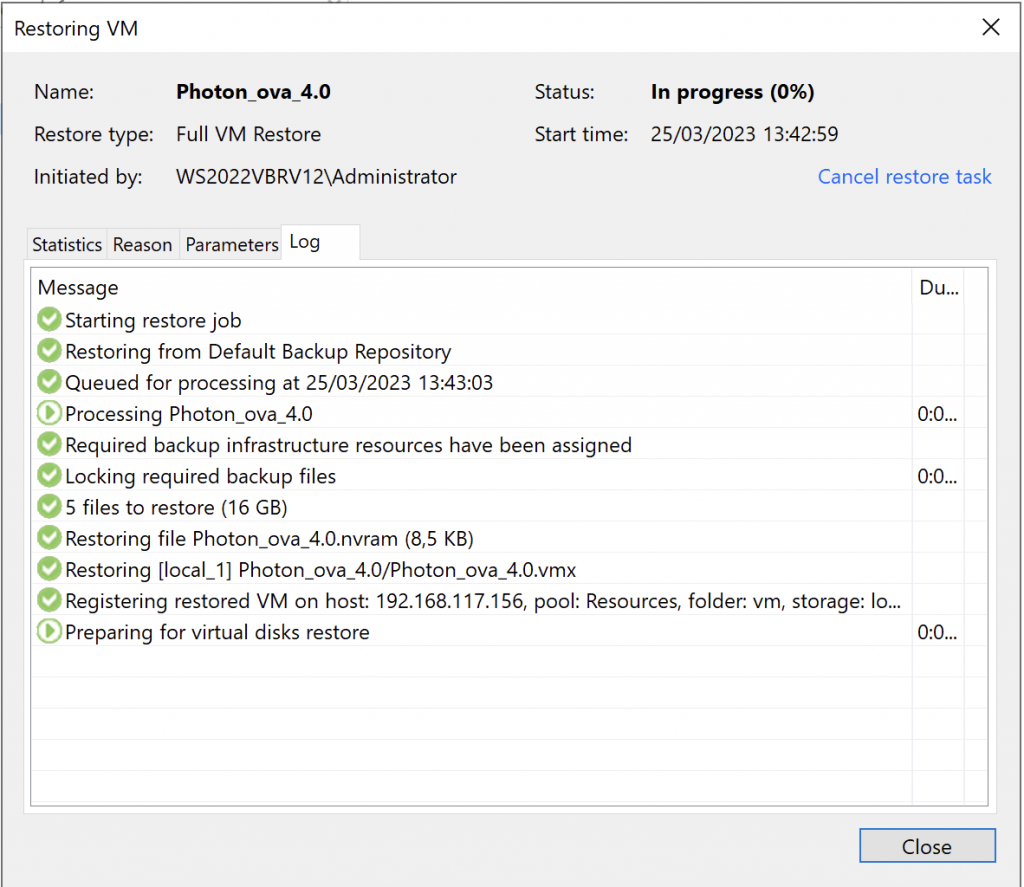
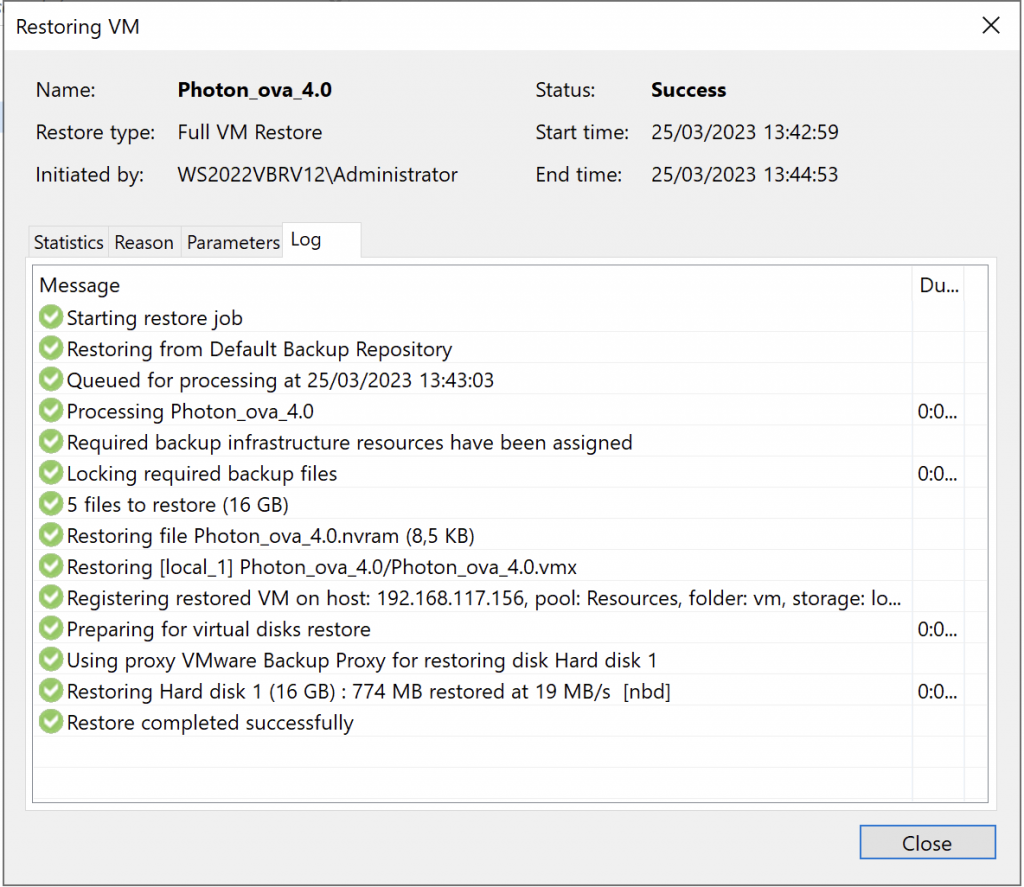
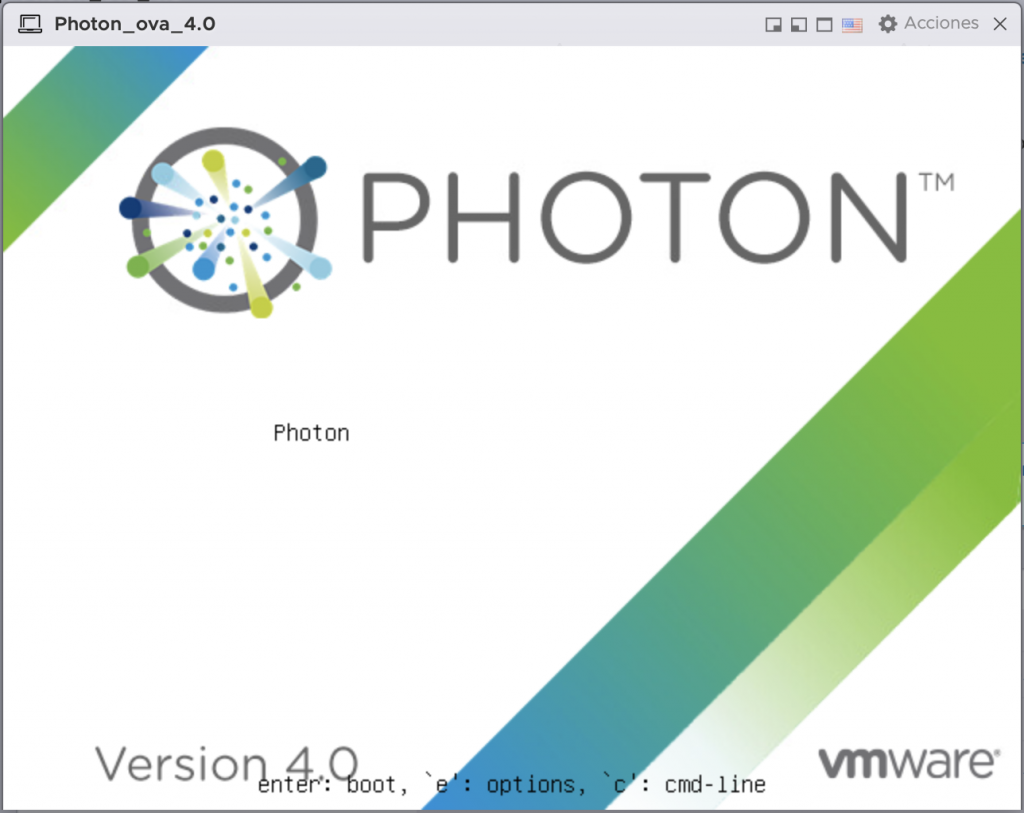
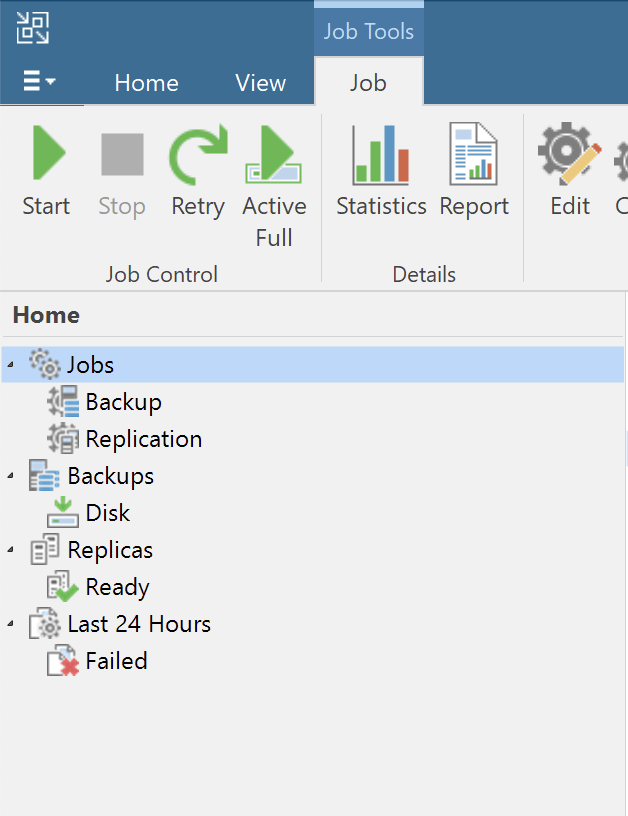
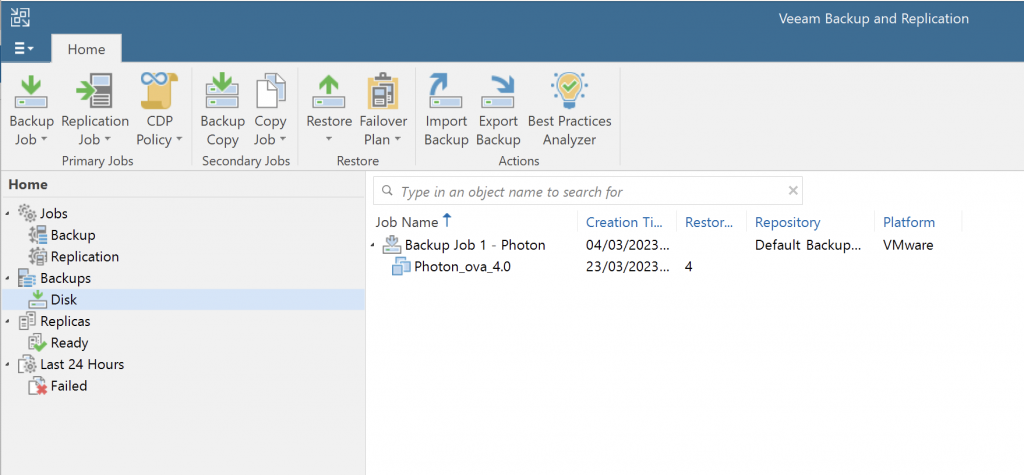
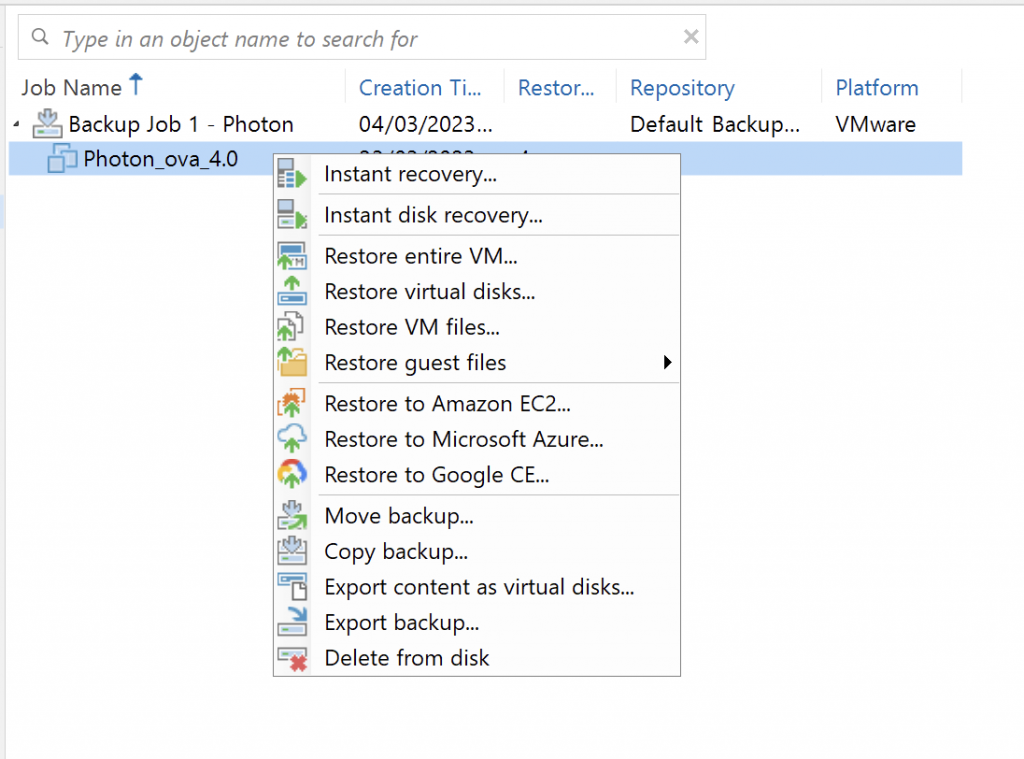
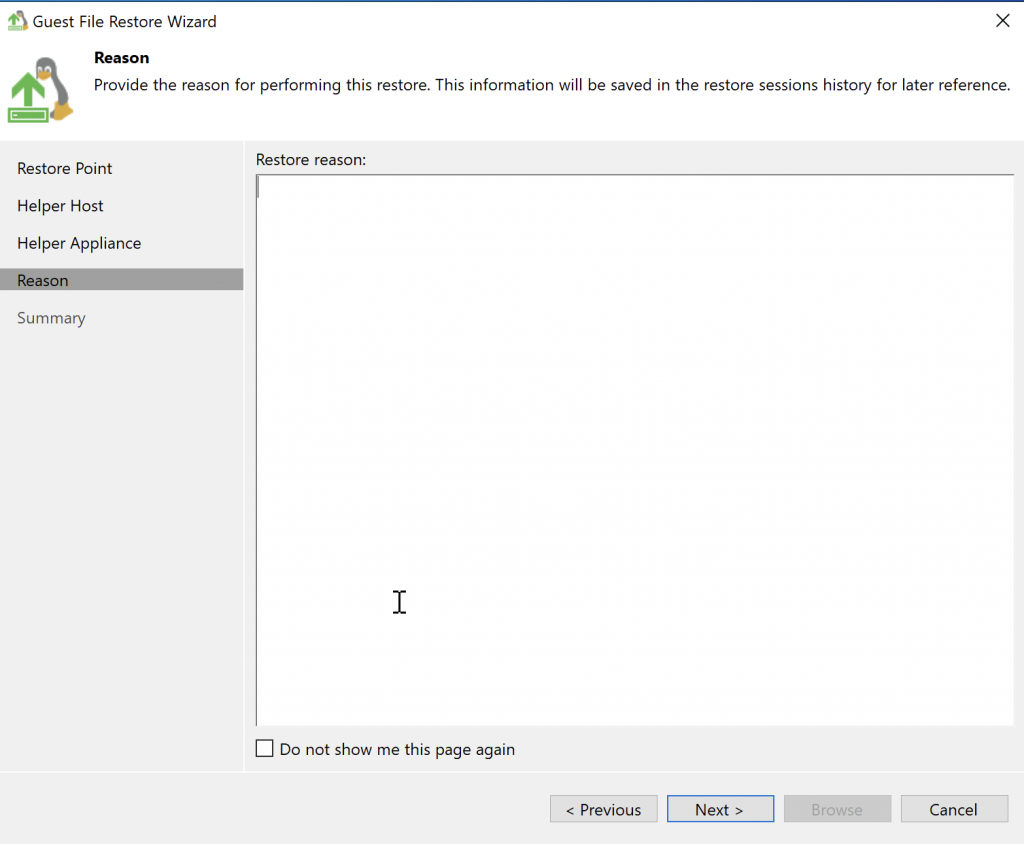
In the Veeam console, go to Disks and select the machine to restore.Take a look at all the available options…Select the backup point to use for restoring the VM.Pay attention here: we can overwrite the existing machine or deploy a new one on a host and/or storage. The last option is especially useful for a “lab” run before restoring.Reason…SummaryAs you can see in vSphere, the machine is not there yet.The process has started.Our virtual machine now appears in vSphere and is registered.Done!Now let’s start it!
The process is complete—simple and reliable.
We’ll look at more options later, such as Secure Restore, Staged Restore, and others.
We’ll go through the recovery steps and options with screenshots.
One of Veeam’s great strengths is that backups are self-contained. We’ll cover this in another post, but as a preview, everything needed for recovery is in the backup file itself, with no unusual indexes or other dependencies.
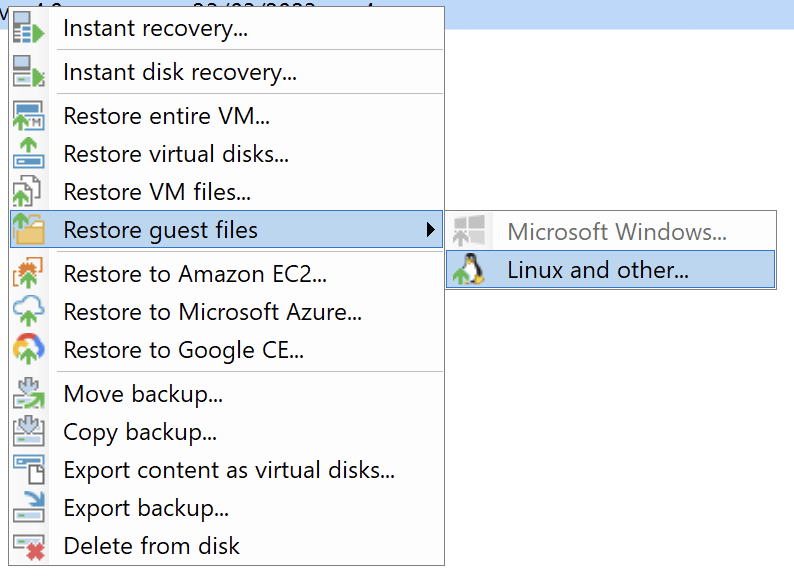
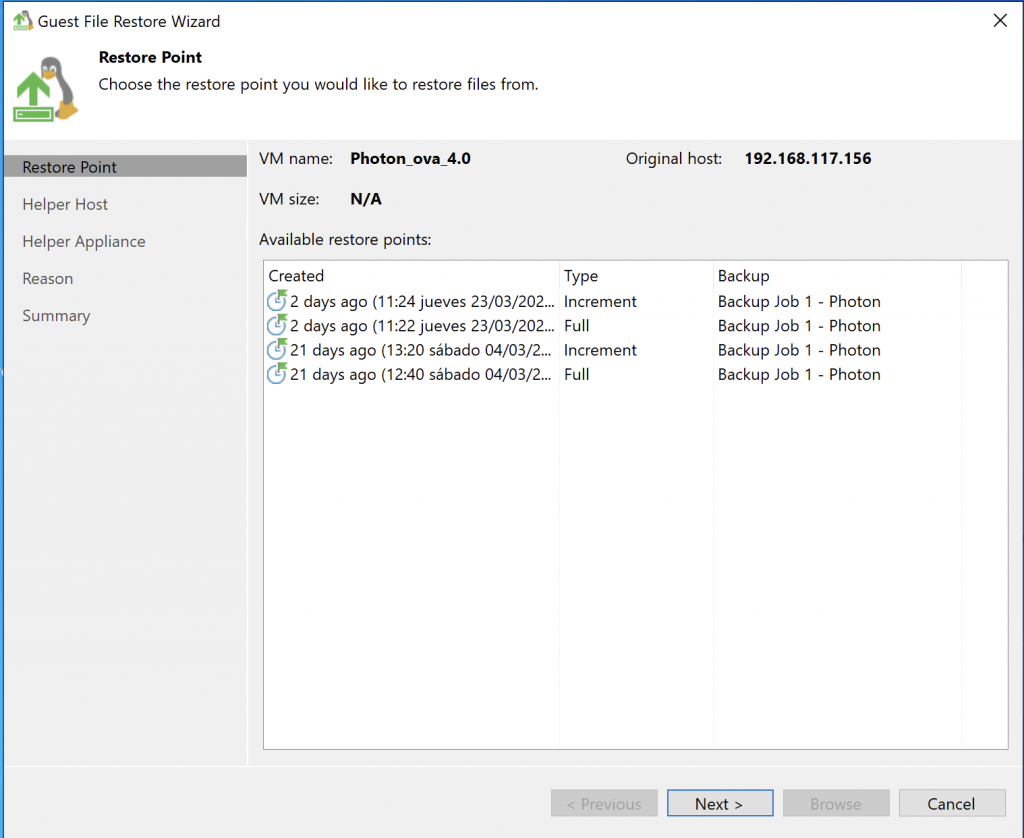
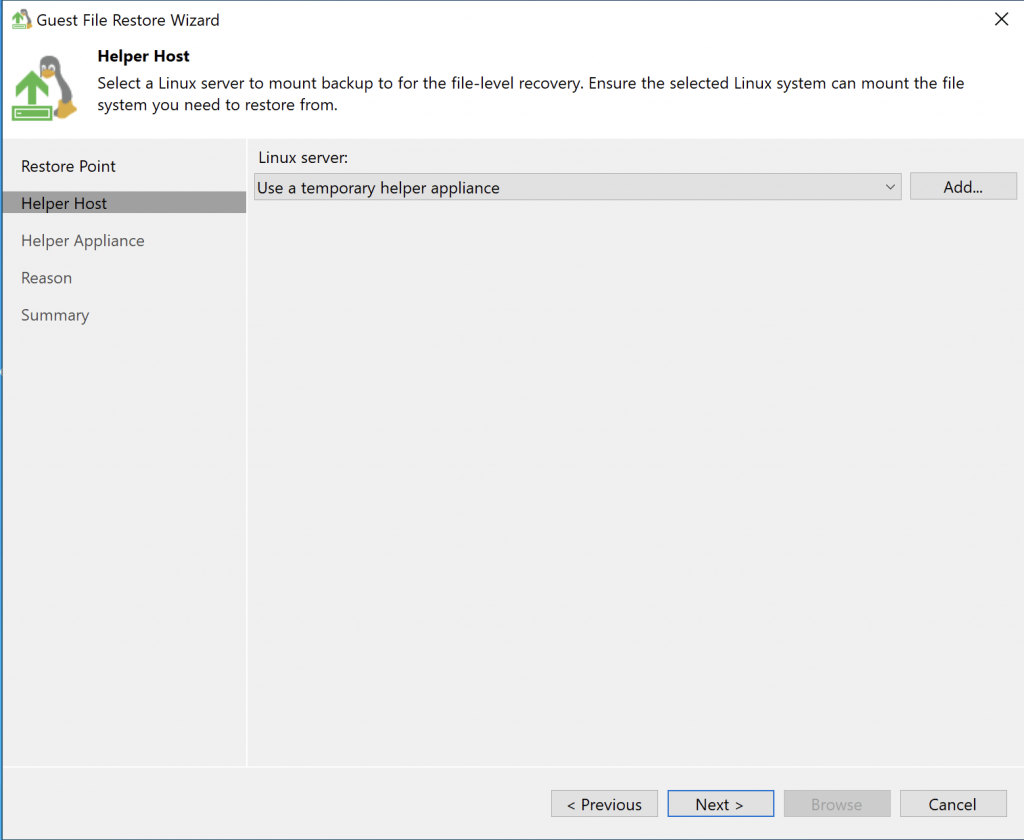
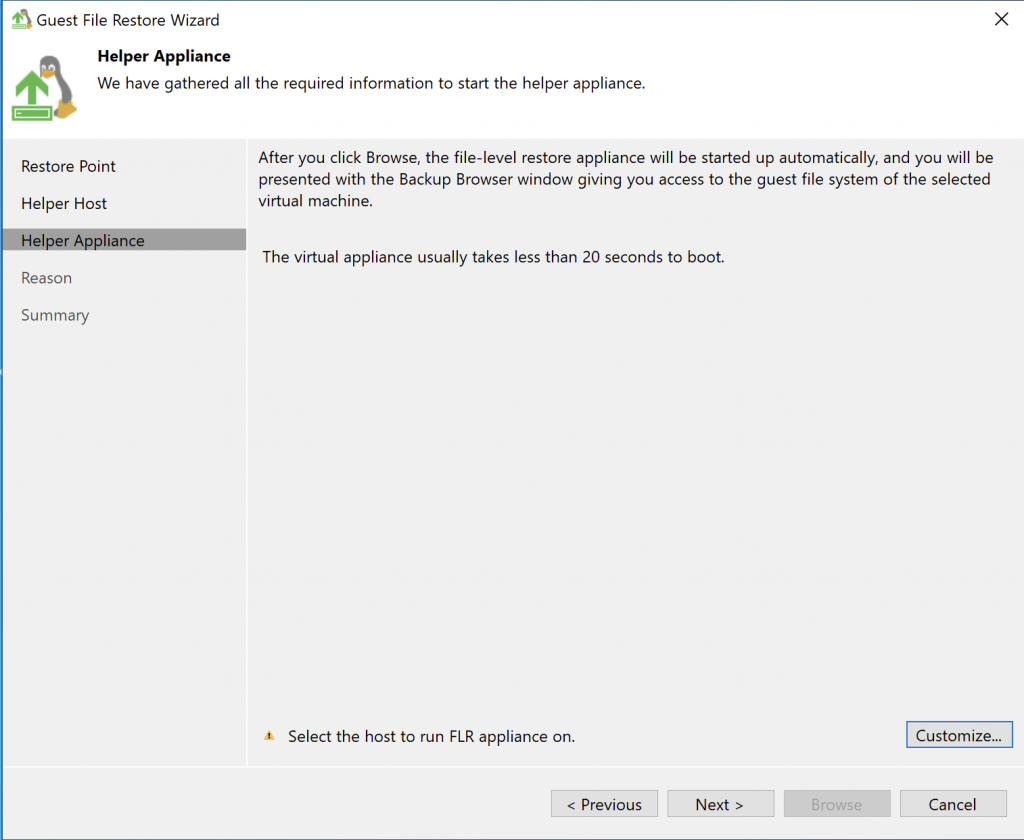
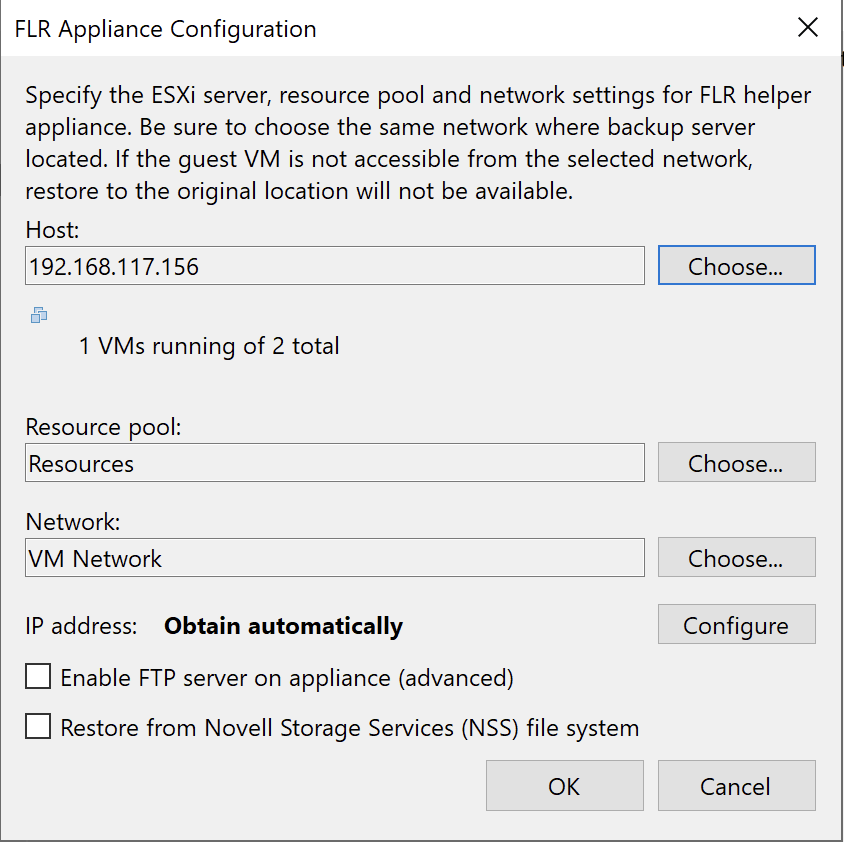
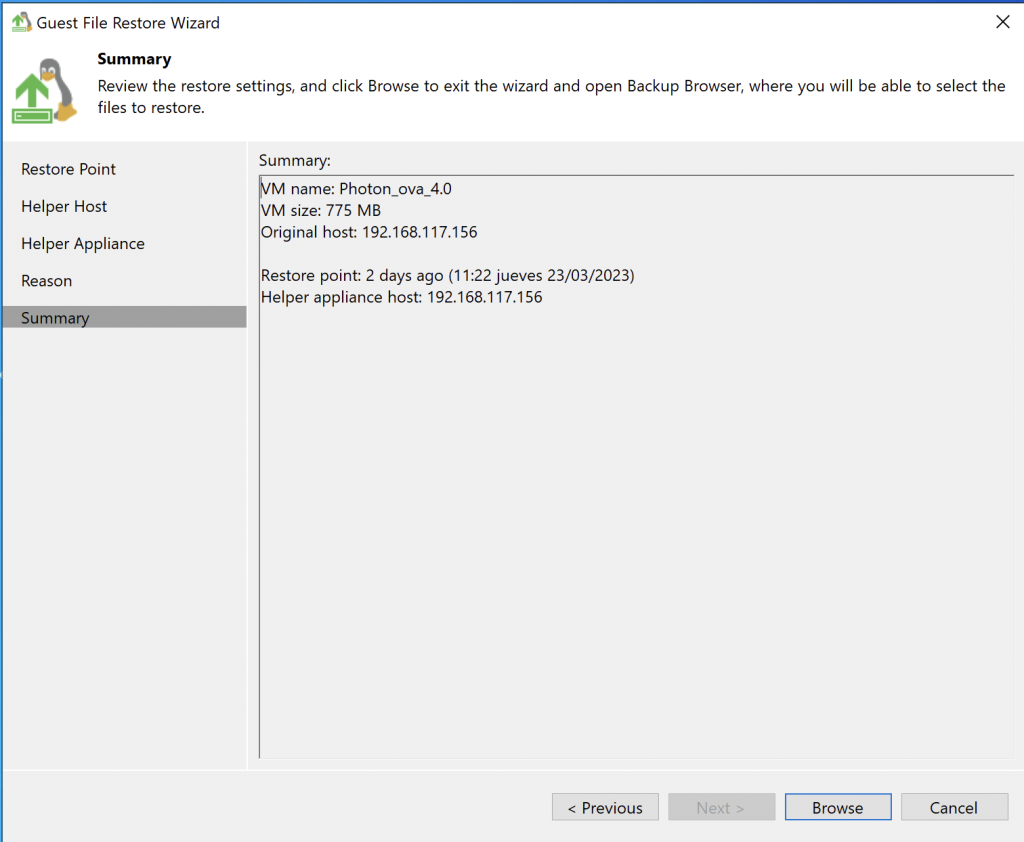
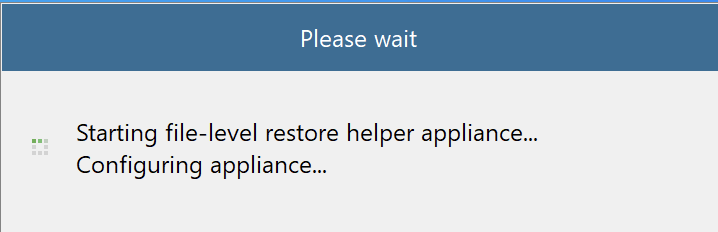
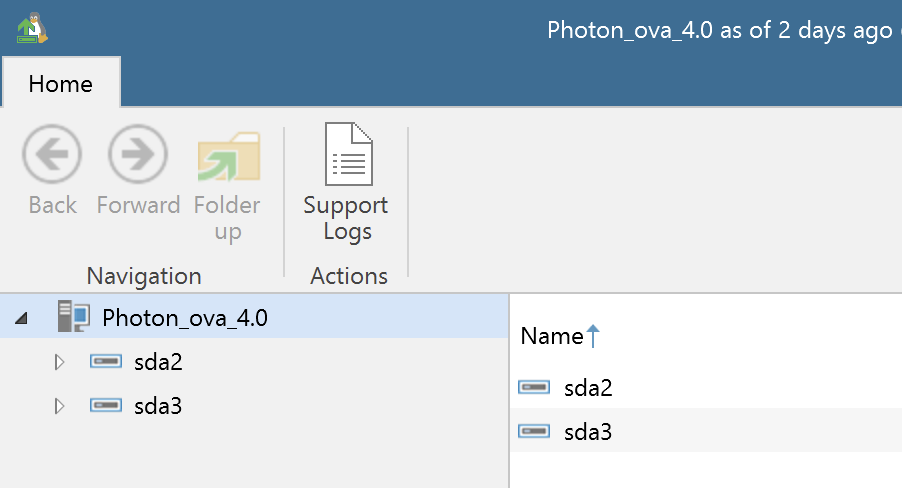
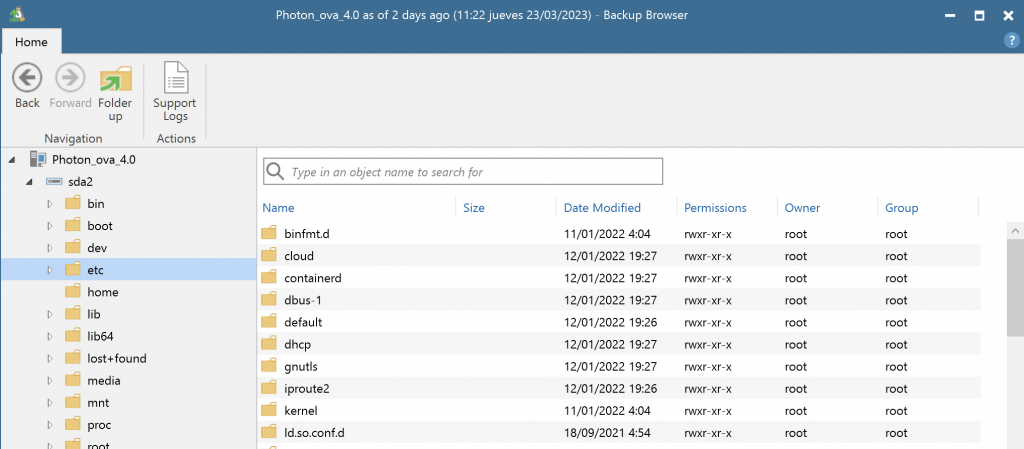
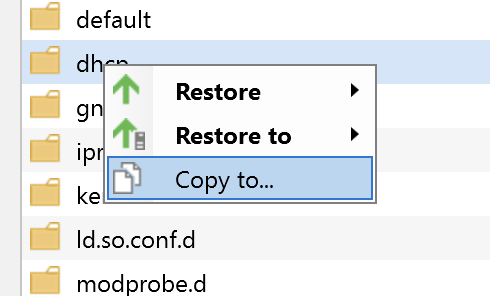
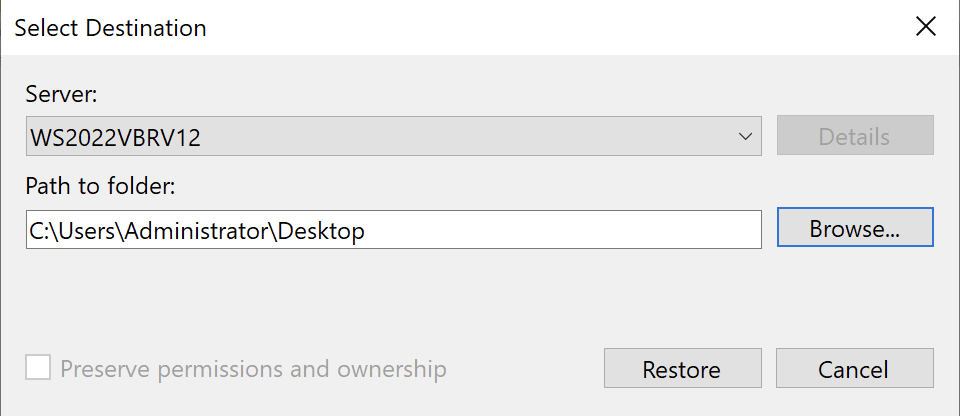
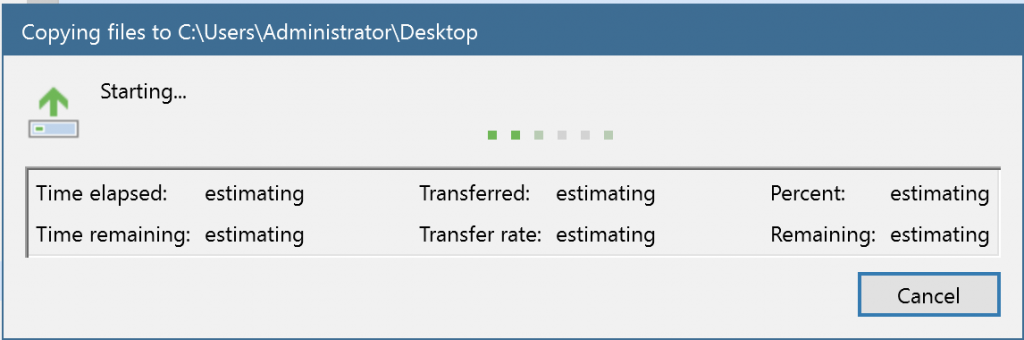
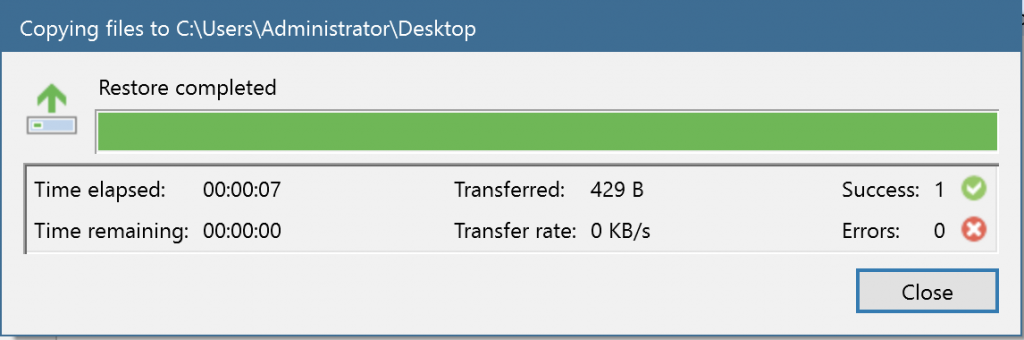
Go to Disks in the left-hand menu.Right-click the machine you want to restore.Since this is a Linux machine, choose this option.Select the restore point you want.Veeam will mount a temporary Linux environment so you can browse the disks.Select an ESXi server on which to mount the Linux helper and present the disks.Click Browse!The file browser opens, and you can see the disks.
We’ve restored the example file. We’ll do another example with a Windows machine so you can see the small differences in the process.
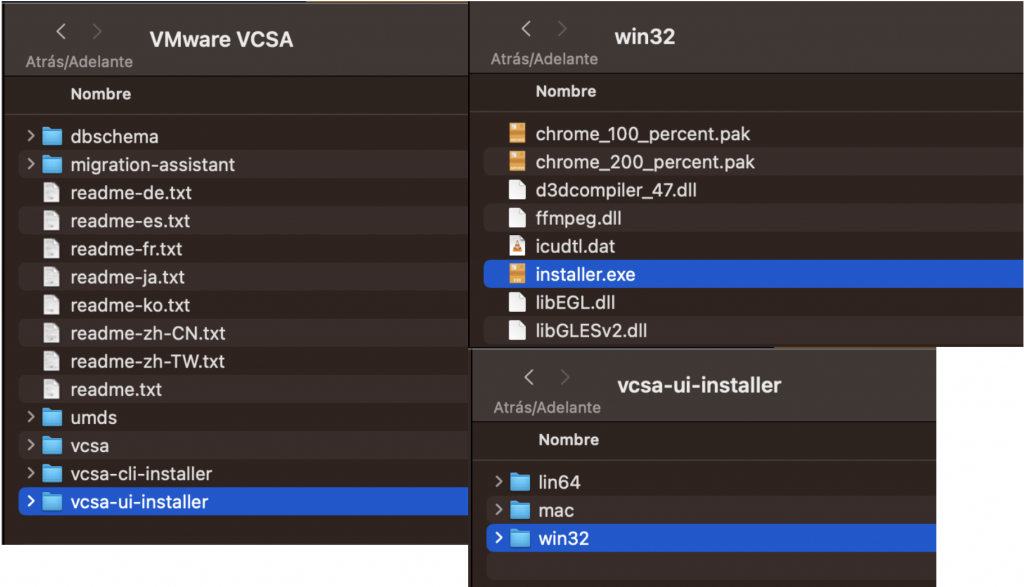
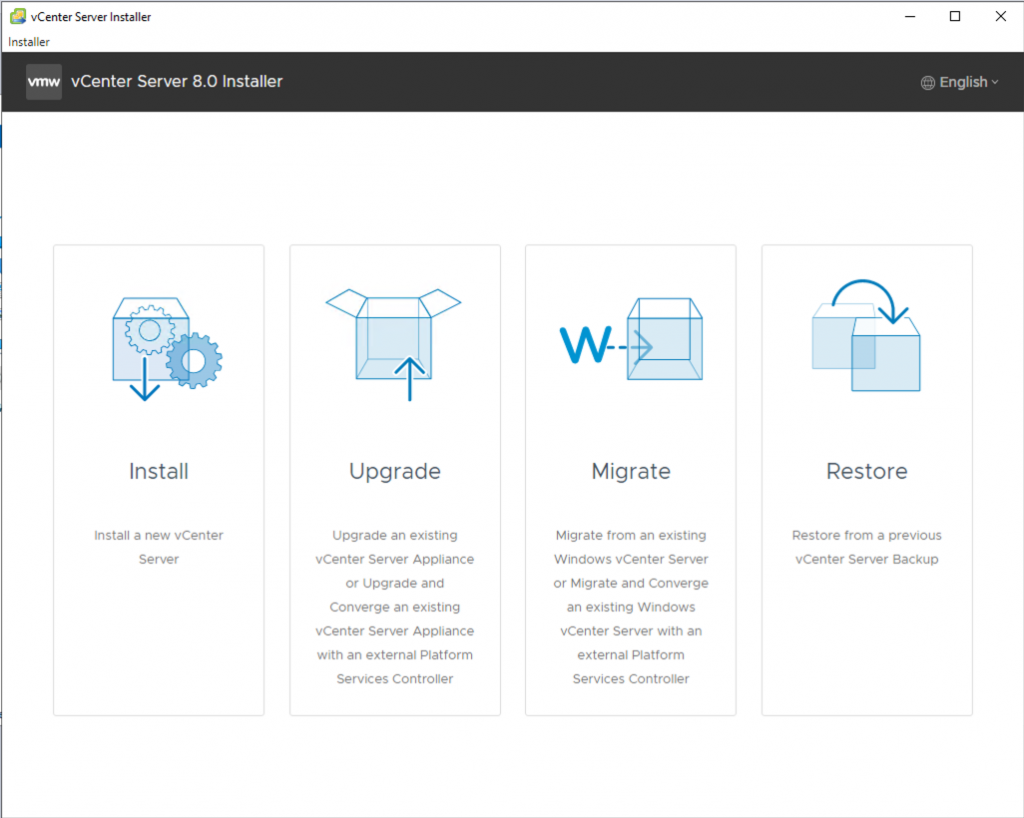
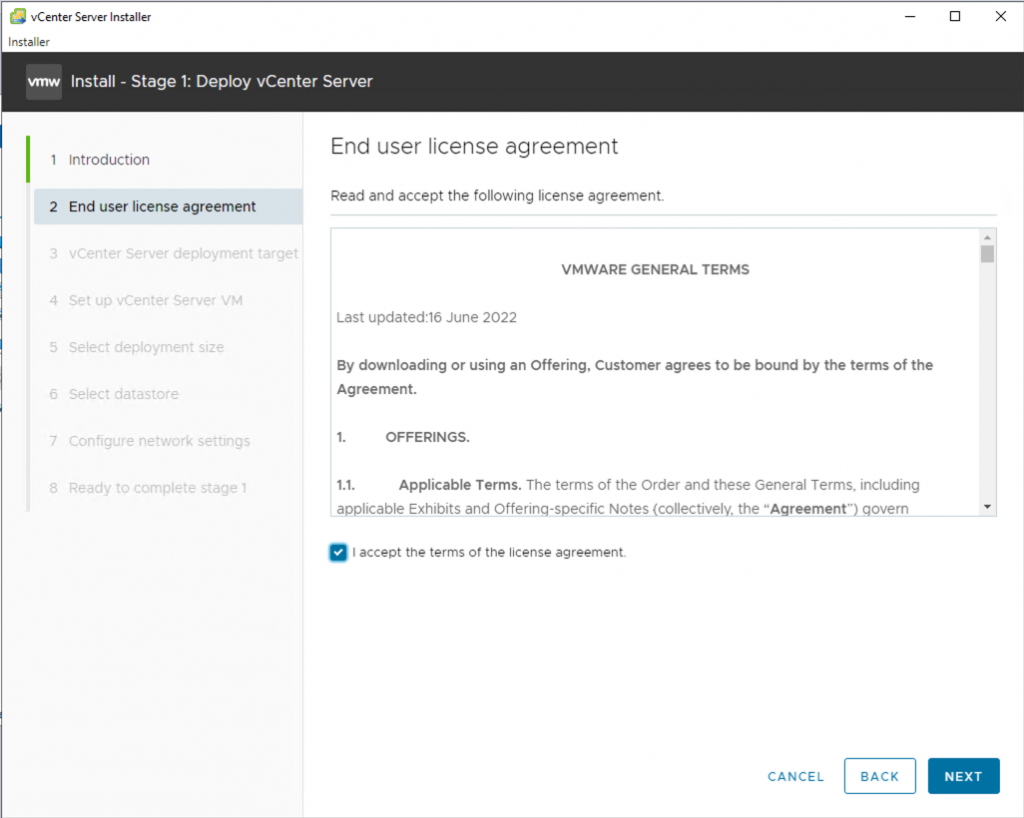
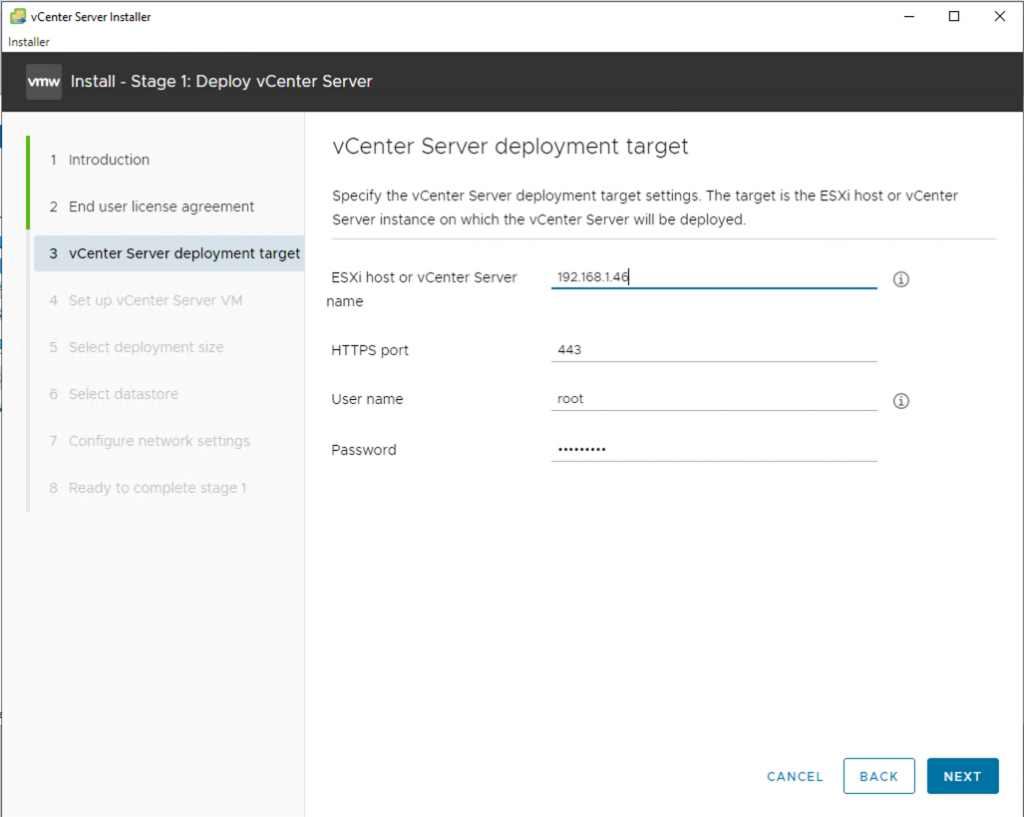
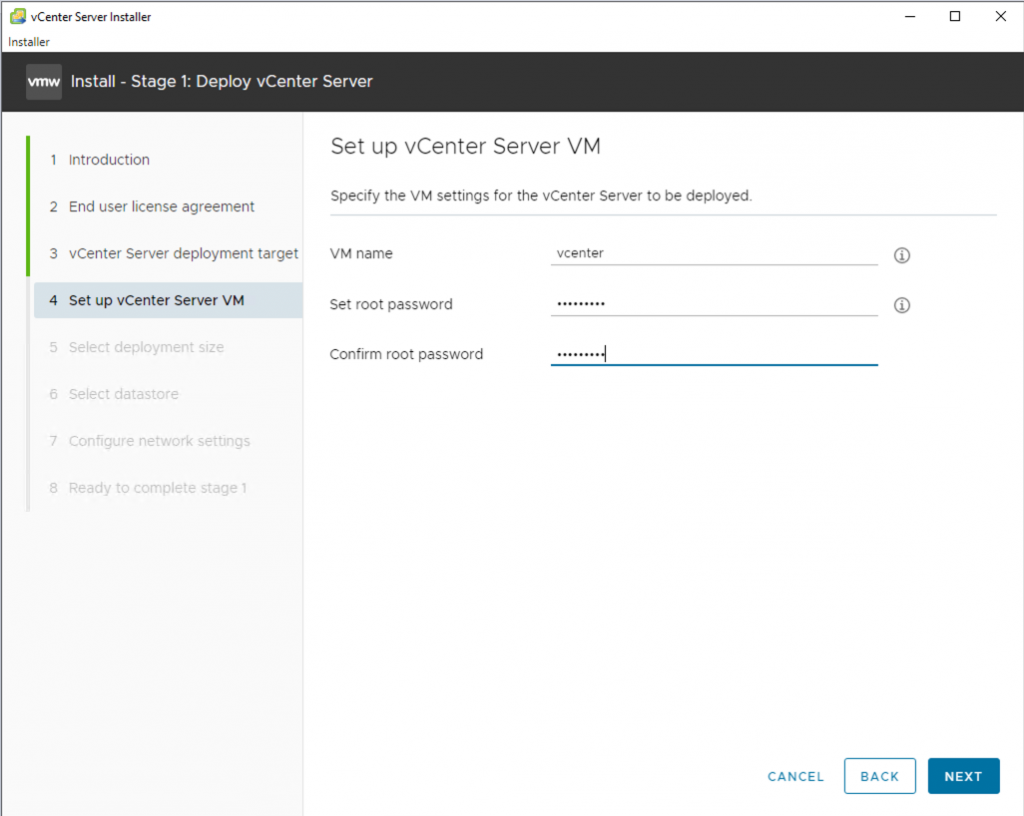
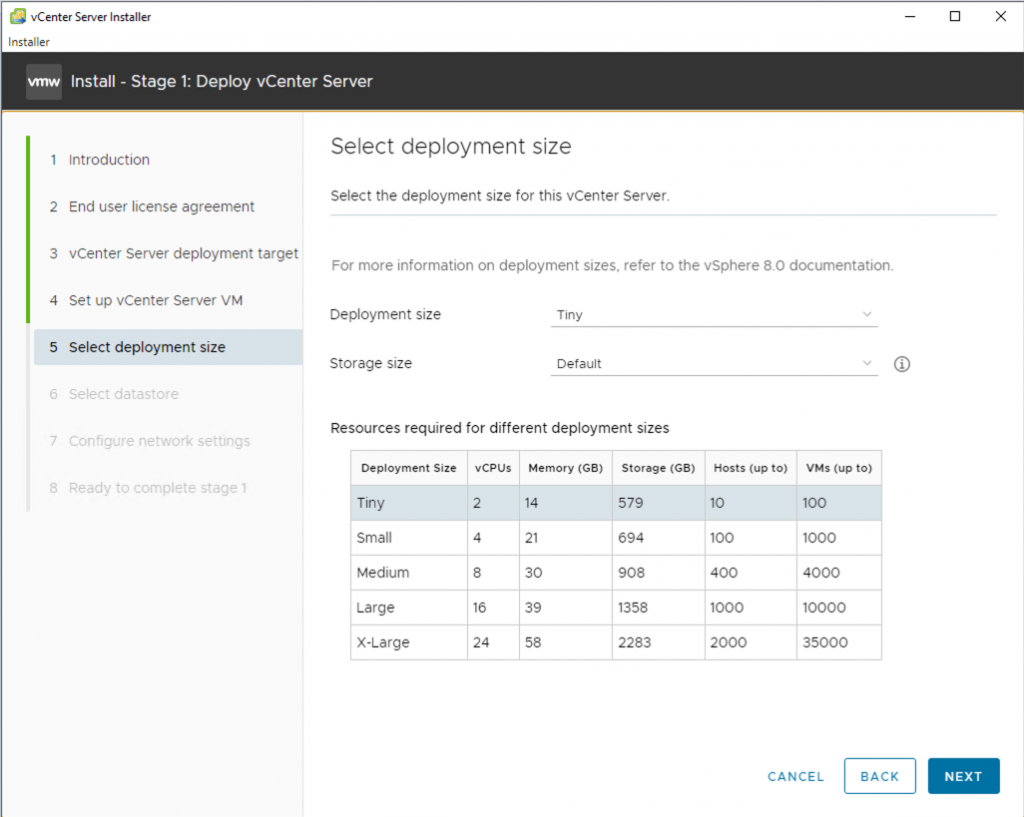
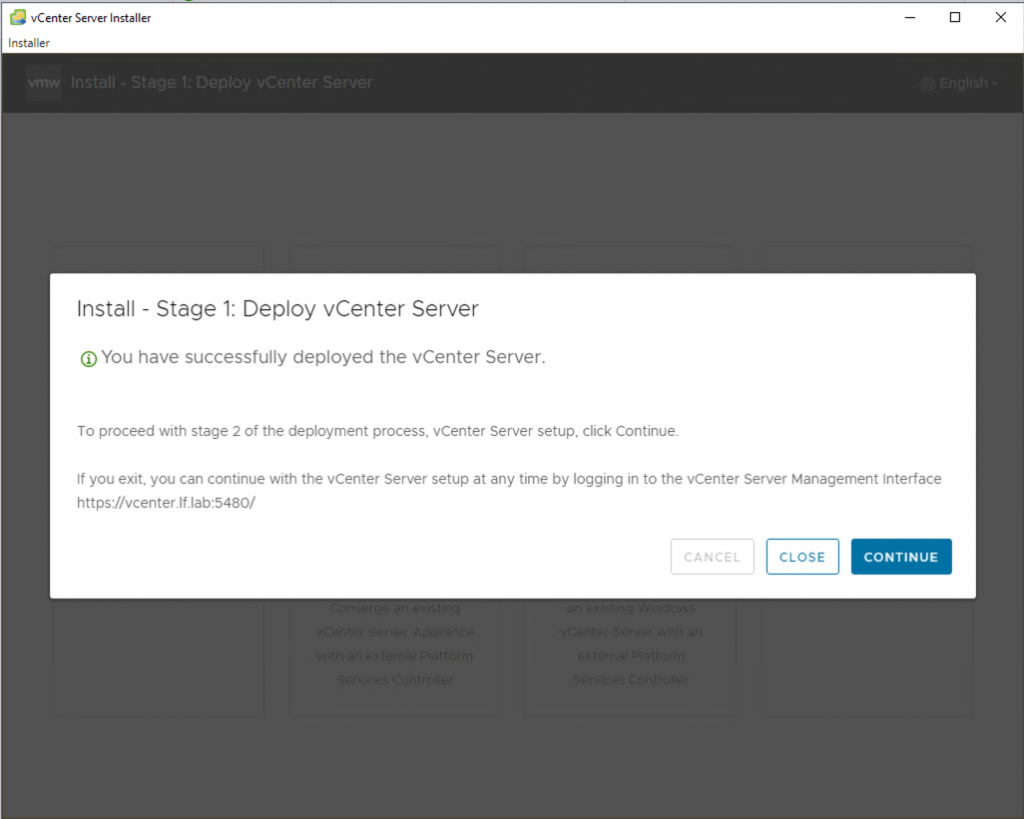
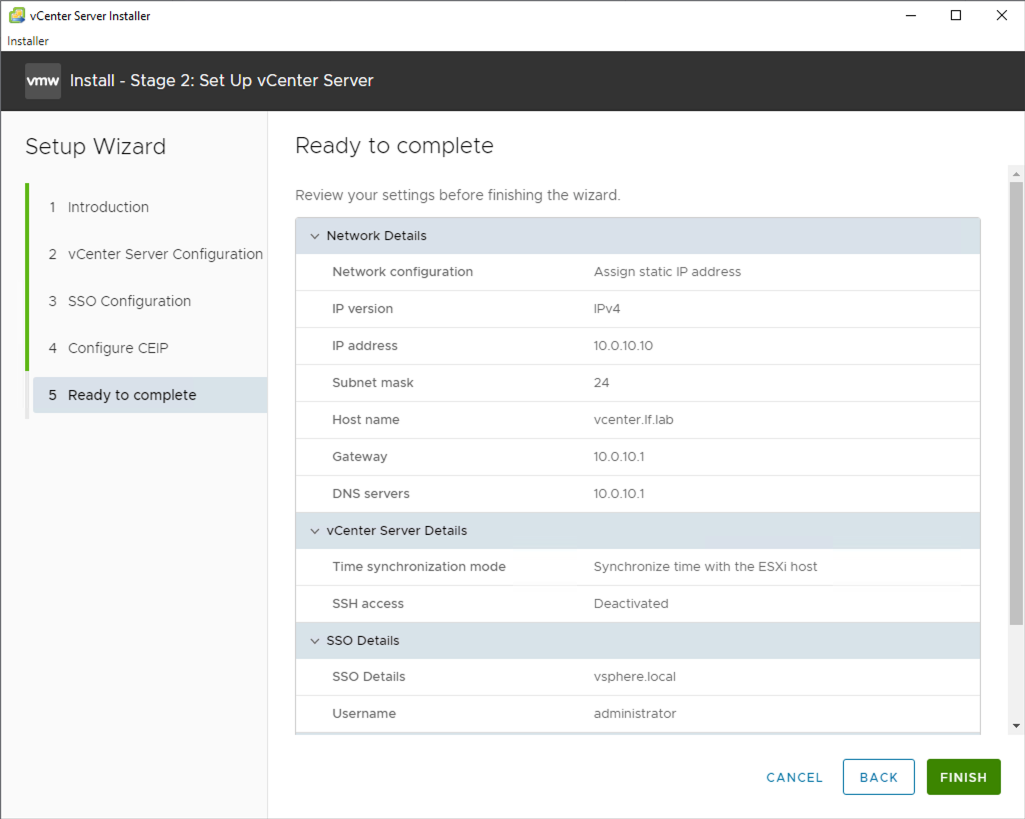
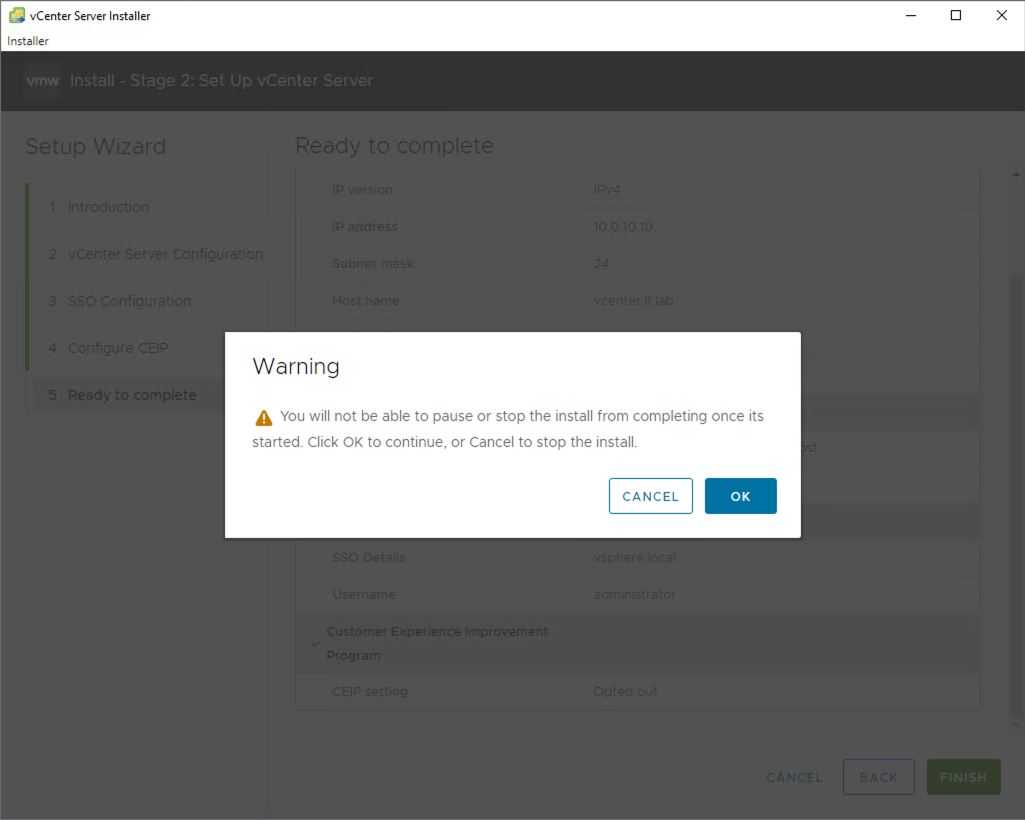
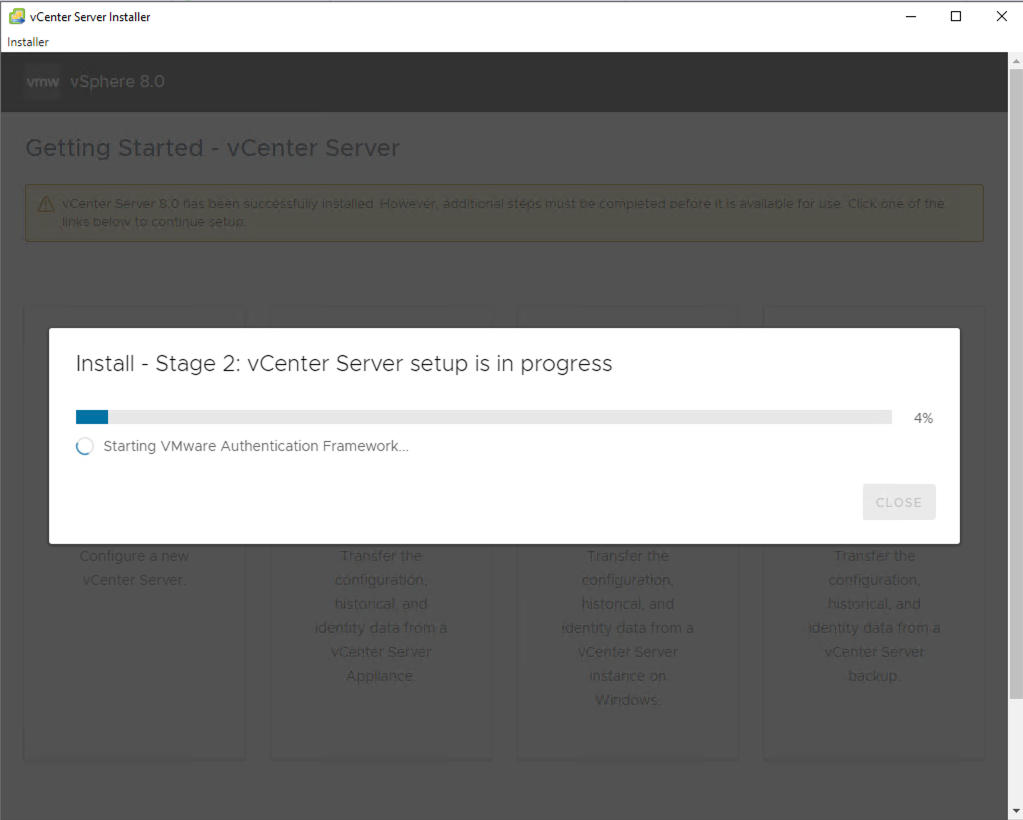
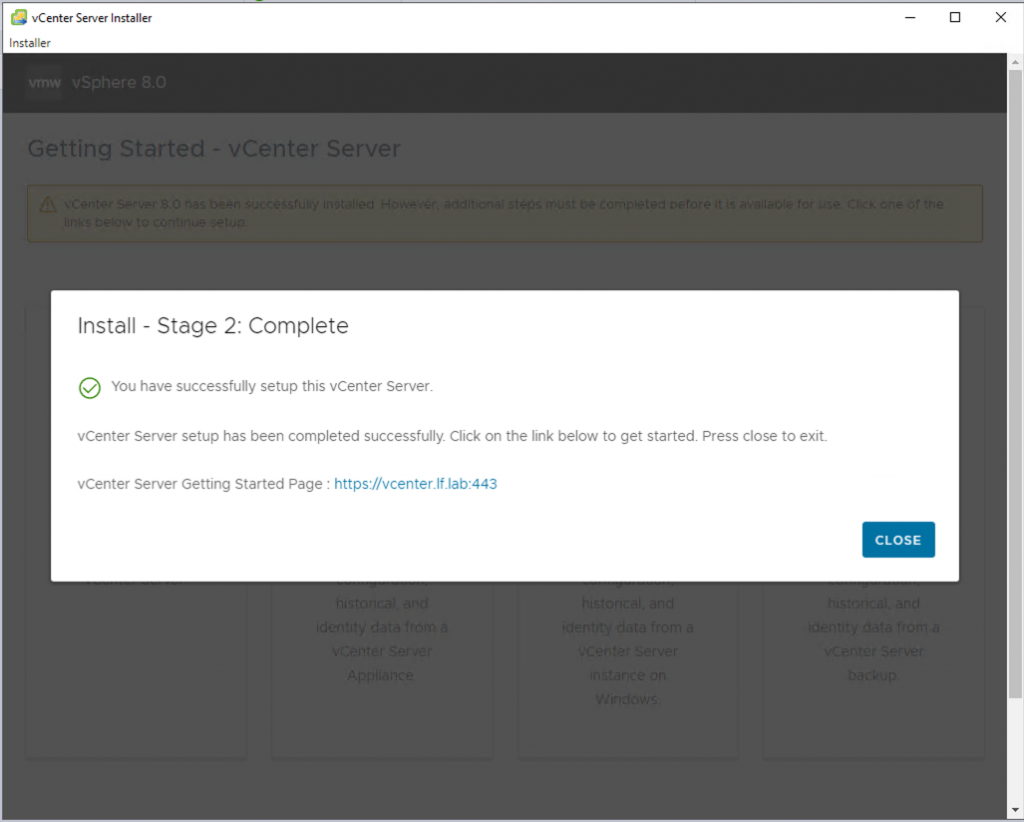
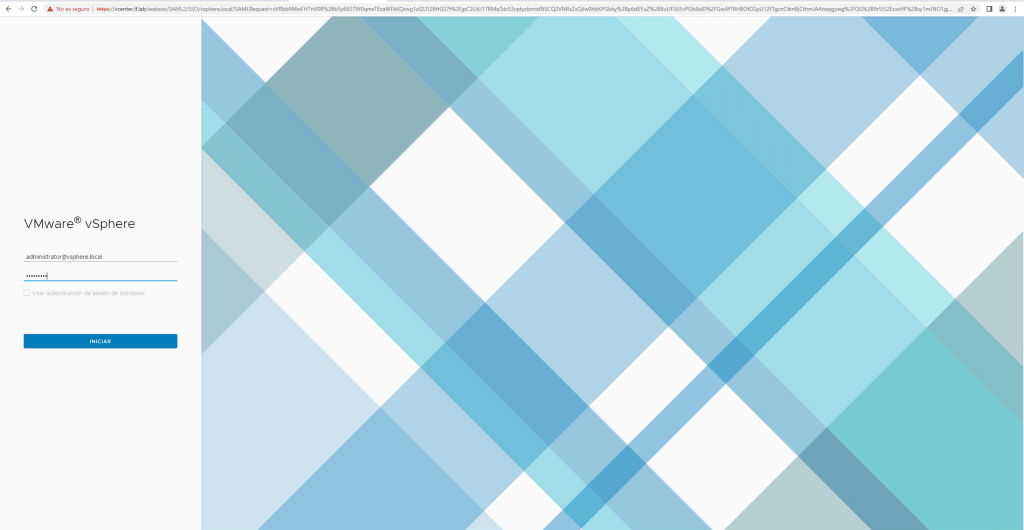
After downloading and opening the vCenter ISO, run the installation executable from Windows with the GUI.
Let’s get started:
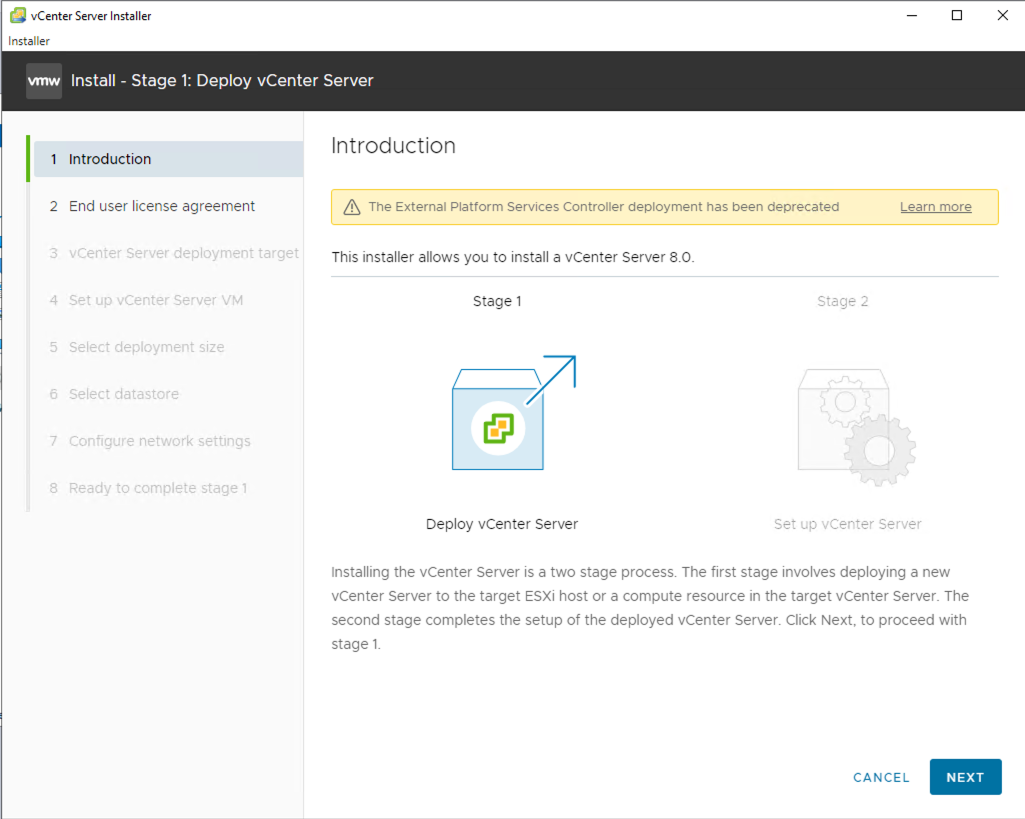
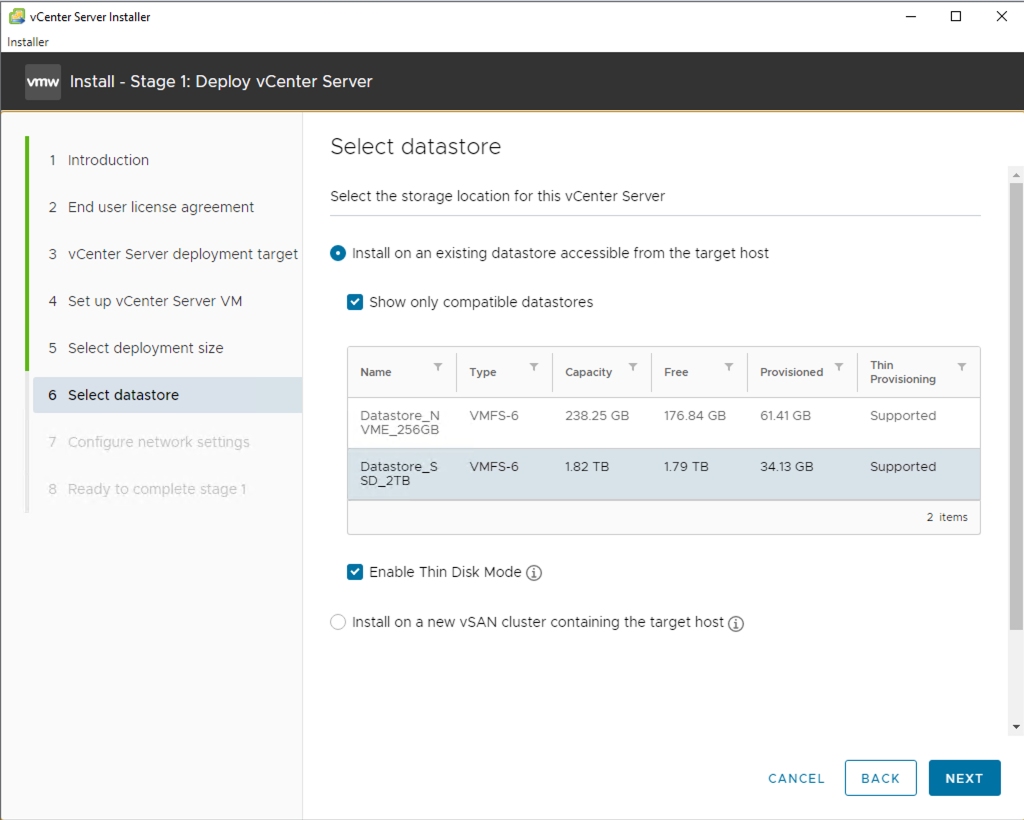
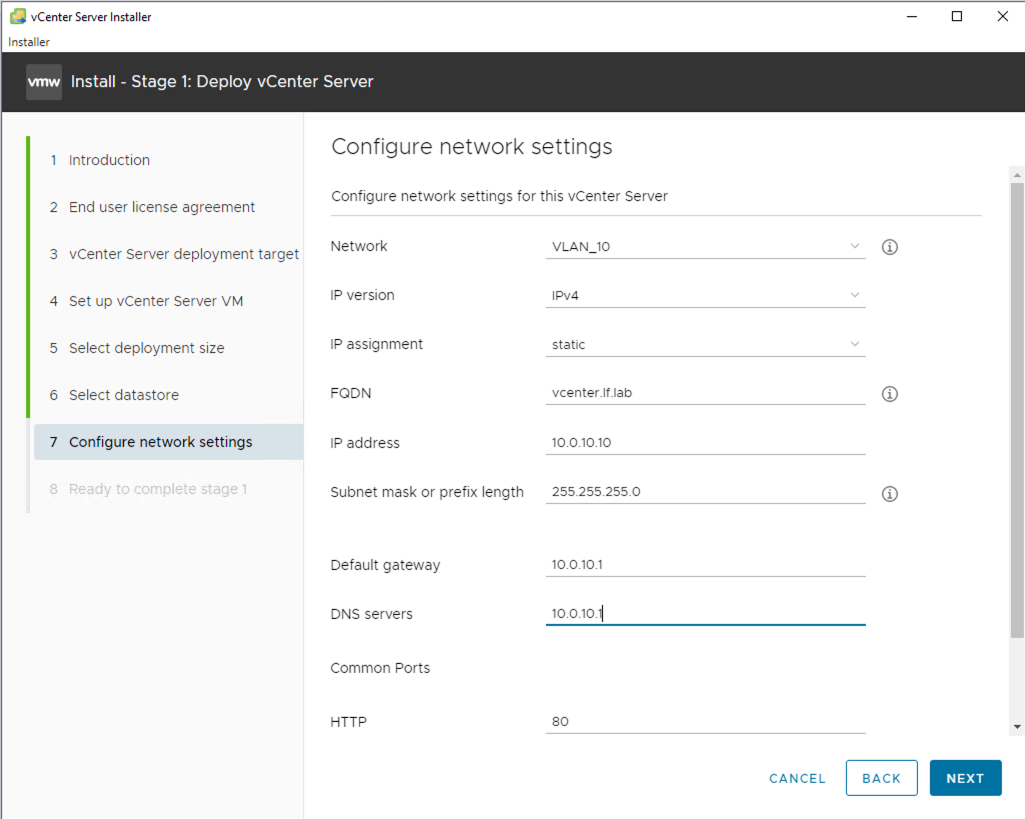
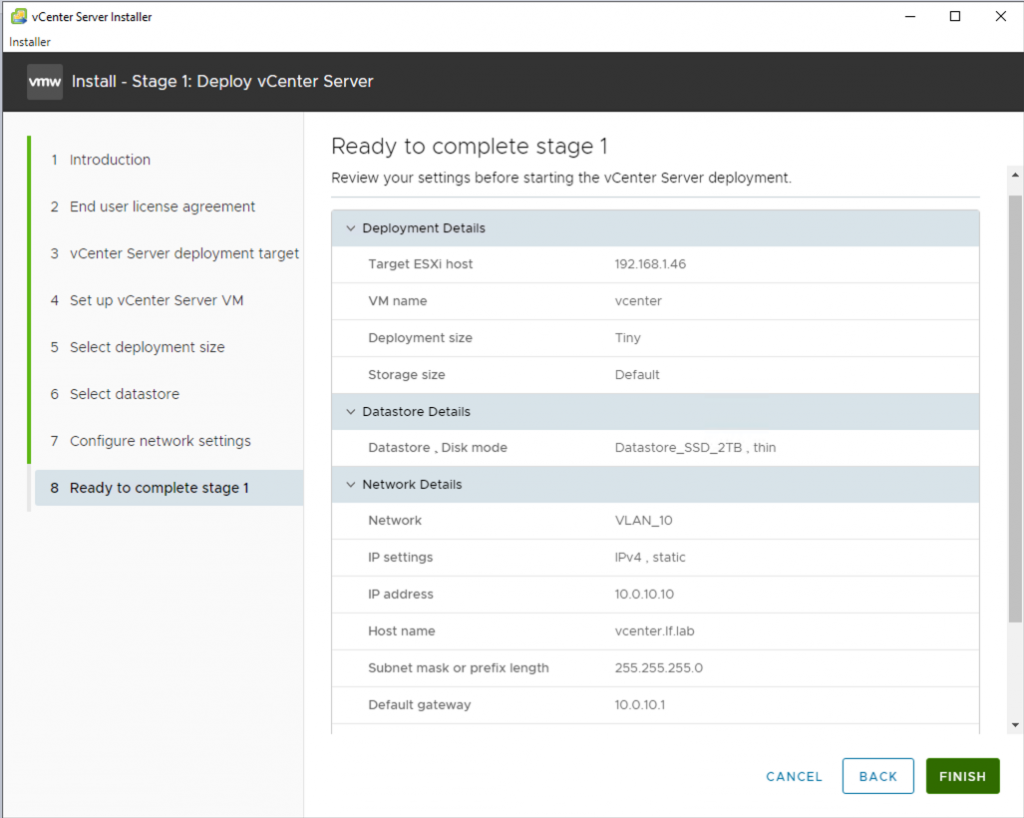
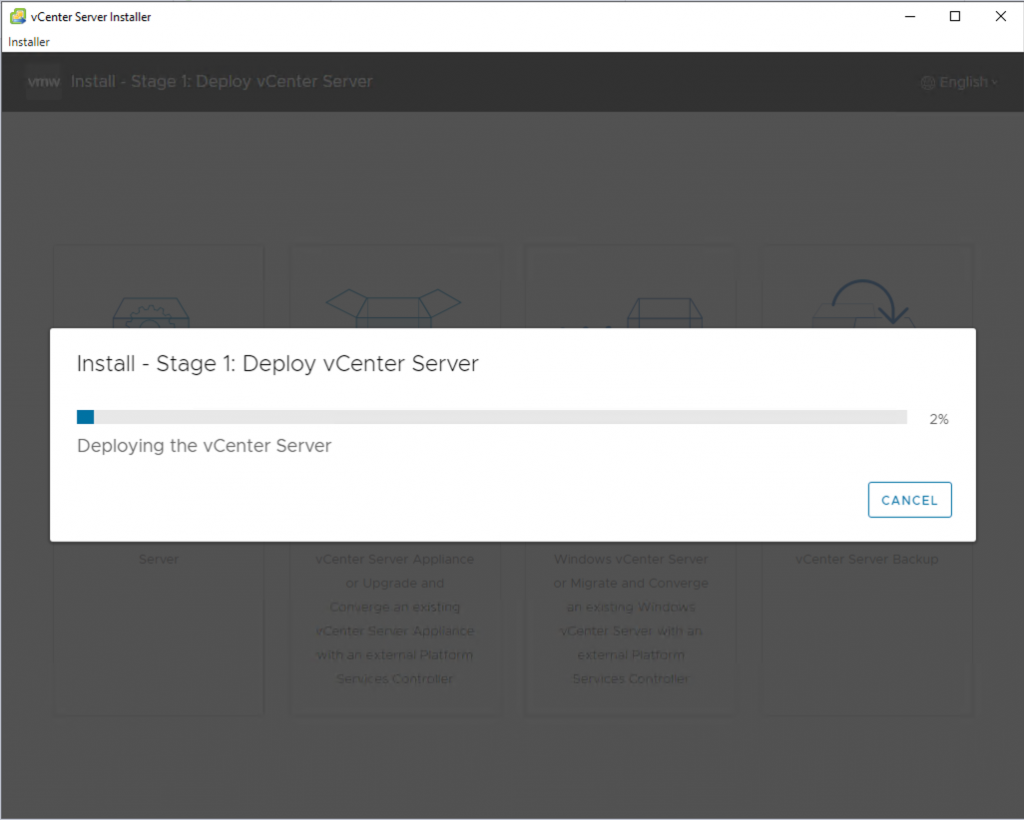
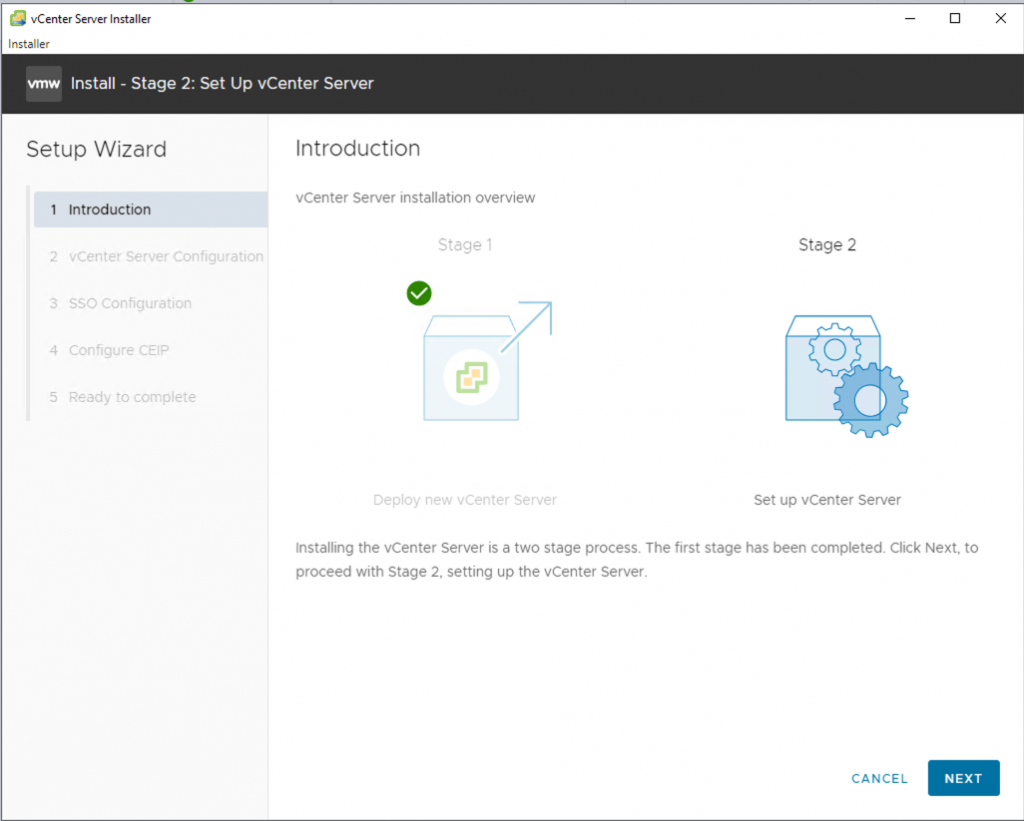
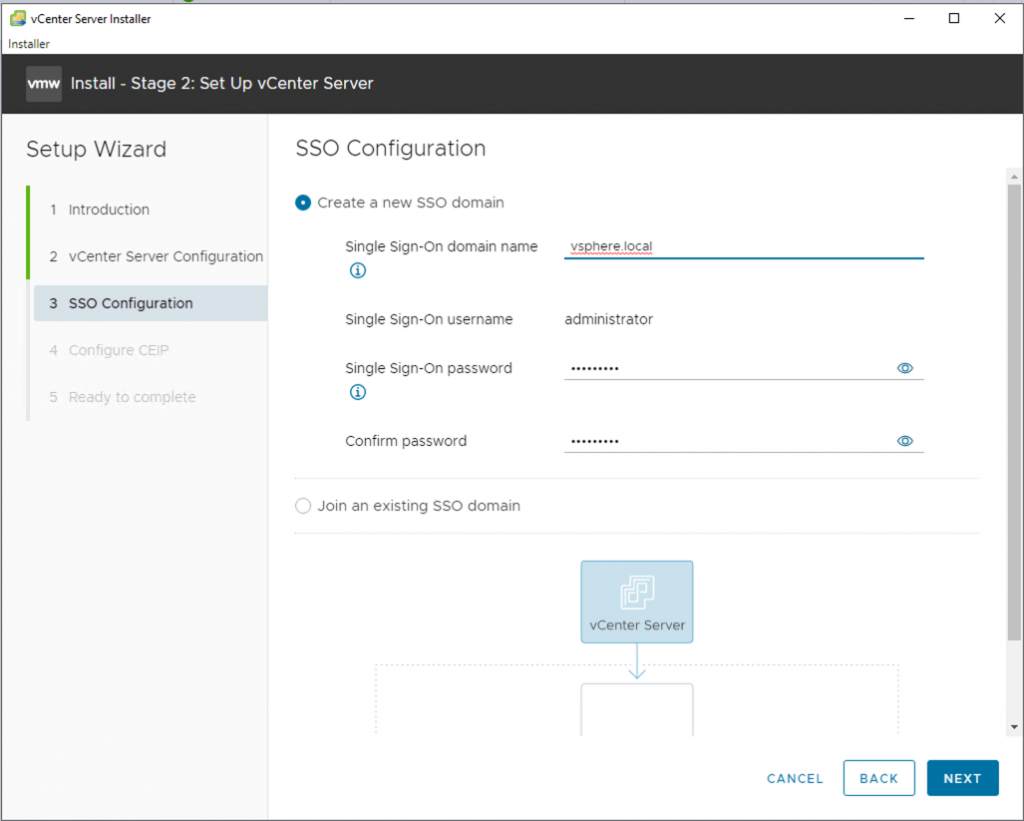
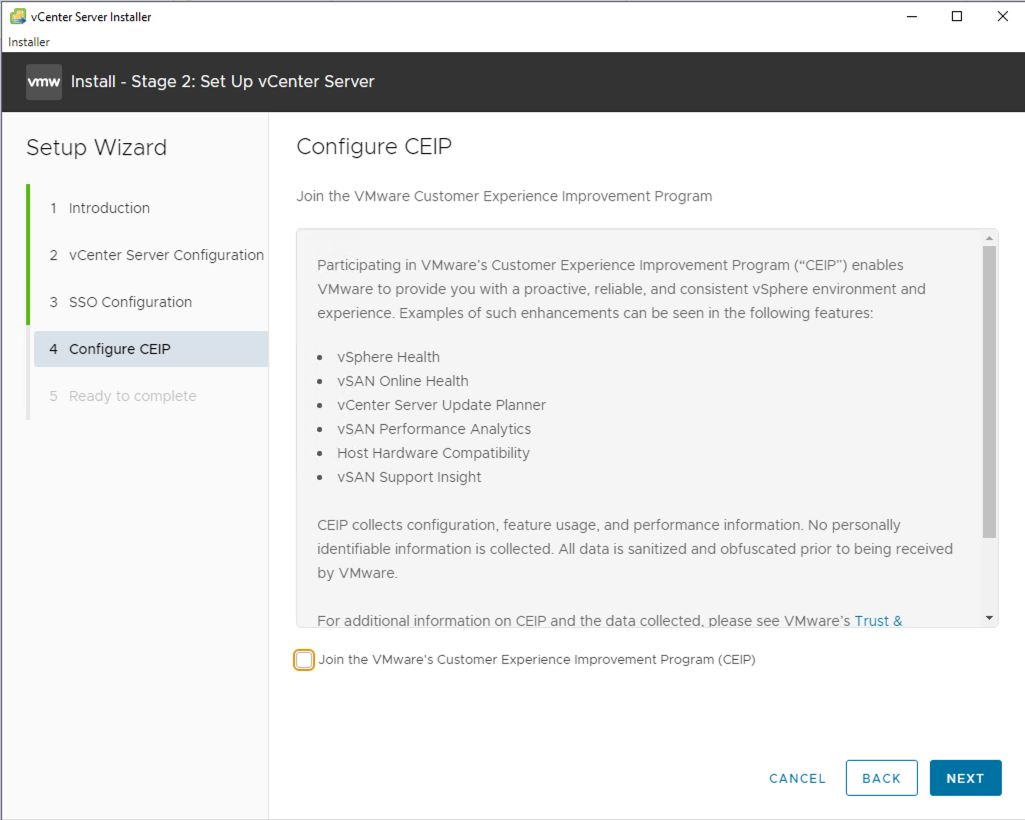
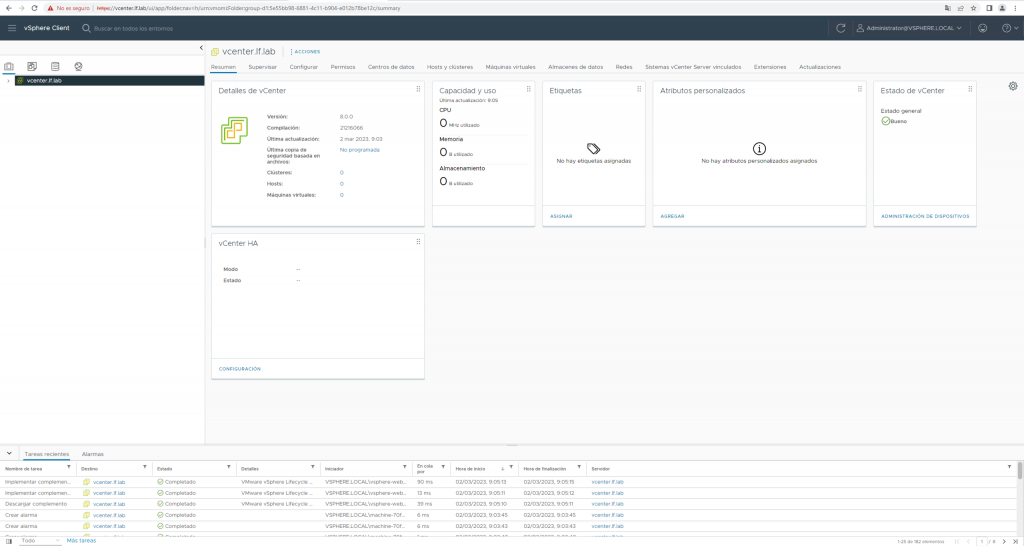
InstallYou can now deploy it only as an appliance. Continue.Choose where to deploy the appliance: the ESXi server.Choose the deployment size that matches your environment. Mine is very small, so I selected Tiny.Select the datastore for deployment. In our case, we’ll use thin provisioning for the disks.Let’s move on to the second part of the installation.If you’re deploying a single appliance, this is fine. If you’re adding multiple appliances for centralized management, create an SSO domain.Everything is ready.Connect, and then continue by creating your datacenter, cluster, and other settings…
First, this is just for fun and was set up in my lab for testing.
I’d been thinking about this for a while. Email notifications are fine, but when your inbox is full and you receive 100 or more messages a day, important ones can get missed. I wanted a way to receive important alerts outside of email, which is how I came up with the idea of getting Veeam notifications through Telegram!
Let’s take it step by step. First, we’ll create a Telegram bot to receive messages, then route them to a group chat or somewhere else:
In Telegram:
Type @BotFather in the Telegram search bar.
Choose the first option, marked with a red verification check (this confirms it is Telegram’s official bot).
Click START
Type the command /newbot or click it in the list of commands shown in the chat.
Next, enter a name for your bot and press Enter (for example, Telegram_Notifier).
You’ll now be asked to set a username, which must end in “bot” (for example, telegramnotifierBot).
Done! Save the token somewhere safe; we’ll need it for authentication later. Click the link to your new bot to open its chat.
Now we need our Telegram ID, so we’ll use another bot: Open IDbot and enter the /getid command. It will reply with your ID: … Make a note of it too.
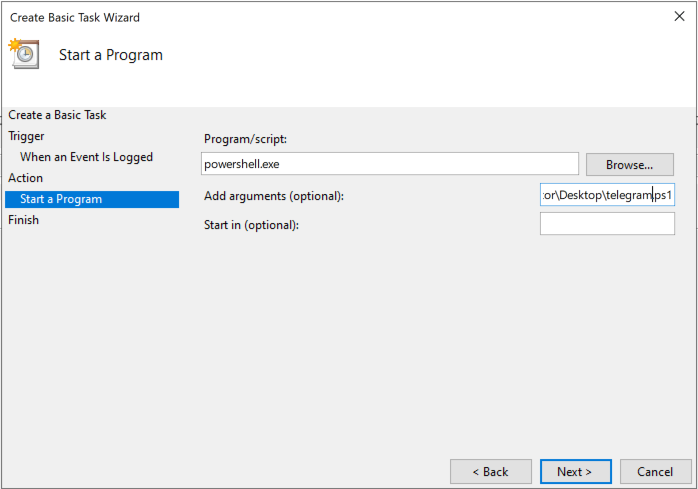
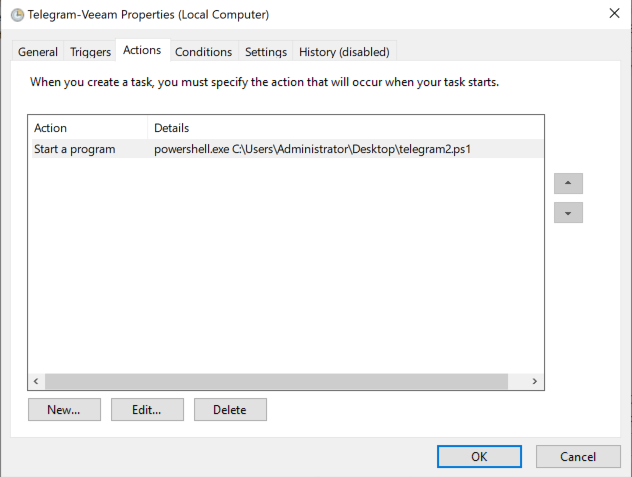
In Windows, I created a PowerShell file called telegram.ps1 with the following content:
Save it wherever you like. Edit it to include your TOKEN and ID!
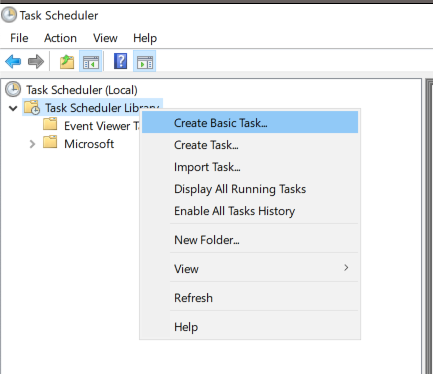
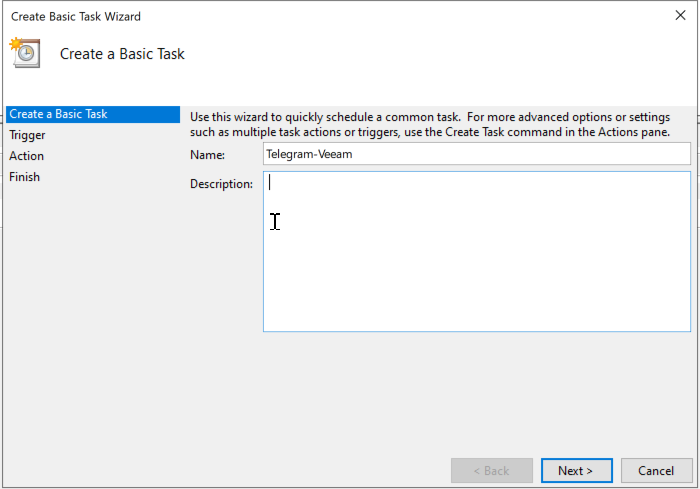
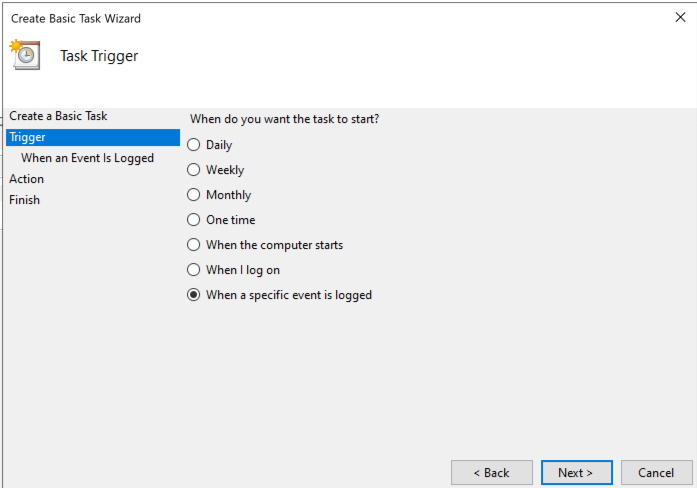
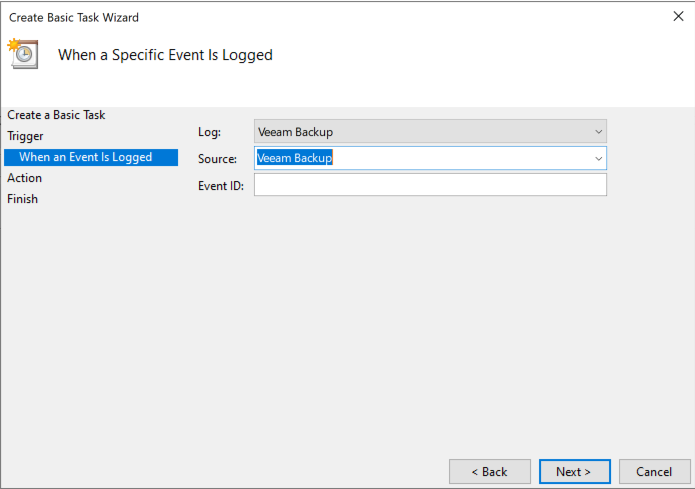
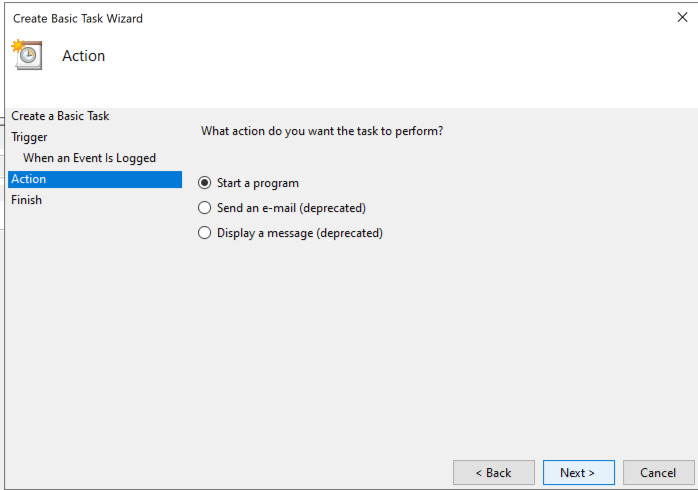
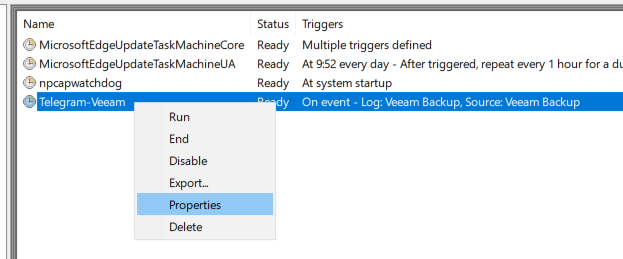
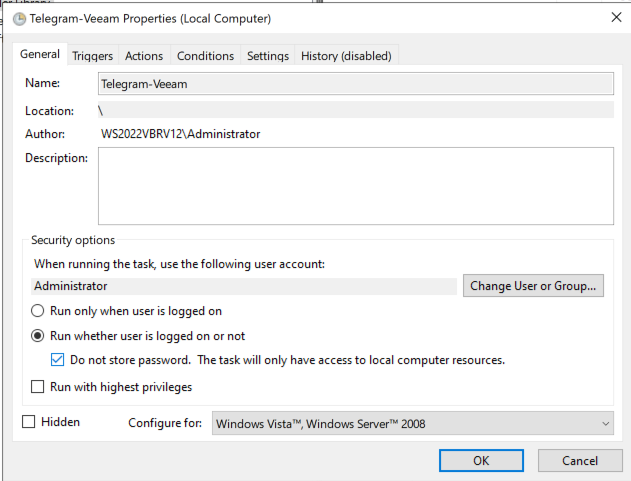
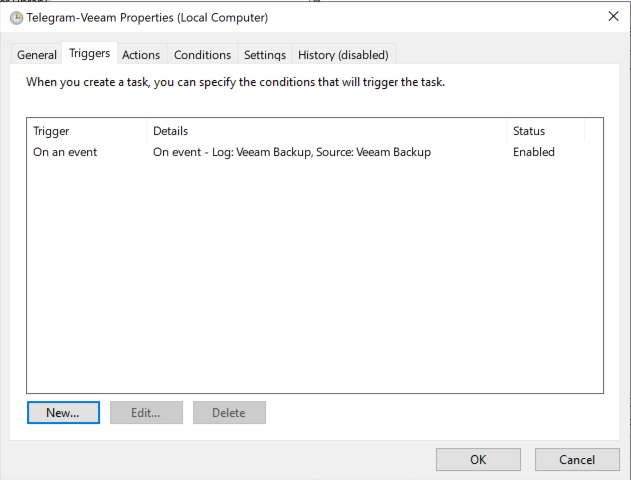
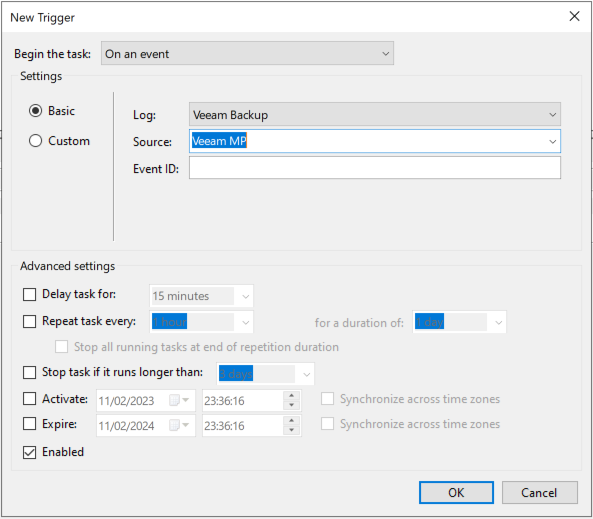
Next, we’ll use Windows Task Scheduler. I’ll include screenshots to make it easier.
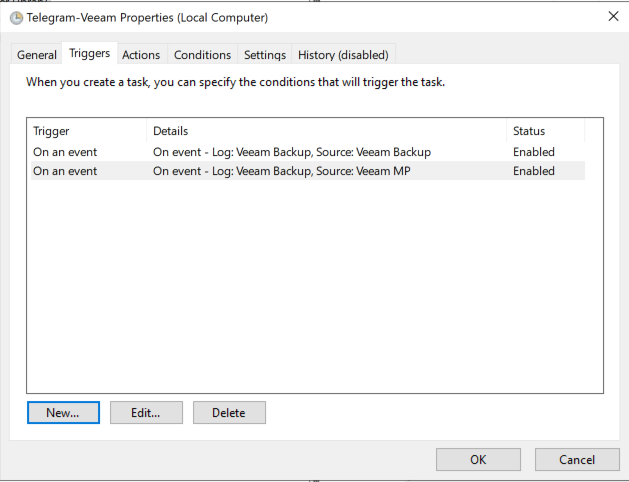
Open Windows Task Scheduler.Follow the wizard.Continue.In the list, select the event log source Veeam Backup. Under Source, select Veeam Backup; we’ll add a second source later.Choose to start a program.IMPORTANT: The program is PowerShell! For the argument, enter the full path to the PowerShell .ps1 file you saved earlier.Finish.Now edit the task’s properties.Set the options as shown in the screenshot: run it continuously and do not store a password.Here we choose which events trigger the task. Add Veeam Backup; we’ll add the other one next.Check that everything looks right.The scheduled task is ready!
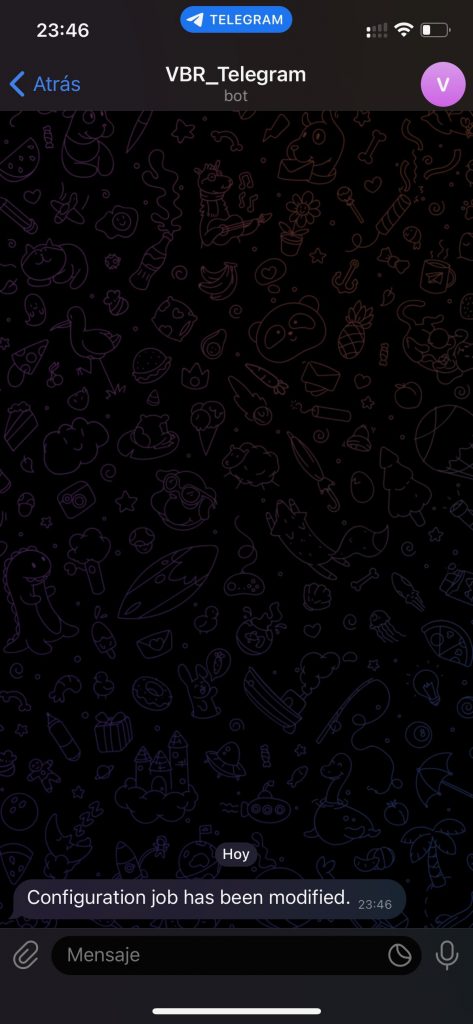
Everything is configured. Let’s run a quick test. Open Veeam B&R, if it isn’t already open, go to Configuration Backup, and increase the configuration backup retention by one day. You should receive a notification in Telegram:
Configuration job has been modified.
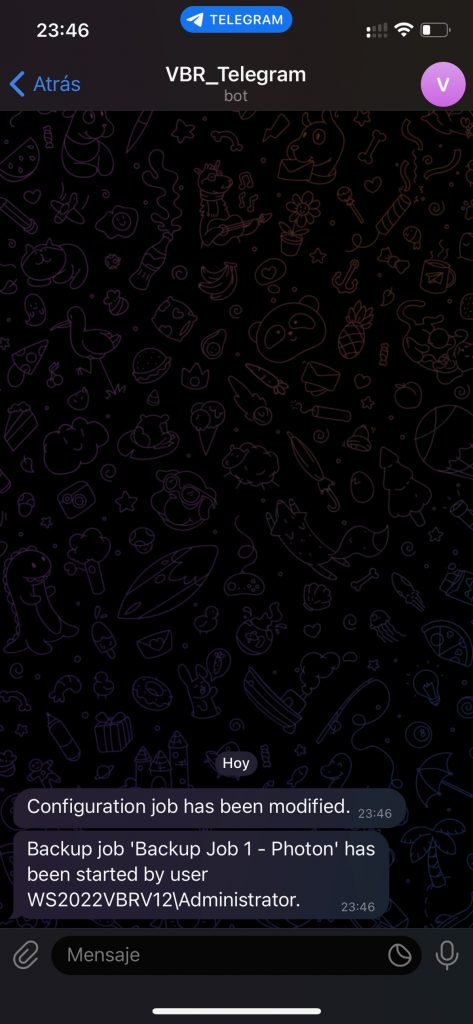
If you start a backup job, you’ll receive a notification like this:
From here, fine-tune the events you want to receive from Veeam B&R through Telegram in Task Scheduler.
I hope this is useful. I’m no programmer, so if you improve it (which I’m sure you will), get in touch so we can update the post and make the Telegram notifications even better!