Expanding our Object First OOTBI Cluster – adding nodes and VBR space

Hi, in a previous entry, we saw how to deploy and get up to work an OOTBI Virtual Appliance,
https://lfconsulting.org/deploying-a-object-first-ootbi-vsa-lab

We will add an extra node to the «Single Node Cluster» to become a multi-node one.

The steps are straightforward, let’s see them via screenshots with comments:

First of all, we need to deploy the OOTBI VSA which will be added to the cluster,
follow the guide from the previous entry, ending after the deployment (don’t create the Cluster again).

Select the Option Join To Cluster
Configure your NIC
The VSA will check for updates
Updates found, let´s update it
updating…
After the update, you will be pushed to the initial menu, go over it again, and the data (NIC config) will remain, just go forward and continue
NTP / NTS
OK, now, add your OOTBI CLUSTER IP ADDRESS,
The one we used/created in the previous entry, and the objectfirst user password we created.
BOOM!
Node Added to the cluster
Now you see the first two options blurry, and the cluster endpoint IP Address (Bottom left) is the same as the previous cluster.
There we have it, 2 NODES, 2TB FREE
Nodes View

IMPORTANT

Now, that our Cluster setup is done, we need to update the information in our VBR to get the space and the cluster working fine.
In the picture below you can see that the S3 bucket from the cluster remains at 1TB.

If we do the rescan repository it will give us an error like so.

Please Right click into the Repo, and re-run the setup wizard,
next, next, finish.

The thing that will happen is that, when extending the cluster, the certificate has changed, so now the VBR needs to grab it again from our OOTBI Cluster to work properly.

Running and ending the setup (properties) wizard again to update the certificate

Boom!
As you can see, after the re-config, the VBR sees 2TB of Storage, so the cluster has been updated!

Following the guide, I will add one more node, so we will have a 3TB Cluster!
Follow the same steps from before, and now, we will see the 3 Nodes and the 3TB storage!

IMPORTANT
Once again, run the setup (properties) wizard for the Repo once again to get the certificate updated!

In the picture, you can see the wizard updating the cert and the bucket now shows 3TB Free instead of 2TB.

cheers!

Deploying Veeam Data Platform on the Lab – Recovery Orchestrator

I want to share with you all my initial setup of a small Lab for the Veeam Data Platform
which is installing VBR + VONE + Recovery Orchestrator.

In my case, I don’t have too many resources, so, for lab proposes, all three roles will be deployed in the same machine

The wizard takes care of installing the tools, just asking you the necessary things to get it done.

As you will see, installing the Orchestrator, includes the VBR and VONE.

If you haven’t downloaded the Veeam data platform, please do…
This is the virtual specs for the VM where VDP is installed on my lab:

Let’s follow up on the screenshots and the comments on the installation.

Here ends the installation.

Now, let’s take a look into the consoles, with very high level / initial configuration:

VBR – We already know how it looks, Showing you adding a Job from a Hyper-V VM.
Initial setup with Backup config, etc…

Veeam One

Recovery Orchestrator Web

Lets add our VBR server, so Veeam One can start collecting info from it,
also, lets add from our infra our Hypervisors, to get more details and monitoring.

In the next entry, we will add an ESXI host to the Recovery Orchestrator and start setting up a recovery plan (a super simple, lab test).

cheers.

Deploying a Object First OOTBI VSA (Lab)

Luckily I have the opportunity to have access to a VSA OOTBI for my Lab,
So I would like to share the deployment and initial steps to get it up and running in my Vsphere lab with y’all.

Let`s get started, by login into our Vsphere console, and starting the new VM process, deploying a VM from OVA:

After finishing the deployment, it is time to open the remote console to continue the wizard from it,

As you can read from my previous entry, in Spanish:
https://lfconsulting.org/object-first-ootbi-primer-arranque-y-configuracion

As you already may read from previous entries, in Spanish Im afraid, let’s create the cluster
yes, single node cluster:

Network config
node Hostame
Checking for updates…
OK, IMPORTANT! apply the updates, and no worries, after so, we will need to start the wizard again, but the info is kept, 😉
updating….
After updating, lets call the wizard again, I will continue in the next new screen, the previous info is saved, so just next next….
snmp, or NTS if you want it encrypted
Here is the deal, lets setup the cluster name and IP Address
Define a password for the «objectfirst» user
INFO: how to connect to the Web UI, model, and S/N
Telemetry, very important to notify support in case of any issue
DONE, now both, setup new cluster and Join are bold, so all set.
Lets access via web UI
Boom!

Now, I will show you how to quickly create an S3 Key and a Bucket and how they look when added to VBR!

Go to Security – S3 Keys – Create Key
Grab and keep secure the info, you ill need it to setup the Repo in VBR.
Now lets create the Bucket, S3 Bucket – Create a Bucket
Of course Enable Versioning, so the bucket will be Immutable
Here you can see the Bucket added into VBR, ready to be use!
another VBR view!

Cheers.

LAB- Deploying VBR13 – on Linux – OVA!

I want to share my initial screenshots of the Linux-based Veeam Backup & Replication Server.
Tech Preview: VBR on Linux (v13)

Private technology preview for Veeam 100, for non-production use only. 

Let’s get started:

As you may know, let’s deploy the OVA in our Vsphere Host:

As always, follow the wizard…

Select where the VM is going to be stored

Important, LAB, so, Thin Prov.

Detailed resume, no worries for the error, is ok! It’s just lab and non-production, remember?

Booting and great looking…

Easy step, to see the assigned IP address to the VM, quick look into the VM properties

Now, it is time to open your favorite browser, and call the URL from the VBR IP Address, for the web console

Boom!
Look at this console, beautifully colorful.
Looking forward to working from it, especially day-to-day operations you don’t need the «heavy console».

Now, with a Vsphere host Added and some VMs

Now, time to show the «Heavy» Client, I will paste the pics, due to the fact that the installation is so straightforward

Stay tuned for more news regarding this VBR13 Linux-based!

cheers.

Actualización Veeam VBR V12 a 12.2

Hola
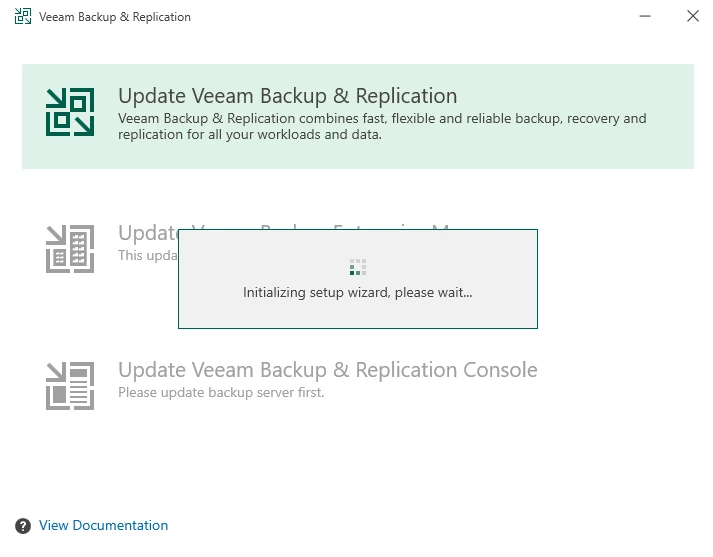
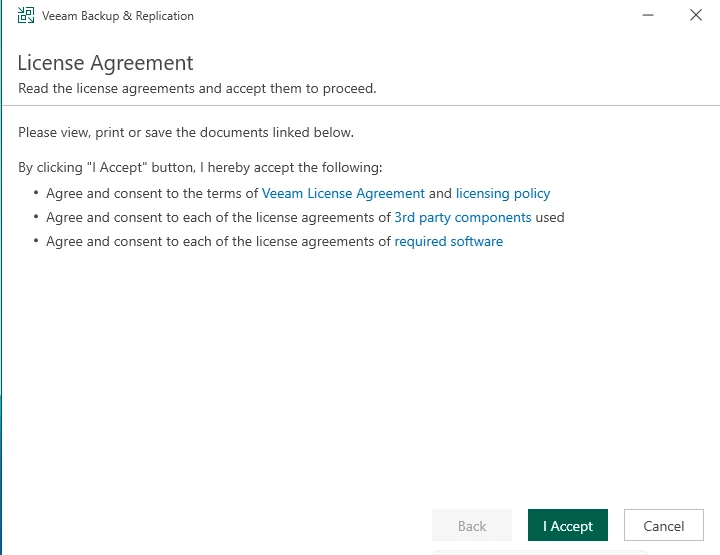
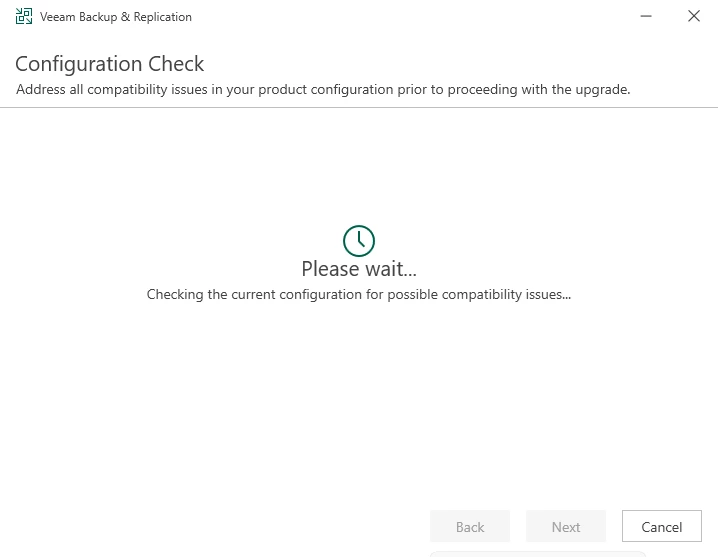
Os dejo unos sencillos pantallazos de como ha sido mi actualización en el Lab de Veeam VBR 12 a la ultima version, 12.2, a pantallazos.

Primero que todo, descargamos la ISO de la última version de la web.

Una vez la tenemos, comienza la actualización

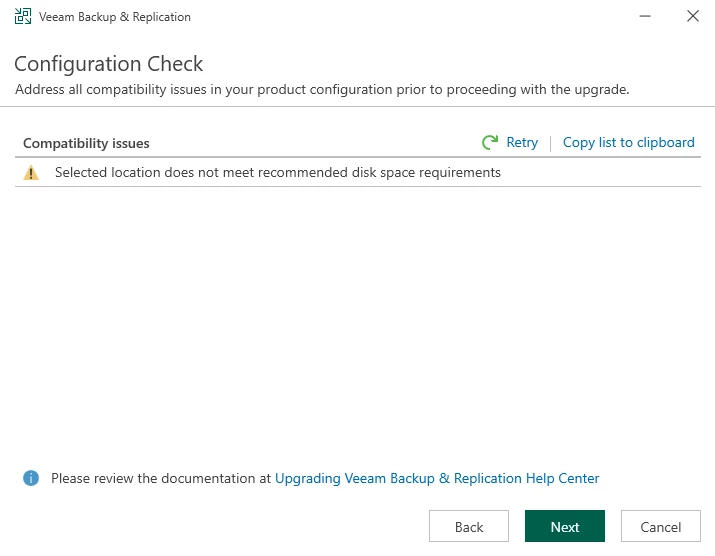
Hasta aquí, todo bien, pero, como veis, me pide reiniciar, dado que ese componente C++ estaba sin actualizar, así que nada, reiniciar el VBR y volver a empezar con el upgrade, y ahora, continúa sin problemas…

temas de lab, no tenemos siempre todos los recursos que quisiéramos….
(el repo S3 OOTBI lo tengo apagado, ya que es un Appliance Físico, y hago pruebas y lo apago)
Listo! Actualizado a la ultima version, y funcionando!!

Saludos.

Instalación VBR 12.1 a pantallazos

Hoy hemos realizado la instalación desde cero de un Veeam Backup & Replication 12.1

Os dejo los pantallazos para que podáis seguirlo.

Detalle, en el Windows server, tenemos 2 particiones, C: para el sistema, y D: para los Datos de Veeam y el Repo Local.

Primero que todo, descargamos la ISO, yo he descargado la Veeam Data Platform,
Ahora si, montamos la ISO y vamos al lio:

Comenzamos por lanzar la ISO, y comenzamos con la Instalación.
Seleccionamos VBR
VBR 12
Ya sabéis que hacer aquí
Seleccionáis vuestra licencia, en el caso de community, no ponemos nada
Comprobamos los parámetros de instalación
como ya sabréis, a mi me gusta tener dos particiones, C para el sistema y D para datos, los datos de Veeam, y el Repo local que nos crea
Y se pone en marcha a instalar todo lo necesario
Tras un ratito, listo!
Abrimos nuestra consola de VBR 12
Y aquí la tenemos, lista para empezar a agregar configuraciones, repos, tareas, etc.

saludos.

Telegram Notifications from Ubuntu Server – all SSH Logins

Recently I added to my home lab, my first Ubuntu Server with a Hardened Repository for Veeam Backup, you can find more info here.

Now, the thing is, I want to be able to get notified if some user logs into the server via ssh, as a extra control, since I disable the SSH service when I dont use it.

Also the idea came, to be able to get notified from other applications via telegram, so wasn’t a crazy idea at the end.

from previous entries, or the internet, you can easily find how to create a Bot, and how to get your ID, so Im not going to dive into that,

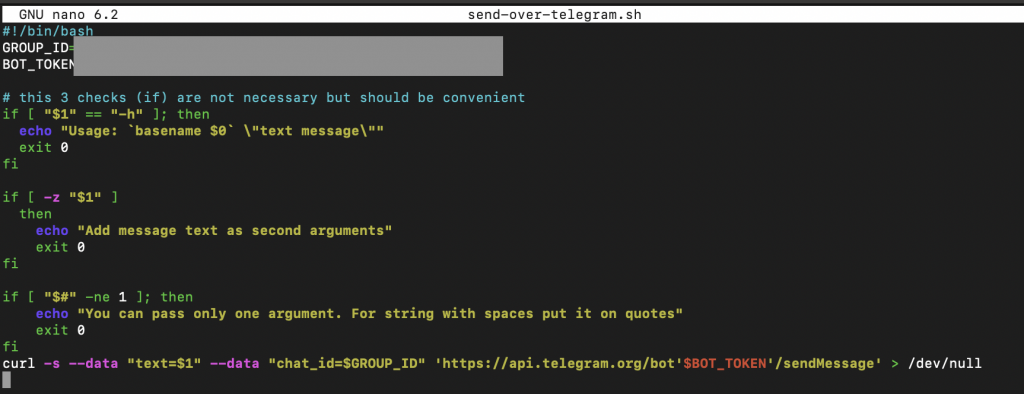
So first, once we have created and activated our bot and user ID, lets go a create our Telegram messaging program,

in our home, lets create a file like this:

nano send-over-telegram.sh
#!/bin/bash
GROUP_ID=
BOT_TOKEN=

# this 3 checks (if) are not necessary but should be convenient
if [ "$1" == "-h" ]; then
  echo "Usage: `basename $0` \"text message\""
  exit 0
fi

if [ -z "$1" ]
  then
    echo "Add message text as second arguments"
    exit 0
fi

if [ "$#" -ne 1 ]; then
    echo "You can pass only one argument. For string with spaces put it on quotes"
    exit 0
fi
curl -s --data "text=$1" --data "chat_id=$GROUP_ID" 'https://api.telegram.org/bot'$BOT_TOKEN'/sendMessage' > /dev/null

GROUP_ID: Your Group ID from your telegram suscription
BOT_TOKEN: your token received when you created your bot.

let`s convert this into a «program» to do so, lets move (or copy) our file into the route /usr/sbin

sudo mv send-over-telegram.sh /usr/sbin/send-over-telegram

Everything inside /usr/sbin is owned by root, so lets change the ownership to our file

sudo chown root:root /usr/sbin/send-over-telegram

Finally, we want any user to execute this «program» so lets also modify the permissions for that

sudo chmod 0755 /usr/sbin/send-over-telegram

now we can test it out:

send-over-telegram test

you should get the «test» text message into your Telegram Group!

Now, let’s get notified any time a user logs into our server via SSH, to do so, we are going to create a script, and move it to a specific folder.

nano login-notification.sh
#!/bin/bash
    
# prepare any message you want
login_ip="$(echo $SSH_CONNECTION | cut -d " " -f 1)"
login_date="$(date +"%e %b %Y, %a %r")"
login_name="$(whoami)"

# For new line I use $'\n' here
message="New login to server"$'\n'"$login_name"$'\n'"$login_ip"$'\n'"$login_dat>

#send it to telegram
send-over-telegram "$message"

As you can see, here we are sending the information to our previously created «command» send-over-telegram

now, lets move (copy) the script where needs to be to trigger the alert:

sudo mv login-notification.sh /etc/profile.d/login-notification.sh
sudo chown root:root /etc/profile.d/login-notification.sh
sudo chmod 0755 /etc/profile.d/login-notification.sh

We are done!
Now, lets log off and back on to our Ubuntu Server,

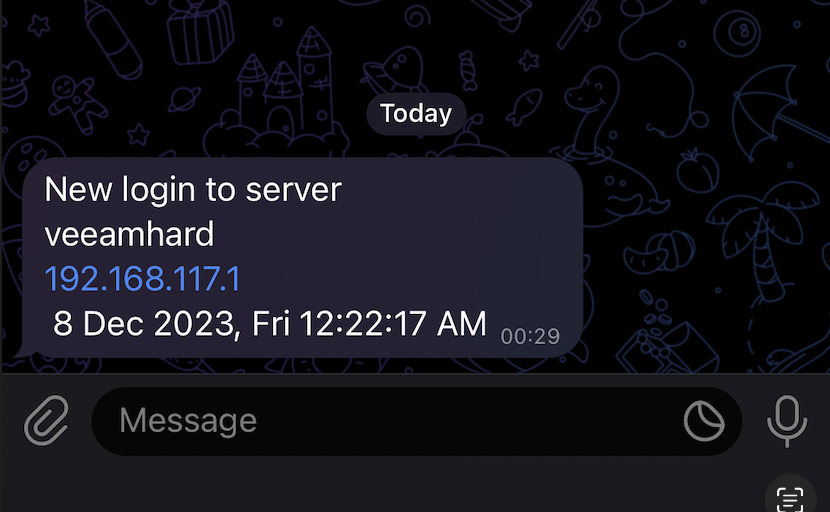
You should get your Telegram Message with the information like this:

Remember!!

After using your SSH access, you should always disable it from the server, to avoid unwanted accesses to your server remotely, and do local changes or enable it just when you need to

To disable SSH:

sudo systemctl stop ssh
sudo systemctl disable ssh

Cheers!

Creando nuestro propio Ubuntu Server + Harden Repository Linux para Veeam V12

En una entrada anterior, veíamos como desplegar el Ubuntu VHL «paquetizado» directamente, ya aplicando todo el Hardening y opciones del script «por defecto» e incluso endureciendo los permisos de usuarios.

Ahora bien, si el caso es, que quieres instalar tu propio Ubuntu Server, y luego aplicar el Hardening, te traigo unos pantallazos con una Instalación estándar más la ejecución del script.

al lío –
Instalamos Nuestro Ubuntu Server:

Ya tenemos instalado el S.O. Base, ahora
Vamos a descargar el Script desde el siguiente enlace, lo subimos a nuestro servidor, y lo ejecutamos, atentos:

Nos vamos a la sección de descarga «Download»
Nos envía a un repositorio git, ahí tenemos el script.
Yo me lo bajé a mi ordenador, y lo subí via ssh a mi servidor Ubuntu. a vuestra elección.
Aqui importante, una vez copiado el archivo, le damos permisos de ejecución, y lo ejecutamos con permisos de «super user».
comienza el script a hacer lo suyo….
Listo, todo aplicado e instalado
aquí, tras un reinicio y login, vemos el mensaje arriba del todo, el famoso «Disclaimer»
También vemos la salida de puntos de montaje, vemos el sistema y /backups, que será donde guardemos nuestros backups inmutables más adelante.

Listo!

Ya tenemos nuestro Ubuntu Server con el Harden aplicado, y ya podemos seguir los pasos del artículo siguiente para añadir nuestro repo a Veeam B&R V12 y hacerlo inmutable, desde la parte de la adición del repo a VBR V12.

saludos.

Instalación e integración de VHR en VBR V12!

(Veeam Hardened Repository)

Hola, Hoy por fin me he animado a desplegar y probar el fantástico proyecto de Veeam, el VHR «Veeam Hardened Repository»

Se trata de un despliegue «paquetizado» de un Ubuntu Server, el cual ha sido «endurecido» o «reforzado» con las pautas de seguridad DISA STIG.

Existe la opción de instalar el S.O. por tu cuenta, y después correr el script de Hardened, pero me ha parecido más interesante probar este «paquetizado«

Voy a ir poniendo pantallazos y algunos comentarios, el proceso es muy sencillo.
Para las pruebas, lo he desplegado en una maquina virtual, pero este VHR está diseñado para ser desplegado en un servidor físico, no en vm.

Toda la información y descargas las podemos encontrar aquí!

Comenzamos:

Como pre requisito, este deploy buscará en los discos el más pequeño para el S.O. y el más grande para el repositorio, yo en mi caso he desplegado un disco de 20GB y otro de 100Gb y los ha reconocido solo.
Recomendado si hacéis el despliegue en servidor, que tenga controladora RAID, un RAID 1 «Pequeño» para el S.O. y un Raid 5 ò 6 para el repositorio.

Booteamos la ISO
Configuración de red, recomendado bond de 2 tarjetas de red, muy fácil de hacer con el asistente.
en mi caso al ser laboratorio, solo he dejado una tarjeta y por DHCP
Si tenemos servidor Proxy para la conexión a internet, importante definirlo, ya que se bajará actualizaciones de seguridad en el proceso de instalación.
OJO! Vamos a destruir todo el contenido de los discos, e instalar el S.O, y el repositorio,
si estais re instalando el S.O por fallo, no hagas esto, o lo perderéis todo.
Definimos usuario
arranca la magia
Sigue la magia con actualizaciones
acabamos, ahora, a reiniciar.
Arranque inicial, nos «logueamos» con el usuario creado previamente…
Ojo al disclammer, nos indica que tras este setup inicial, y reiniciemos, el S.O. se va a «endurecer» deshabilitando todos los comandos para el usuario, a excepción de reboot y shutdown!!
Haremos nuestros ajustes, y ante de reiniciar, lo añadiremos al servidor de Veeam VBR!!!
En nuestro VBR, vamos al Wizard de añadir repositorio de backup.
HARDENED!!!
Añadimos nuestro servidor VHR recién desplegado
Las credenciales como single use, sino, nos va a fallar, es un hardened repo, todo debe ser lo más seguro posible!
Continuamos con el proceso,
Seleccionamos nuestra unidad donde vamos a almacenar los backups, el Repo!
Aquí definimos la inmutabilidad, en días, lo he dejado por defecto, 7!
Seguimos con la configuración convencional de nuestros repos
Listo!

Vemos aquí nuestro repo Inmutable listo para ser usado, independiente, en SORB, etc…

OJO, continuamos ahora en el Servidor VHR que desplegamos, para terminar el Hardening!!

Como veis, ya lo hemos añadido a nuestro VBR, por tanto, ahora, a reiniciar, tras lo cual, se ejecutará el script de «endurecido» quedando el usuario solamente con la opción de shutdown y reboot.
Listo! ya nos dice el disclamer que el Hardening se ha efectuado.
Todo listo para usar nuestro repositorio en nuestro servidor seguro.

ara poder hacer troubleshooting, tendremos que reiniciar y lomearnos en el servidor como root desde el modo Standalone desde el arranque del Grub, ya que el root está deshabilitado, y nuestro usuario únicamente tiene permisos de Reboot y Shutdown.

Espero os haya gustado, y os facilite el despliegue de esta fantástica opción,
yo lo tengo en mi laboratorio, y como bien dice la documentación, usarlo a vuestro criterio, y no tiene soporte, no habrás tickets en soporte!

Para monitorear los discos en caso de fallo, etc, deberes configurar la ILO, IPMI, DRAC, etc… que tenga vuestro servidor, ya que el S.O. del VHR no mandará notificaciones.

un saludo.

USB Storage over the Network!

Hi everyone!

I had a case during this week, and I wanted to share my experience / workaround with y’all.

I wanted to export a backup to an external drive, the VBR was a virtual machine, and no access to the Hypervisor to plug the USB and push it to the vm.

Now you may think, mount it somewhere and share it over the network as a shared folder…

I did, and was not working, some windows stuff that we were not allowed to share any unit, and was driving us crazy!

We did some research, and remembered that there was a way to share / mount remote USB Devices over the Network! now, time to give it a shot!

The idea is very straight forward, a Server machine, where the USB Devices is located at, and a client, to mount the remote resource as “local”.

The tool name is VIRTUALHERE

USB SERVER(Local USB Drive)→NETWORK→USB CLIENT“Remotely mounted USB Drive”

You simply download the Server and client, and execute them in the decided machines, couple of easy configs, and you are good to go, let me show you some screenshots.

VirtualHere Server running in the workstation out of the Vsphere environment.
Client running in the VBR Server
We right click into the device we would like to mount remotely – locally.
Boom! now shows the USB Drive like being plugged locally, its not!
VBR Sees the unit from the system, so now we are good to export the backup to it.
Some networking traffic going on, sending the files to the USB drive.
After the usage, we unmount the unit by right clicking and stop using the device.
Now we can see here at the “Server” that the unit has the files into it! worked perfectly.
Finally, you can see that the USB Drive is unmounted in the VBR server, all the files copied ok.

Hope you liked this little workaround, 

now, planning and thinking in future usages for this great tool.

Just wanted to highlight that I used the “Free” Version, which only allows to mount one USB Device at a time, there is a licensed version, but not used for now.
Also wanted to tell you that I have no relationship at all with them, just found it and wanted to share it with all of you.

cheers!