Now, Object First has launched a new release of OOTBI, 1.6.63.10886
These are the new features described in the release:
The update process, as shown before, is super straightforward and allows you to update and reboot your cluster in a few clicks without any stress or «fancy» steps, guides, or troubleshooting.
The feature I was looking forward to getting, and finally is here, is the user’s roles, I’m super excited about these:
we will continue testing the new features, and describe them in the future.
Now, is time to update our cluster, One of the most important reasons to implement OOTBI, is the ability to get updates, improvements and upgrades straight away, keeping yourself in the important task of protecting the Infrastructure and data, Object First has you covered with the Tech and Updates.
Let’s follow up the process witha few screenshots and thoughts:
When it’s time for an update, our console will tell us, also, at any time, we can check it in the settings menu as well.
Let’s login to our web GUI, and check the events and alerts, as you can see, the system is telling us that an update is available:
We go to the menu under settings. Cluster Update and the system checks for the latest updates
The Update cluster button becomes purple, and you can see the available update, let’s hit the button and proceed
IMPORTANT!
Let’s Install!
And done! Now our cluster is up to date!
I hope you like it
as you can see, the process is super simple and straight forward, and this is the main pilars of this technology, easy to use and maintain.
We will add an extra node to the «Single Node Cluster» to become a multi-node one.
The steps are straightforward, let’s see them via screenshots with comments:
First of all, we need to deploy the OOTBI VSA which will be added to the cluster, follow the guide from the previous entry, ending after the deployment (don’t create the Cluster again).
Select the Option Join To ClusterConfigure your NICThe VSA will check for updatesUpdates found, let´s update itupdating… After the update, you will be pushed to the initial menu, go over it again, and the data (NIC config) will remain, just go forward and continueNTP / NTSOK, now, add your OOTBI CLUSTER IP ADDRESS, The one we used/created in the previous entry, and the objectfirst user password we created.BOOM! Node Added to the clusterNow you see the first two options blurry, and the cluster endpoint IP Address (Bottom left) is the same as the previous cluster.There we have it, 2 NODES, 2TB FREENodes View
IMPORTANT
Now, that our Cluster setup is done, we need to update the information in our VBR to get the space and the cluster working fine. In the picture below you can see that the S3 bucket from the cluster remains at 1TB.
If we do the rescan repository it will give us an error like so.
Please Right click into the Repo, and re-run the setup wizard, next, next, finish.
The thing that will happen is that, when extending the cluster, the certificate has changed, so now the VBR needs to grab it again from our OOTBI Cluster to work properly.
Running and ending the setup (properties) wizard again to update the certificate
Boom! As you can see, after the re-config, the VBR sees 2TB of Storage, so the cluster has been updated!
Following the guide, I will add one more node, so we will have a 3TB Cluster! Follow the same steps from before, and now, we will see the 3 Nodes and the 3TB storage!
IMPORTANT Once again, run the setup (properties) wizard for the Repo once again to get the certificate updated!
In the picture, you can see the wizard updating the cert and the bucket now shows 3TB Free instead of 2TB.
Luckily I have the opportunity to have access to a VSA OOTBI for my Lab, So I would like to share the deployment and initial steps to get it up and running in my Vsphere lab with y’all.
Let`s get started, by login into our Vsphere console, and starting the new VM process, deploying a VM from OVA:
After finishing the deployment, it is time to open the remote console to continue the wizard from it,
As you already may read from previous entries, in Spanish Im afraid, let’s create the cluster yes, single node cluster:
Network confignode HostameChecking for updates…OK, IMPORTANT! apply the updates, and no worries, after so, we will need to start the wizard again, but the info is kept, 😉updating….After updating, lets call the wizard again, I will continue in the next new screen, the previous info is saved, so just next next….snmp, or NTS if you want it encryptedHere is the deal, lets setup the cluster name and IP AddressDefine a password for the «objectfirst» userINFO: how to connect to the Web UI, model, and S/NTelemetry, very important to notify support in case of any issueDONE, now both, setup new cluster and Join are bold, so all set.Lets access via web UIBoom!
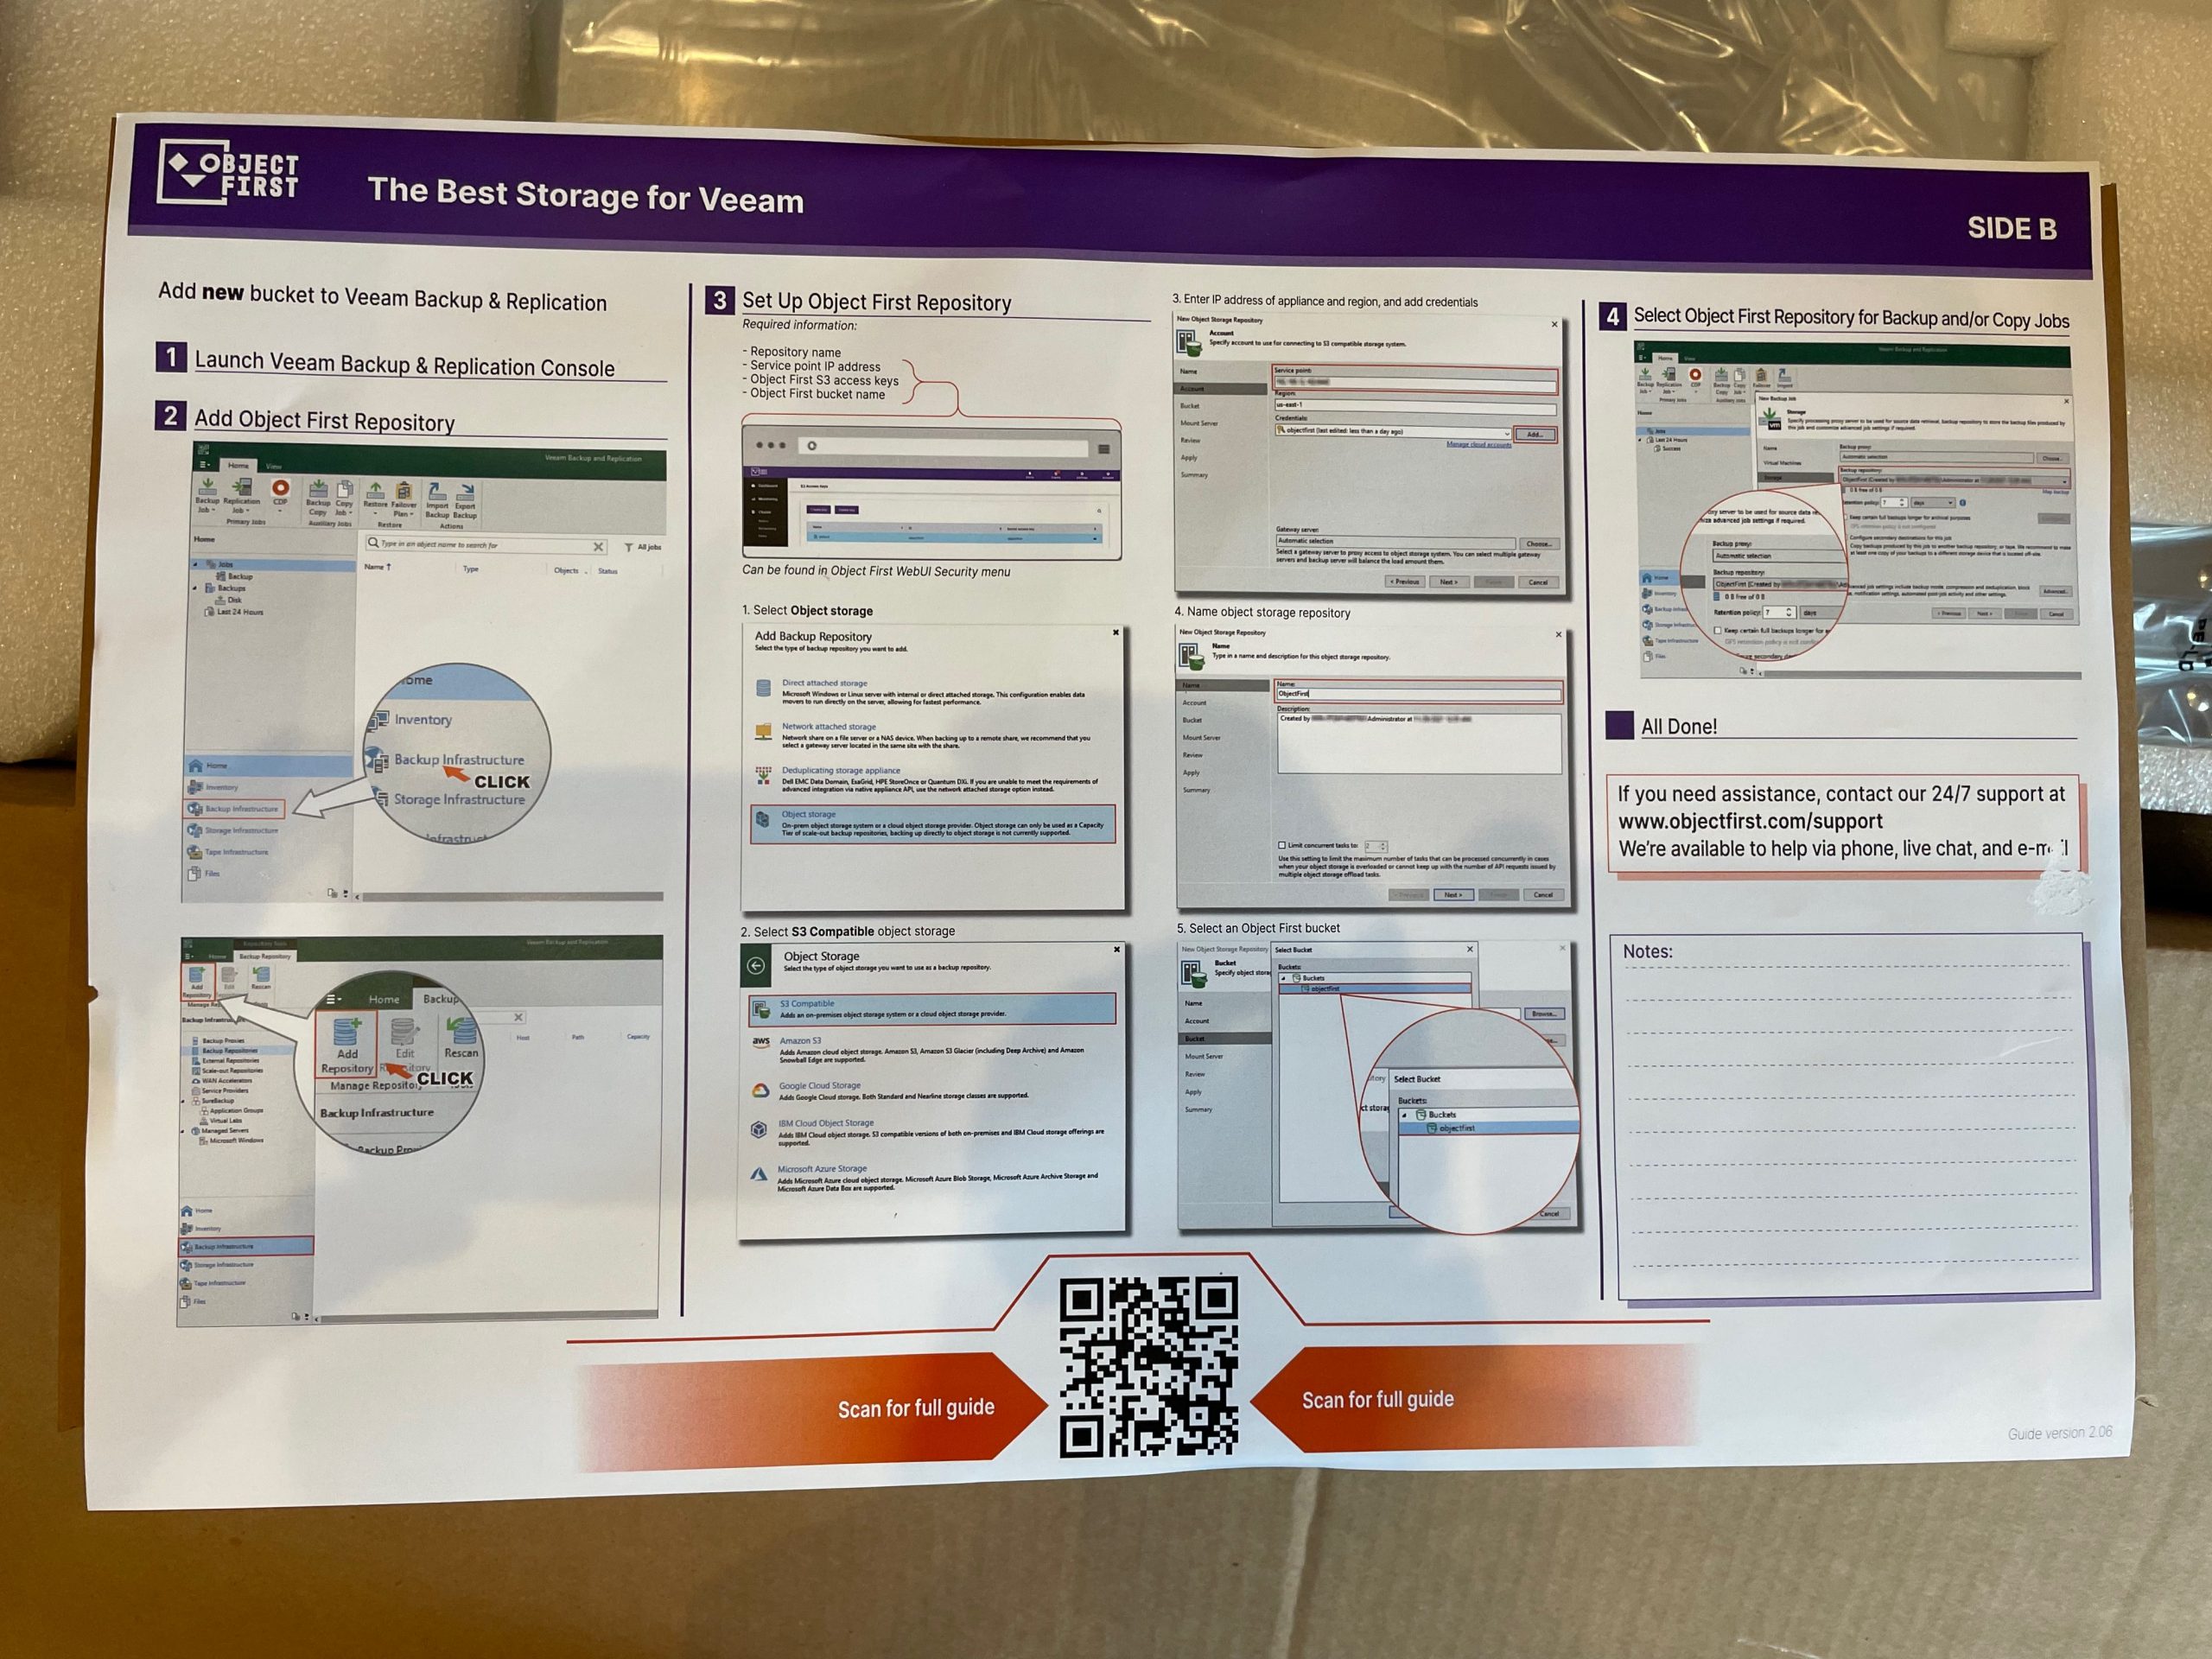
Now, I will show you how to quickly create an S3 Key and a Bucket and how they look when added to VBR!
Go to Security – S3 Keys – Create KeyGrab and keep secure the info, you ill need it to setup the Repo in VBR.Now lets create the Bucket, S3 Bucket – Create a BucketOf course Enable Versioning, so the bucket will be ImmutableHere you can see the Bucket added into VBR, ready to be use!another VBR view!
Ahora vamos a lo «divertido», configuración del Bucket S3, configuración y adición en VBR y primeras impresiones, como siempre, a pantallazos!
Accedemos a la GUI de nuestro OOTBI desde la IP del cluster creada en pasos anteriores, y ponemos credenciales, usuario objectfirst, contraseña, la que hayas definido en el proceso de instalación.Precioso Dashboard inicial, con información sencilla y crucial.Vamos a Crear nuestra Key S3, para poder luego crear el BucketAquí la tenemos, guarda bien esta información, Key ID y PasswordYa está creada y listada la keyAhora vemos en el menu lateral de navegación que nos hemos ido al menu S3 BucketsCreamos nuestro bucket con un nombre, y habilitamos versioning para la inmutabilidadya lo tenemos creadoAhora, añadimos nuestro repositorio S3 OOTBI a nuestro VBR, Infra, Backup Repos, Add RepoObject StorageS3 CompatibleS3 CompatibleEstos pasos ya nos deberían de sonar, NombreIP de acceso, region, credenciales, aquí añadiremos nuestra S3 Key que hemos creado antesAceptamos el certificadoBoom! tenemos nuestro bucket, lo seleccionamosAquí nos pide crear un directorio dentro del Bucket, yo le he llamado igual, cuestión de convención de nombresIMPORTANTE, vemos que está la opción de Inmutabilidad, el segundo cuadro, lo seleccionamos y asignamos el tiempo a ser inmutable, en mi caso, lab, 1 día, pero dependerá de la retención que quieras tener tu, ten en cuenta que un backup inmutable no se puede borrar hasta que «expira», haz bien el Sizing.Resumen de lo que añadimosListo! lo vemos añadido a nuestro VBR
Ahora que hemos añadido nuestro Repo a nuestro VBR, vamos a realizar una prueba sencilla con una vm, una tarea, e inmutabilidad por 1 día
Tarea de testDesde VBR V12 podemos mandar backups directamente a Repos S3, lo seleccionamos, con una retención policy baja, es test.Resume, 3 dias de retención, Inmutable por 1 día, 1 maquina virtualAqui está creado su backuop FULLAqui vemos el Full en nuestro OOTBI guardadoVamos a intentar borrar el backup, recuerda, tiene inmutabilidad por 1 día, por tanto, no debemos ser capaces de borrarlo.Precioso error, Failed to delete, immutableAquí vemos que sigue disponible nuestro backup, por tanto, la inmutabilidad nos ha salvado de borrar nuestro punto de restauración.
Espero os haya gustado y servido el ejemplo con pantallazos de despliegue y prueba.
Ahora toca hacer pruebas con maquinas mas grandes, Instant recovery, SORB Repos para Performace y Capacity tier, etc… poco a poco.
Tal y como vimos en la entrada anterior Abrimos la caja y vimos nuestra unidad OOTBI.
Ahora, es tiempo de encenderla, conectarnos por remoto a su consola, y realizar la configuración inicial del sistema, acceder a su GUI, y crear nuestro primer Bucket.
Vamos…
Nos conectamos a la IPMI de OOTBI, para encontrar la IP, yo escanee mi red con Advanced Easy Scanner… El usuario es ADMIN, la contraseña, la que viene escrita en la pestaña del frontal.Pantalla inicial del IPMI, desde aqui, vamos a controlar por remoto y encender nuestro OOTBIBoton rojo PowerPower Ondale!Ahora que está arrancando, nos vamos a la consola remota por HTML5 Remote Console, Remote Console, Launch Console.Boom! aquí vemos como bootea nuestro OOTBIOs suena esta ventana? a mi mucho… donde la habré visto antes… Como veis, comenzamos con la creación del Cluster, si, aunque sea solo un nodo, luego nos facilitará el ampliarlo.configuración de red, en mi caso, solamente 1 interfaz RJ45 de 10Gb, las otras las dejo deshabilitadas.HostnameDatos del cluster, los cuales emplearemos para dar de alta luego en VBR y configurar en la GUIImportante, password del usuario objectfirst para la GUICluster (de 1 nodo) creado, ahora, vamos a un navegador, y a seguir explorando.Os acordais de la IP configurada para el cluster? hora de meterla en un navegador y conectarnos a la GUI de nuestro OOTBI, con el password precisamente configurado.Boom! precioso acceso a la GUI, desde aquí, crearemos keys, Buckets de S3. veremos estados de discos, etc.
Para la siguiente, crearemos el bucket S3 con su clave, y lo añadiremos a nuestro VBR.
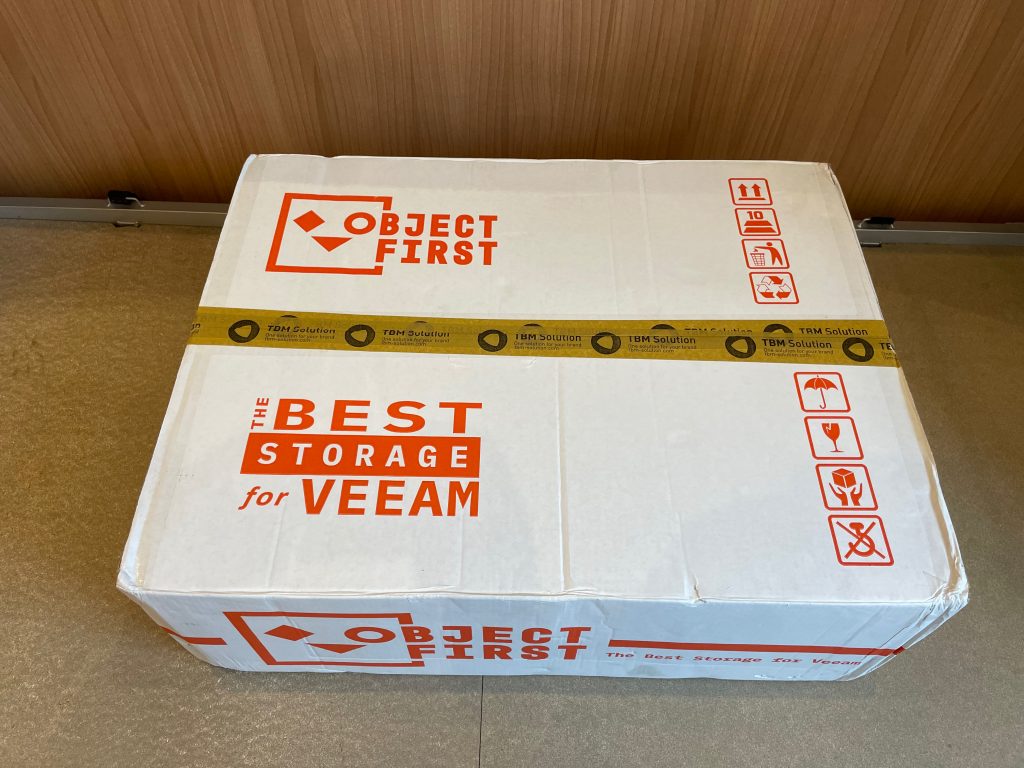
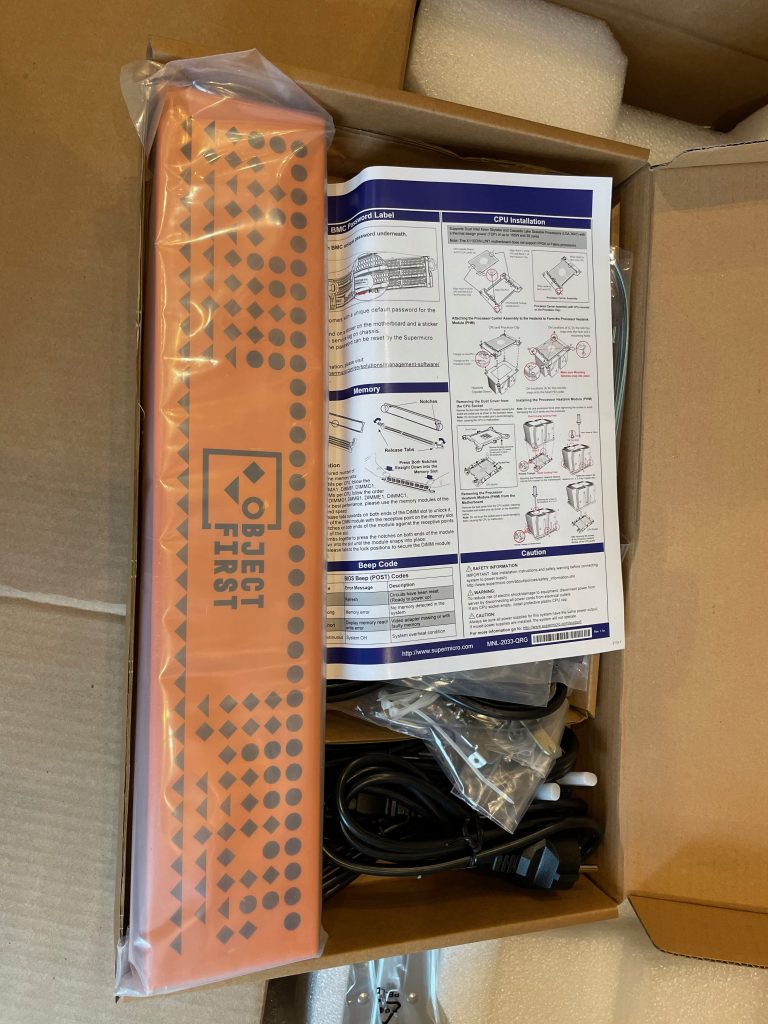
He podido abrir mi caja, la cual llevaba unas semanas esperándome, y tras un pequeño esfuerzo, por fin hemos podido hacer el «unboxing».
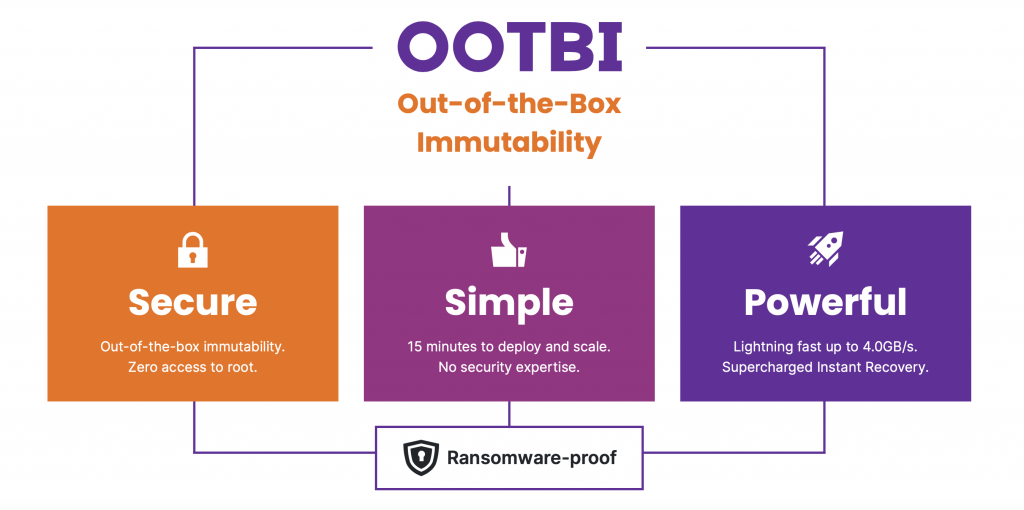
Se trata de un Appliance OOTBI de Object First, Como bien sabeis, se trata de una solución de almacenamiento S3 inmutable para Veeam, Os dejo aquí un poquito más de información!
Bueno, vamos al lío, os voy poniendo fotos, y explicando un poquito lo que va apareciendo:
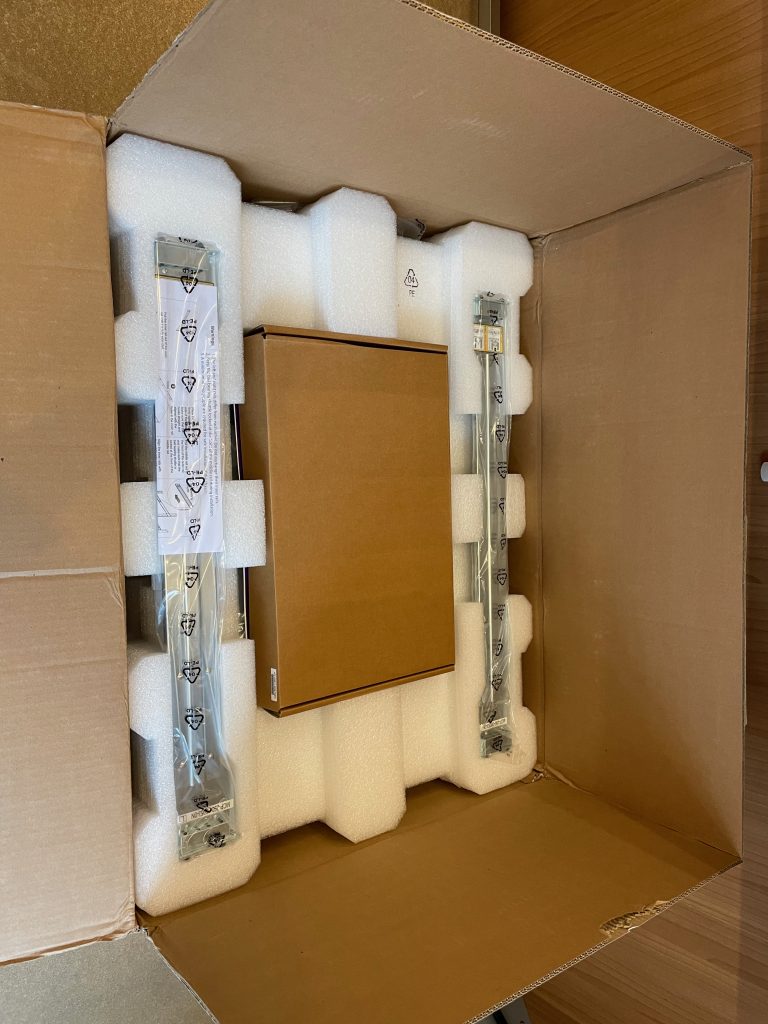
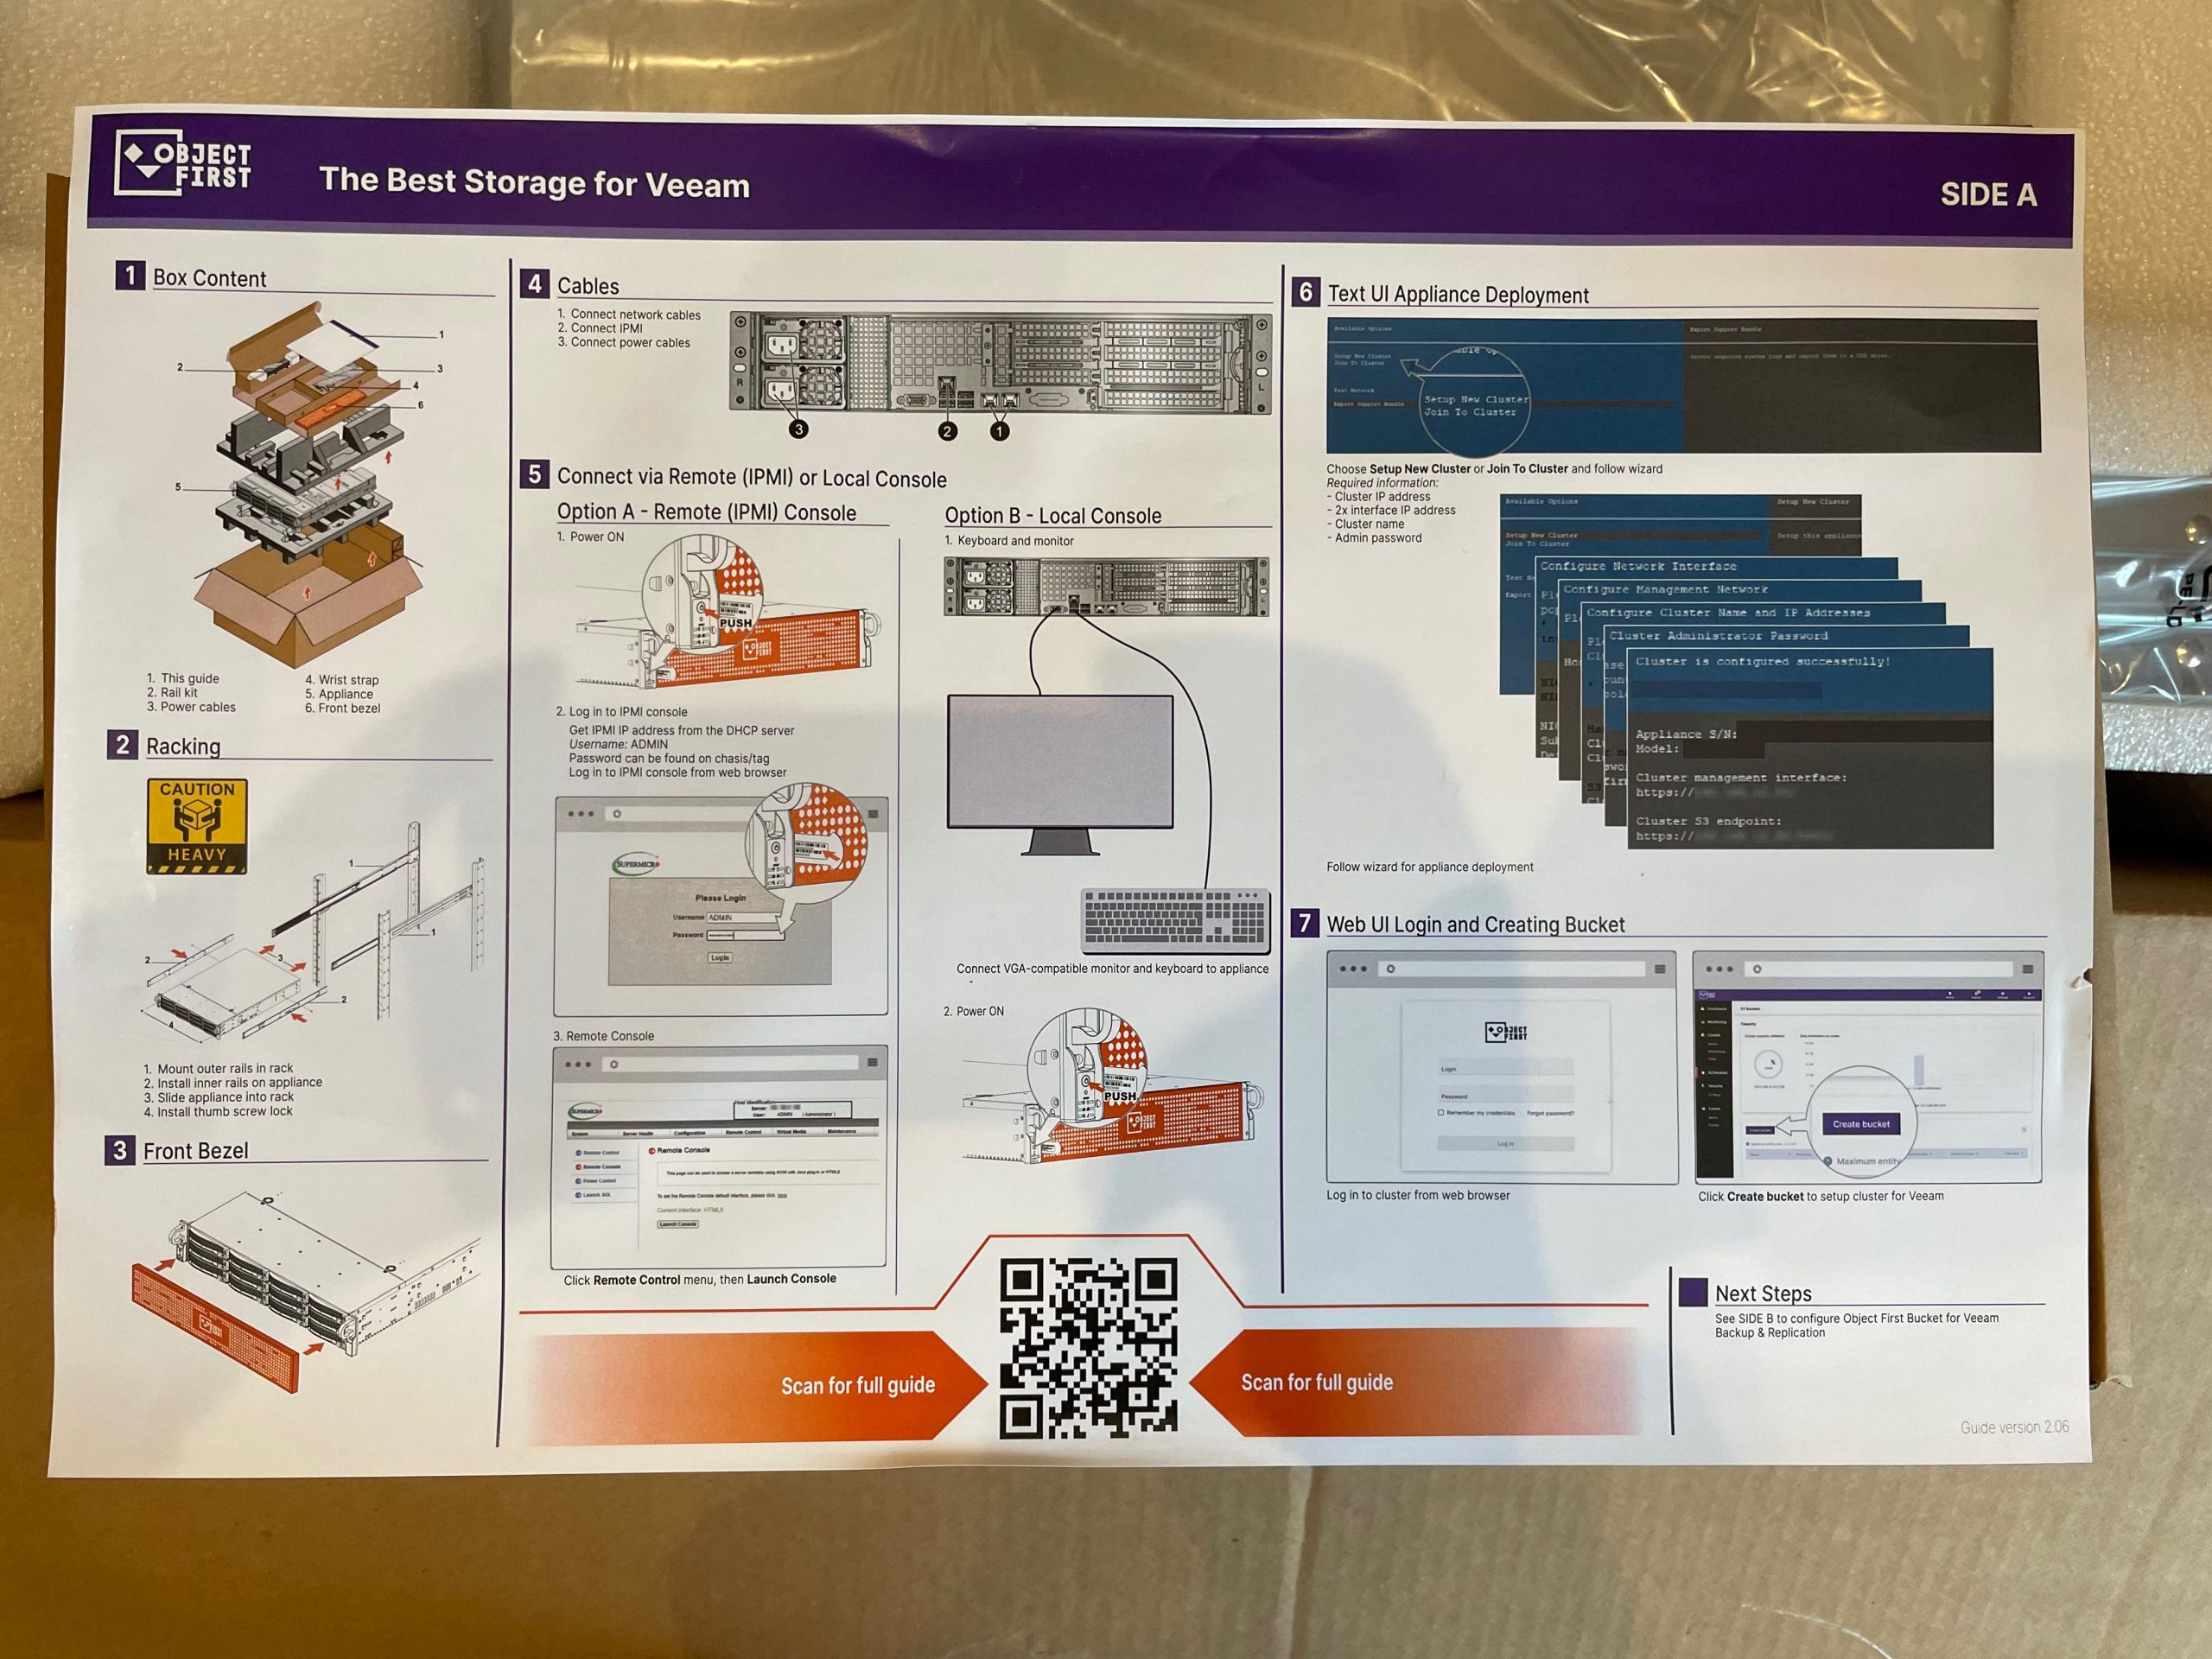
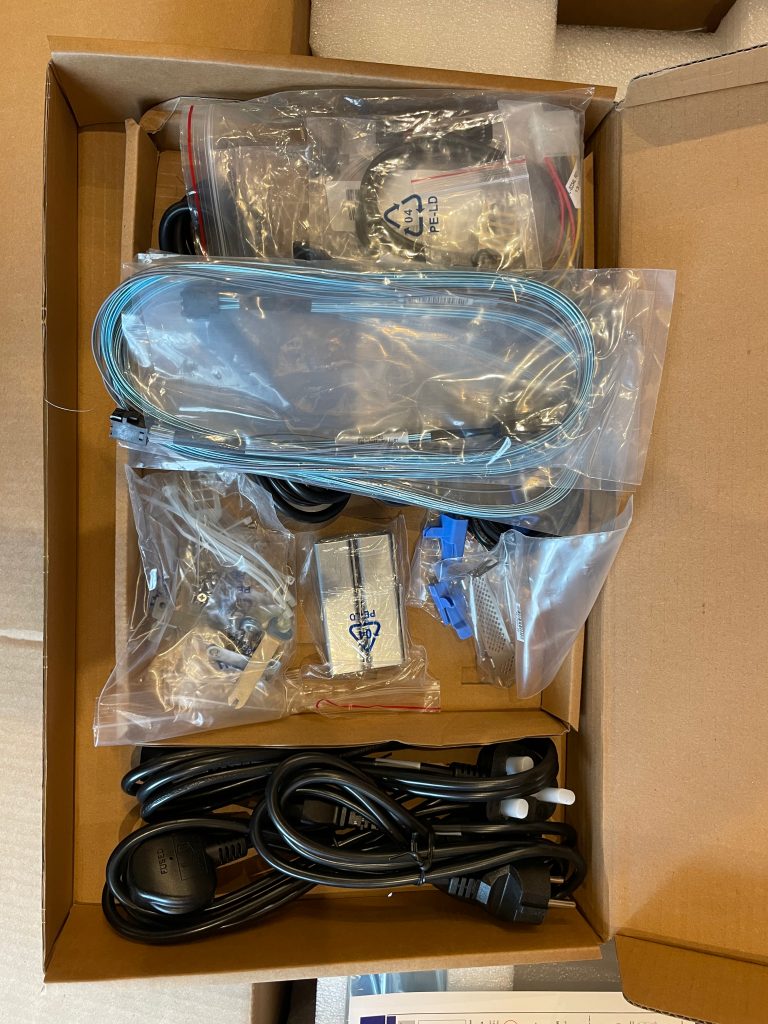
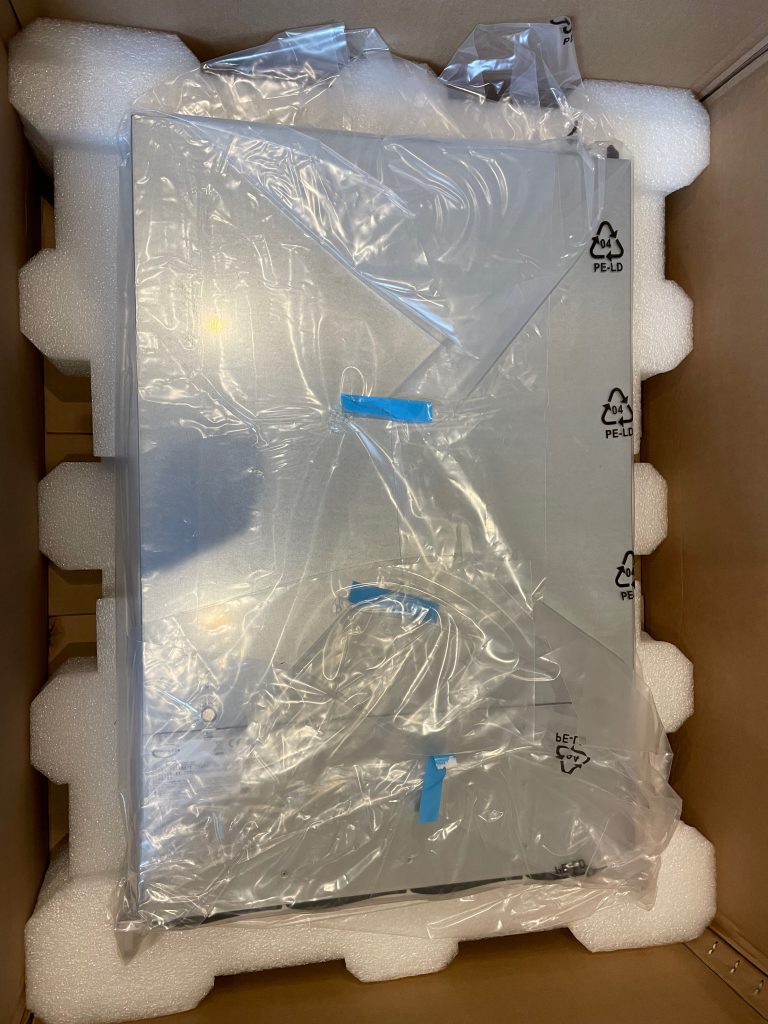
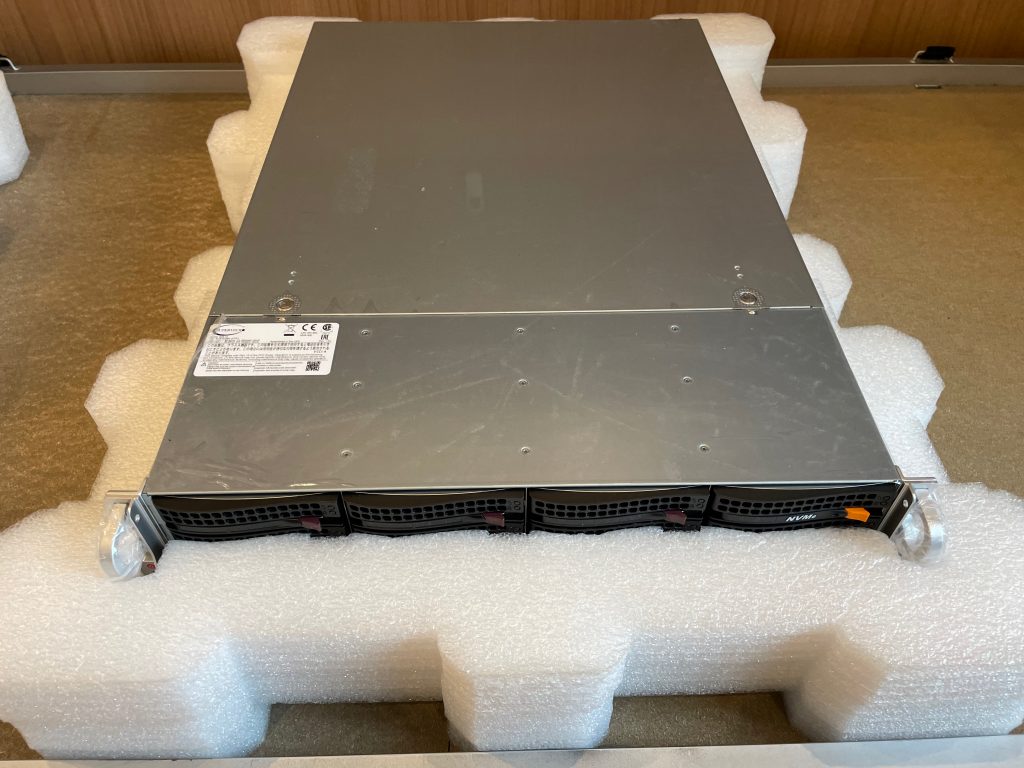
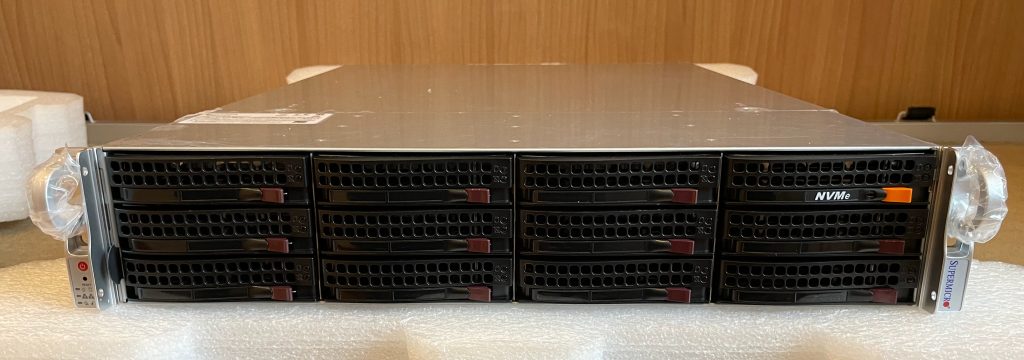
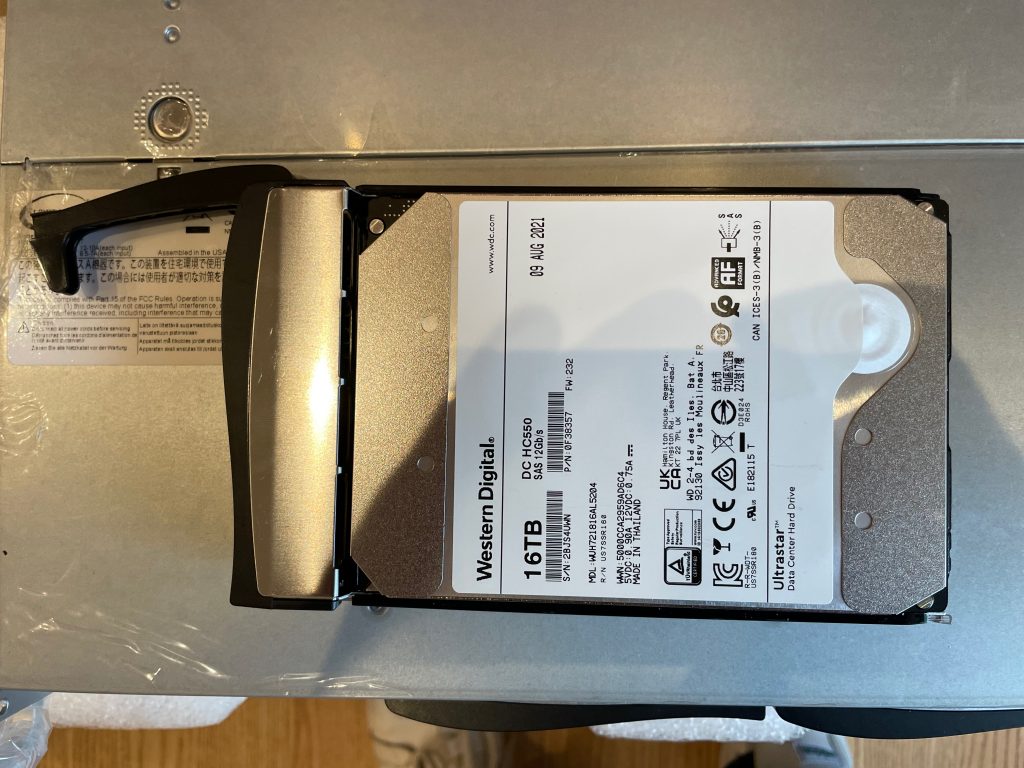
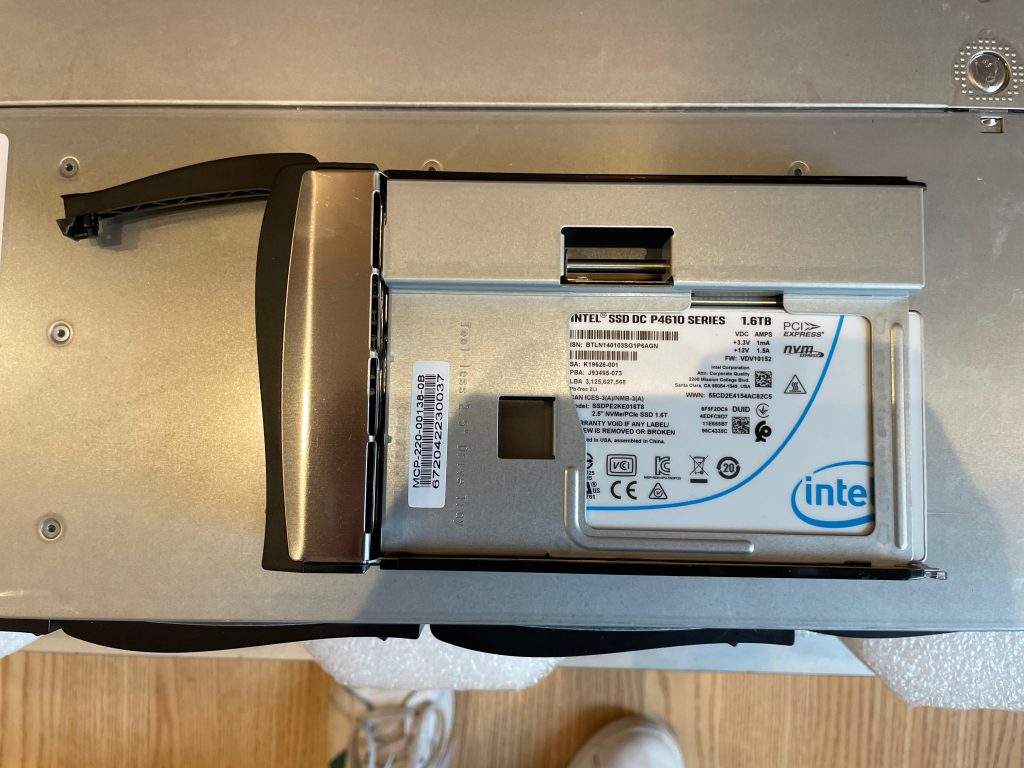
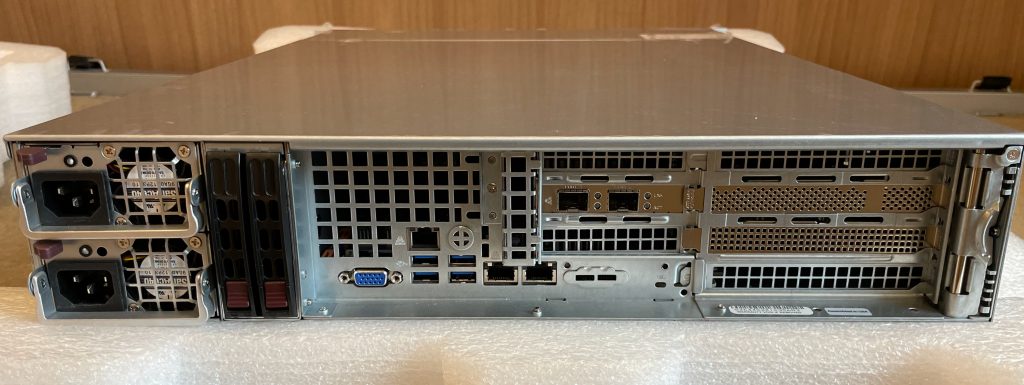
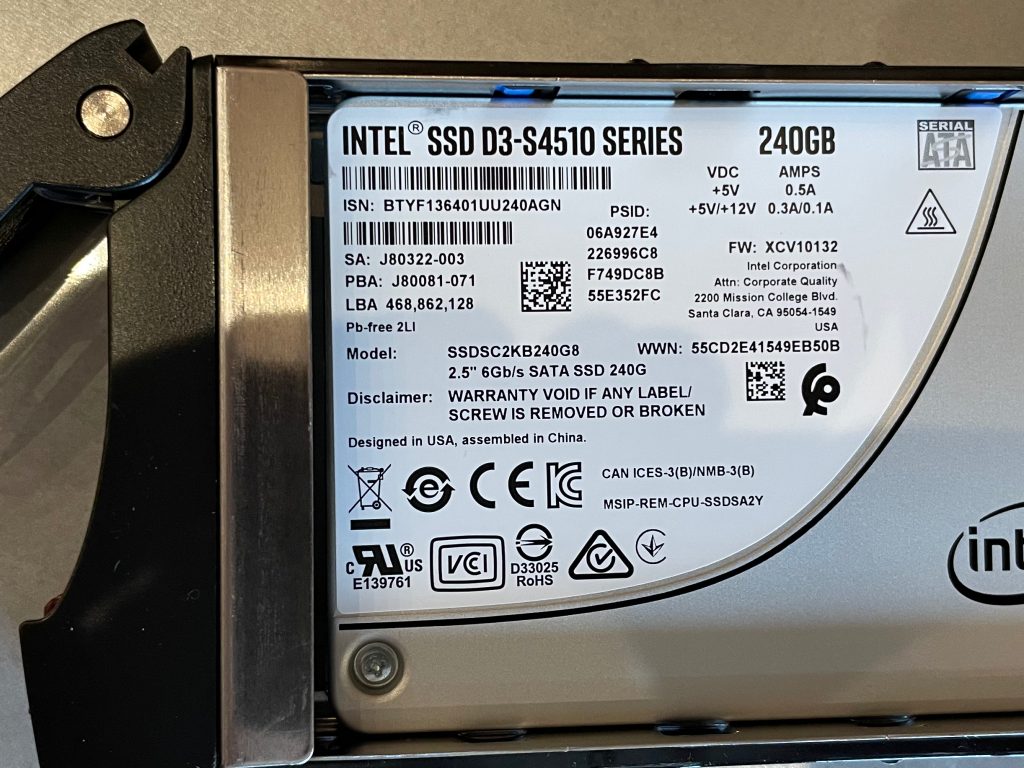
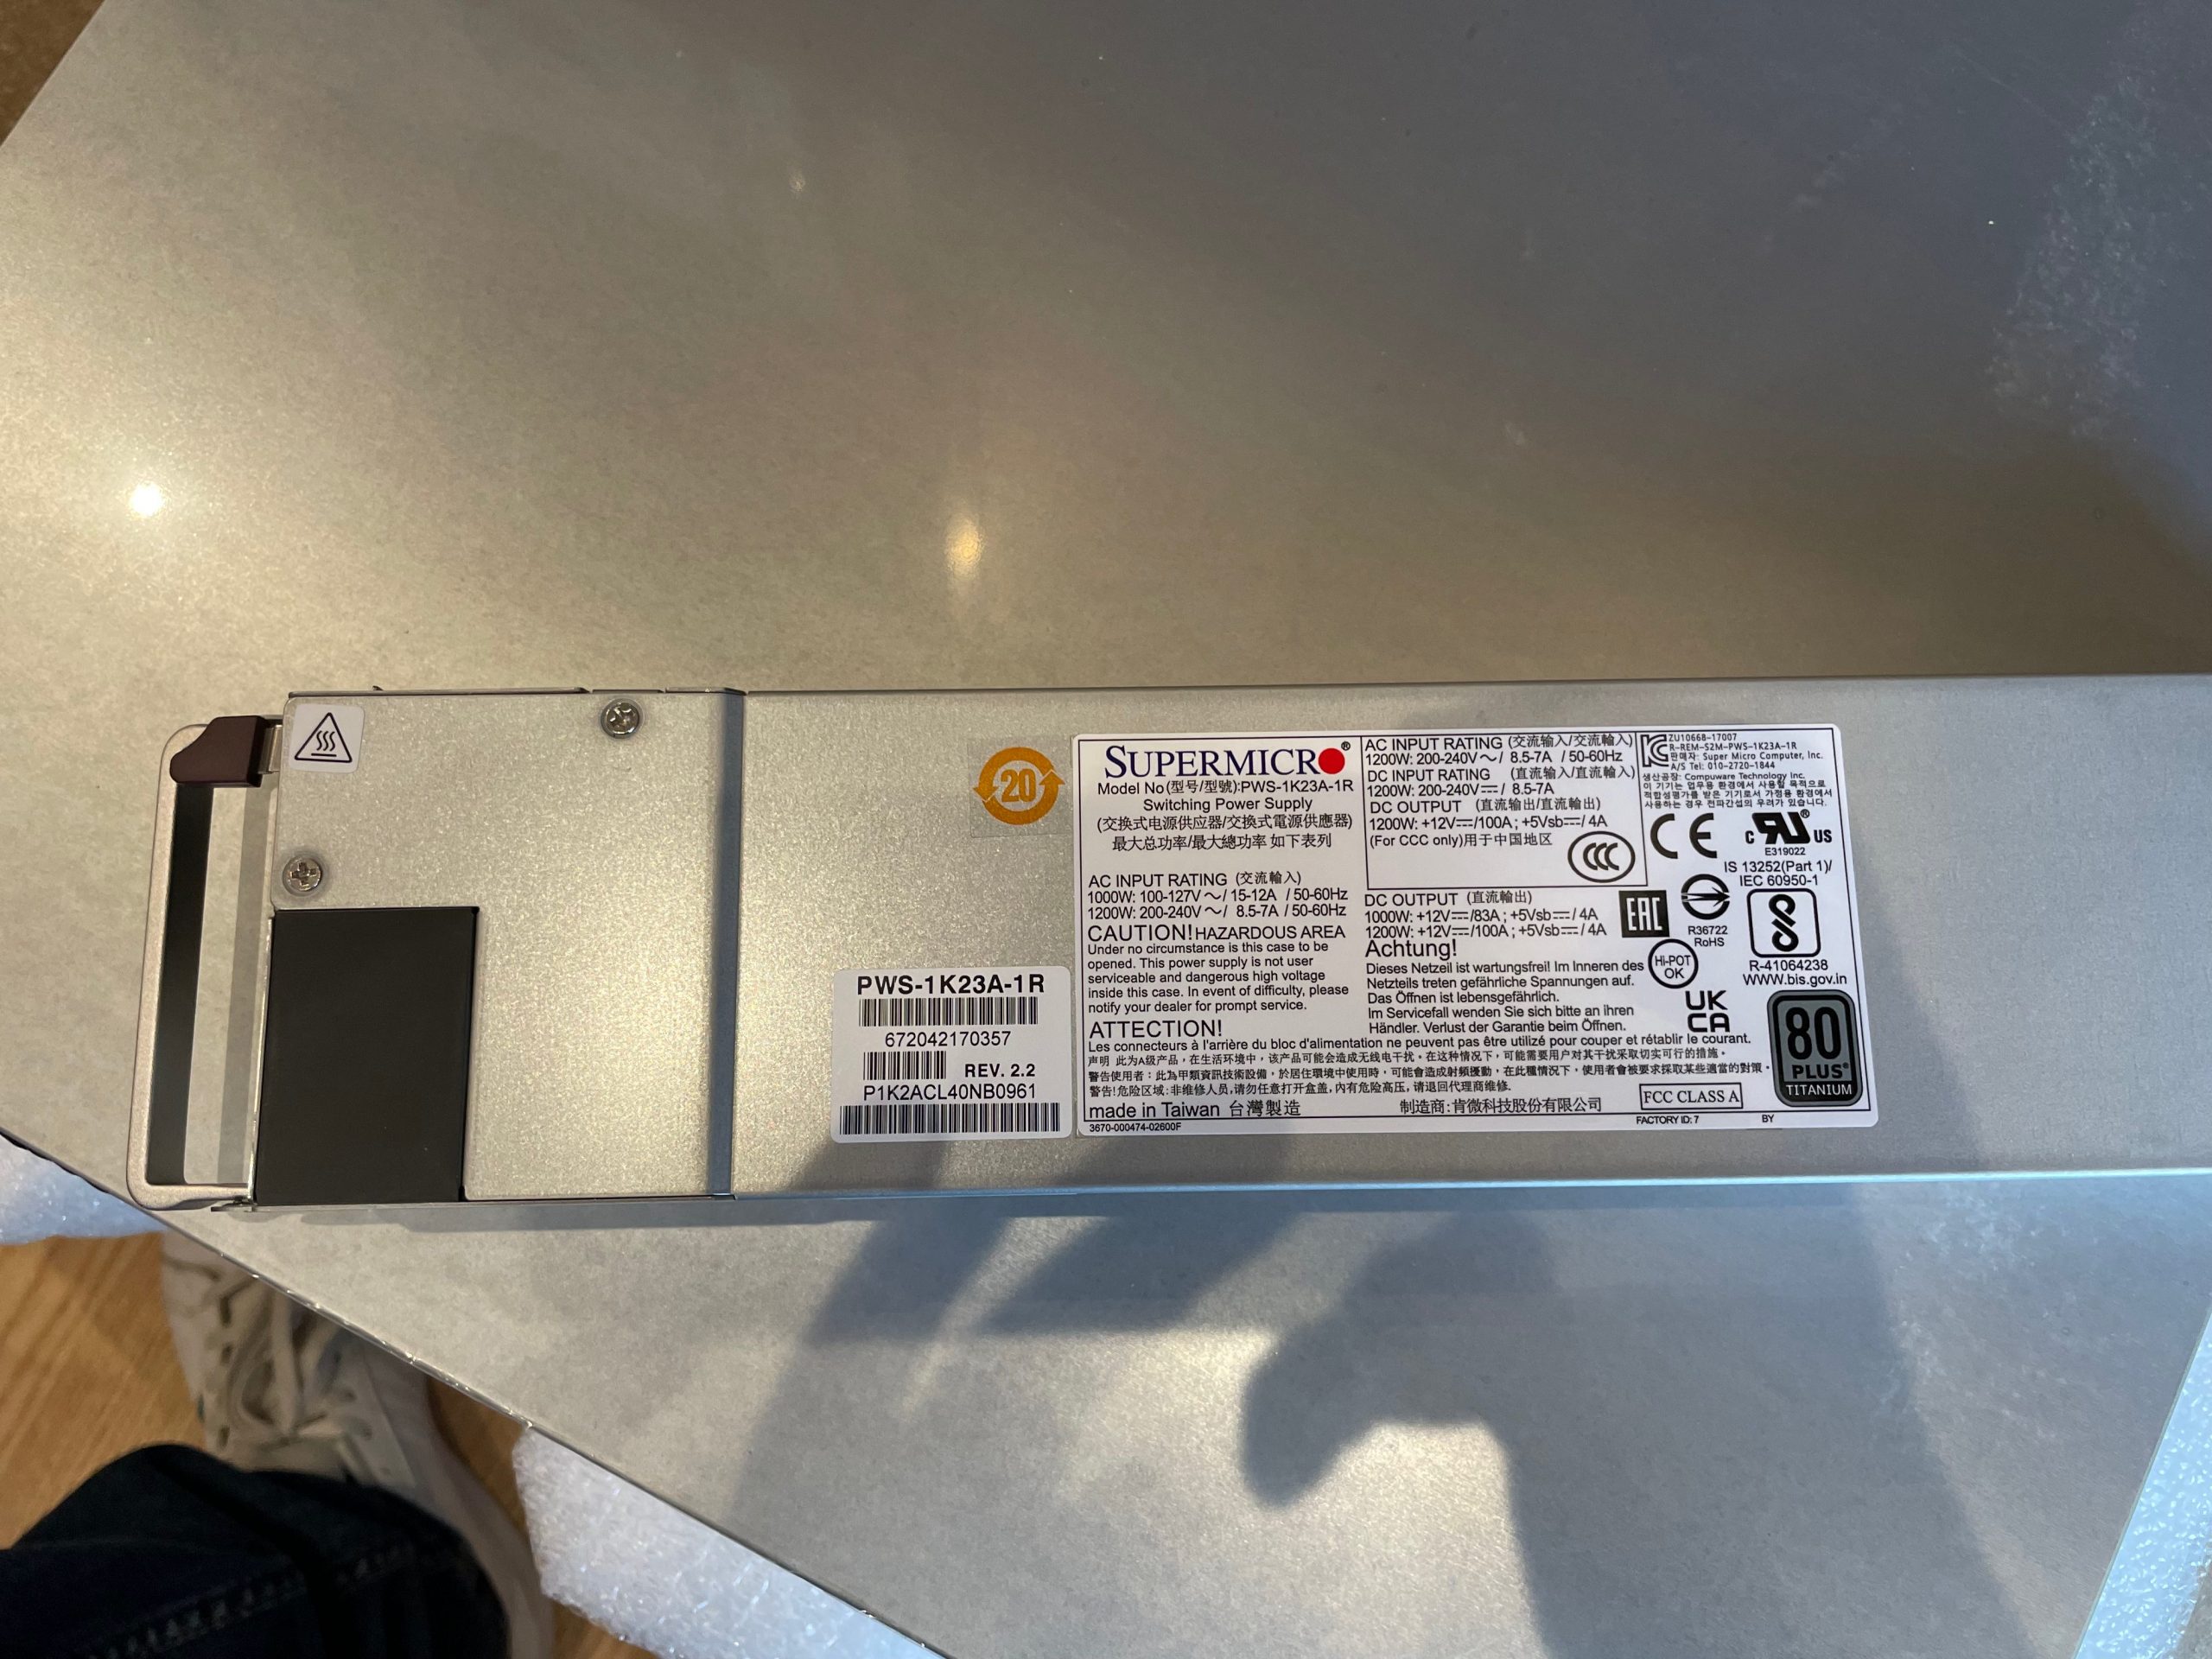
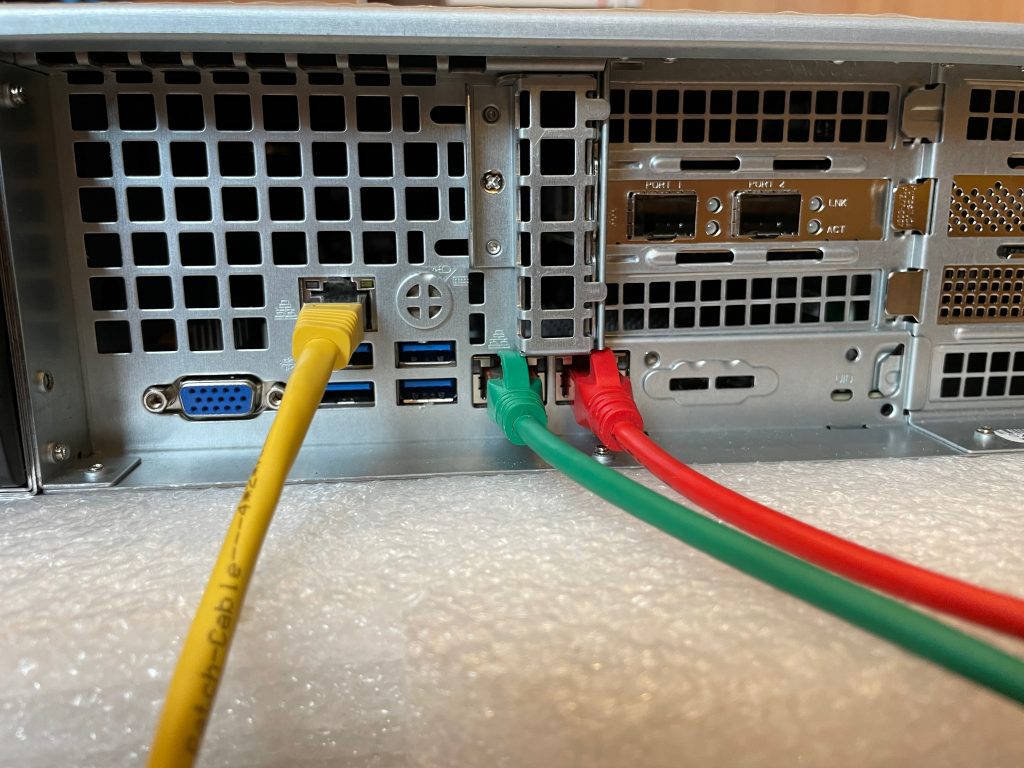
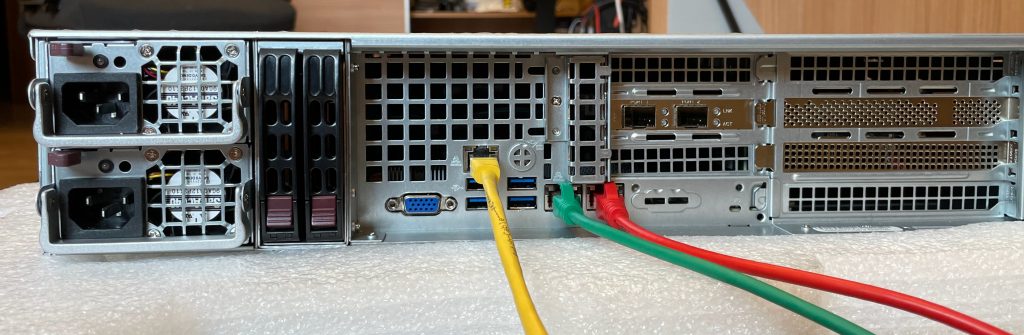
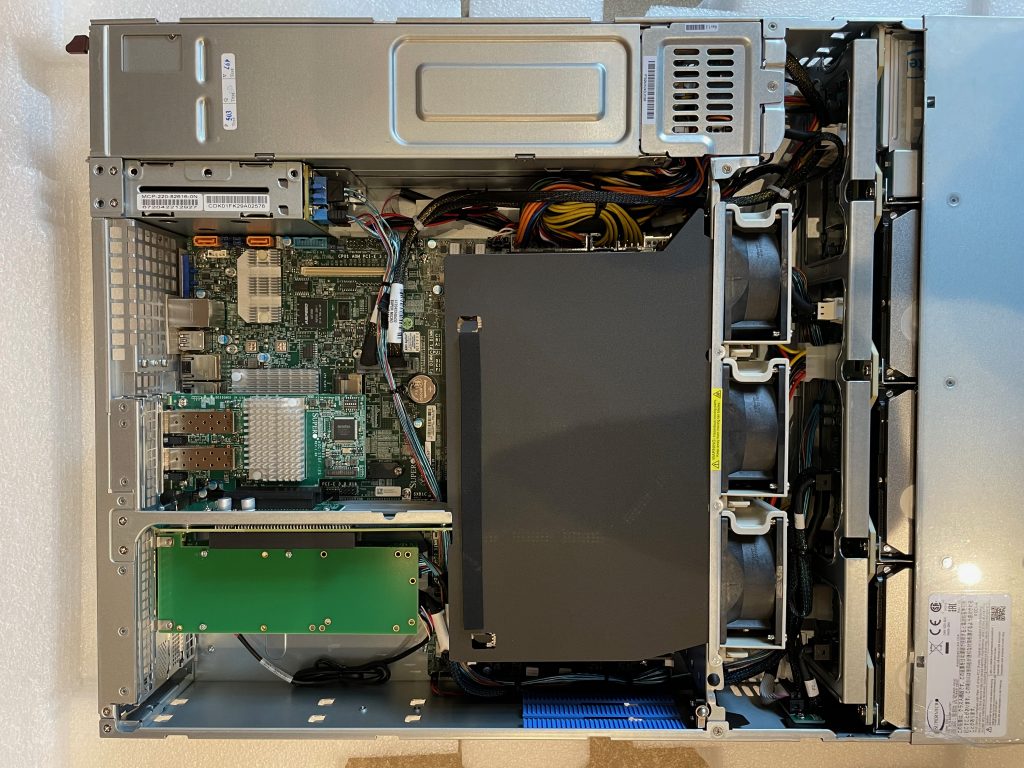
Comienza la diversión, bien empaquetado, rotulado, etc.Nos encontramos una caja con accesorios y los railes para instalarlo en un RackPoster con instrucciones, me encanta, lo colgaré en mi despacho!Cara B del PosterOh si, el frontal que todos estábamos esperandochuches…al liowowFrontal de ensueño, 12 bahías de 3,5″Trae la friolera de 11 Discos como este, este appliance es el modelo de 128TB EfectivosEl disco que tiene el Caddy rotulado como NVMe, el super disco para el caché!La parte trasera, ese back plane con dos discos de 2,5″ es precioso! sin olvidar los 2 Ethernet 10Gbps, 2 SFP+ 10Gbps y el puerto IPMILos disos de la parte trasera de 2,5″Fuentes extrapoles, trae dos como la que estamos viendo, para redundanciaAsí se ve la parte trasera con los cables de red conectadosUltimo vistazo trasero, que maravilla!Así luce por dentro, muy limpio y ordenado, con sus ventiladores, tarjeta SFP+, Controladora de discos y batería, back plane, procesadores y memoria. No me he podido resistir a ver bajo el capó lo que llevaba, una bestia!
Hasta aquí la impresión física y primer encendido,
He de decir que se ve de una calidad excelente, el más alto nivel de Supermicro, Junto con los discos de gran calidad, capacidad y velocidad!
En la próxima, el arranque del SO, integración en Veeam VBR 12.1 y primeros trabajos e impresiones.
Os vuelvo a poner la foto del frontal, el cual, simplemente me parece precioso!! Quedaría fantástico colgado en la pared de mi despacho, a modo de cuadro!