Home Lab upgrade!

Hi Folks, recently I wanted to “upgrade” my home lab, and I was thinking the best way to have an affordable, low consumption usable home lab for a ESXi Cluster, nothing fancy, just to be able to deploy a couple of little VMS, play with HA, DRS, shared storage and so on.

I started checking out the Intel NUCs, but then I realized that it comes “empty”, so it becomes costly at the end.

Then, what about HPE Gen 8-9 Servers, “the wife would kill me”
They are noisy, expensive and consumes tons of electricity!

So, looking over the hardware I have, I looked into my Workstation, a Lenovo P320 which it has 64GB of ram, more than sufficient to run a Nested lab, but I wanted something more realistic, with wires and lights, you know, Im a hardware and wires lover!

I kept the Workstation as base Server, Planning tu run there the base or foundational vms I normally run like: vCenter, DNS, AD, a Storage Appliance and a Veeam Server.

lets keep it “low profile”, so, Nowadays normally we do have a laptop or workstation capable enough to run a vmware workstation or a ESXi to place a vcenter instance and a Windows Server machine, pretty basic.

Then, I though, I need a switch, and I had an “old” 1Gbps Router – switch capable of Vlans, so perfect for this task.

Now Im just missing some hosts to add to the picture, and I found these little guys:

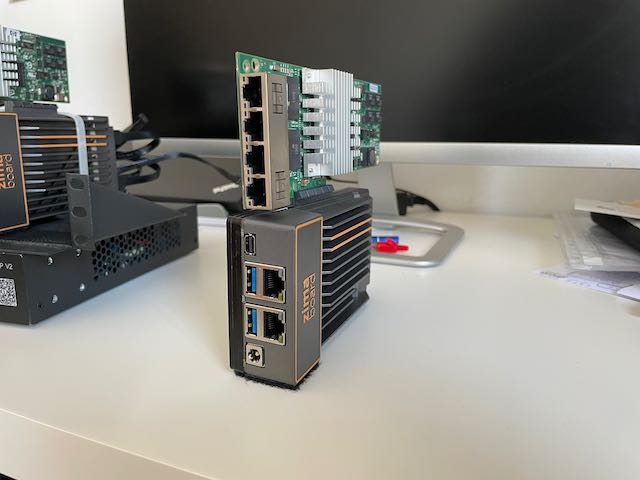
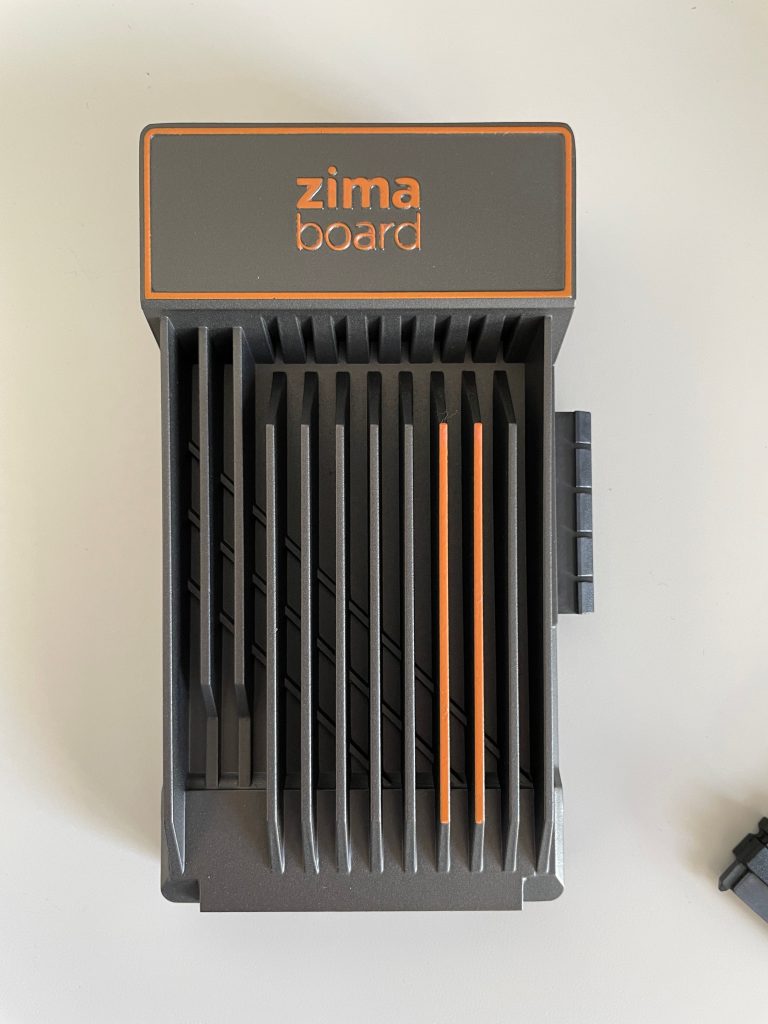
Zima Board

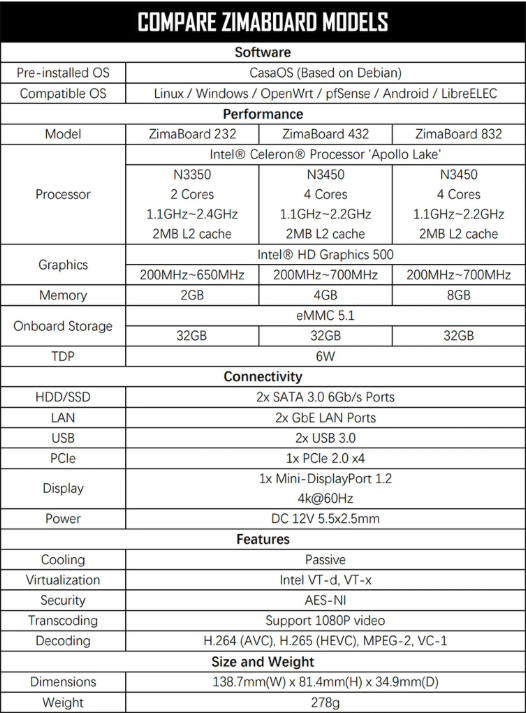
Looking at them, they were quite perfect, the top performing setup has a 4C processor, 8GB of RAM, and a local NVME 32GB, so perfect for a ESXi mini server.
Ah! forgot to say: it has a 4x PCI-E and 2 SATA Ports!! Amazing!!
Everything was going soooo good, until the tragedy came,
Realtek Gigabit Ethernet, not supported by vmware vsphere…. nooo!
but wait a second, I told you already they’ve got a PCI-E port?

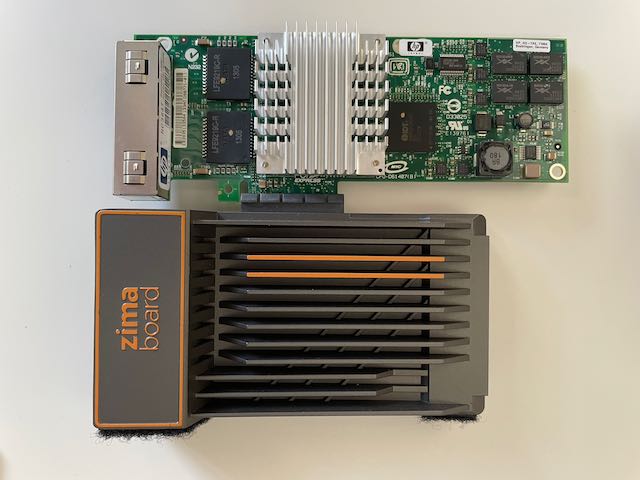
Exacly, I looked over into my warehouse, and there you go! a 4 Ports Intel NIC card!
Fully compatible and ready to be installed!!
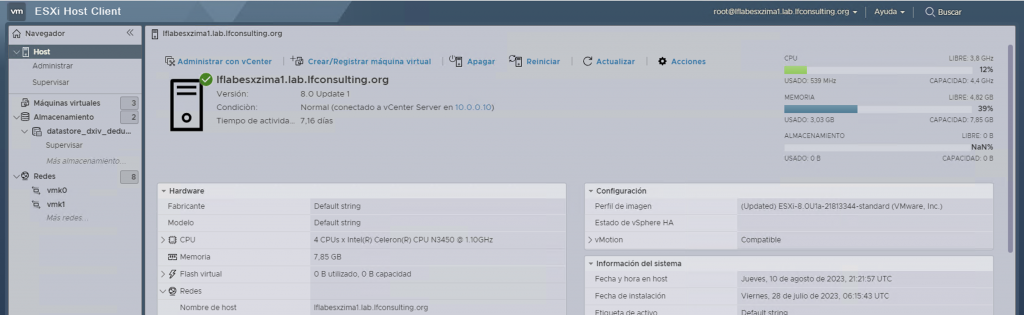
Now, with all setup, lets get into it, installing Vsphere 8, no problem!!
NIC Card, OK, system ready and first boot OK!
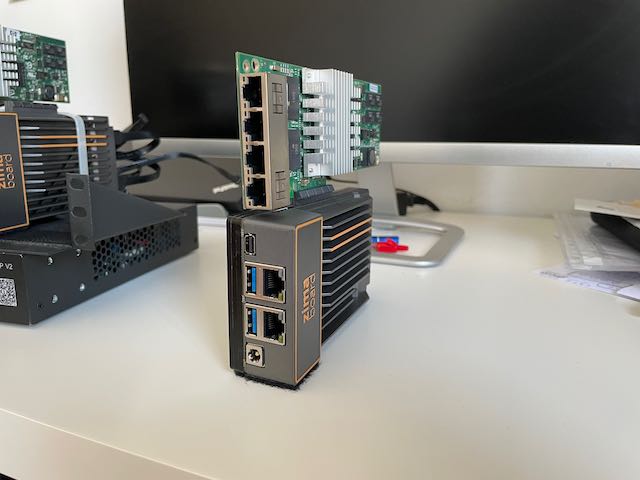
Then I did the same operation with the other two Zima mini CPUs I’ve got!
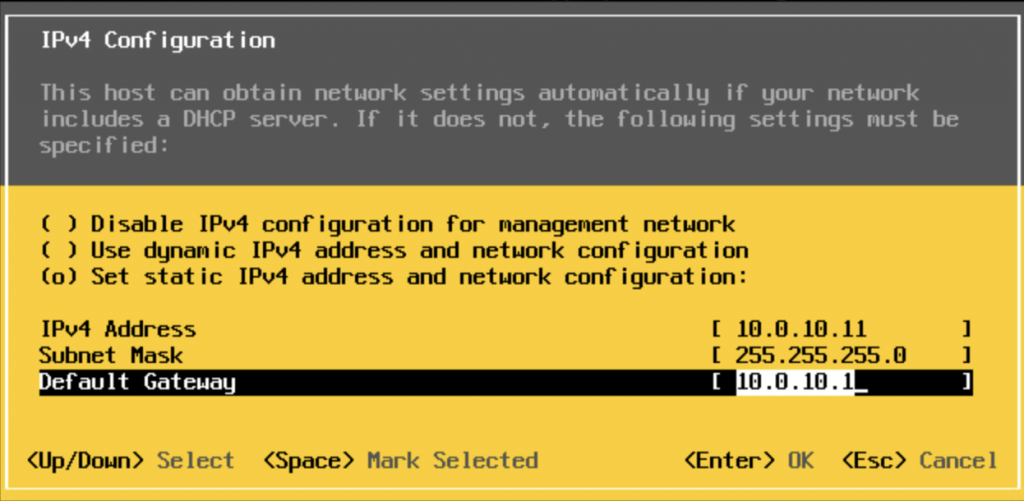
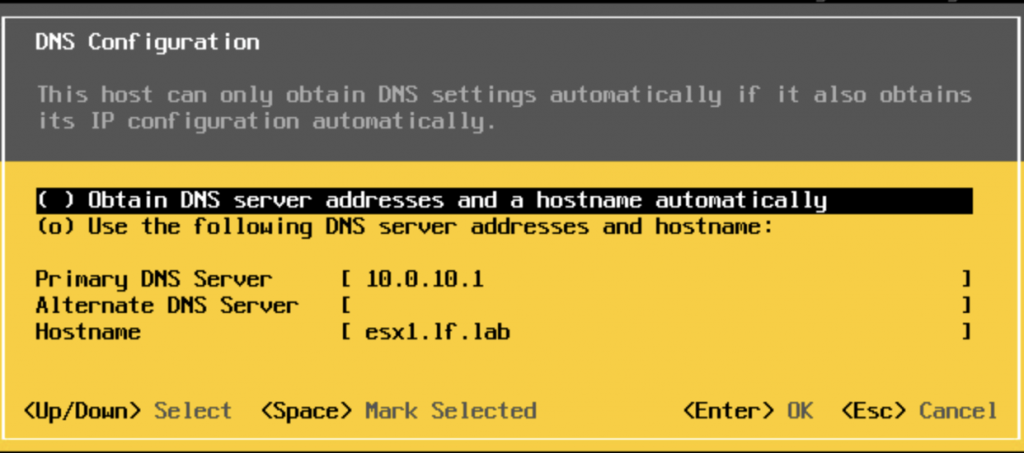
Configured the initial parameters, IPs, Hostnames, DNSs, etc. and ready for next steps!
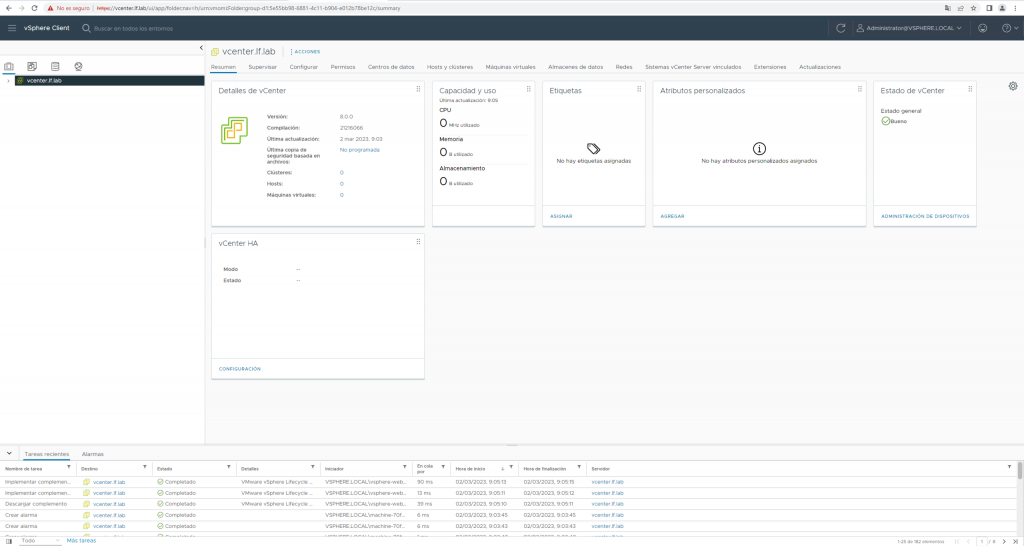
By the time, I setup a vCenter instance and a Software Appliance for Storage, Simple NFS datastore for home lab experiments, a Quantum DXiv Community Edition.

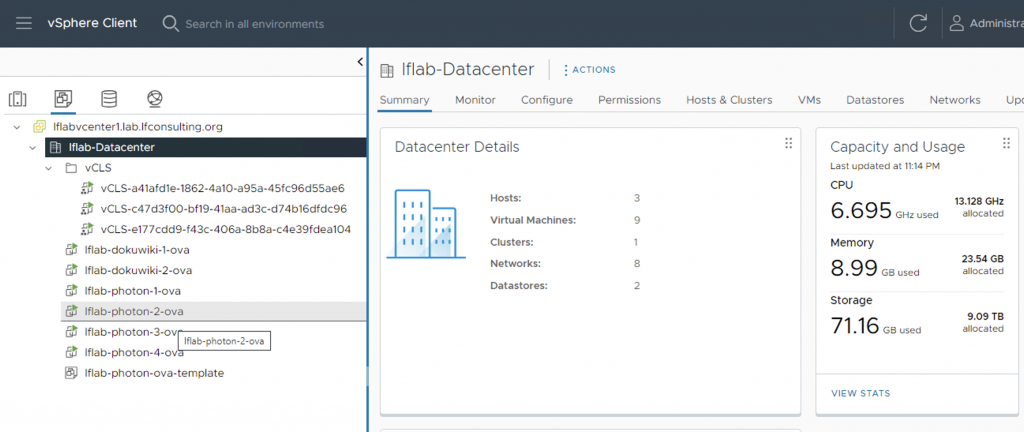
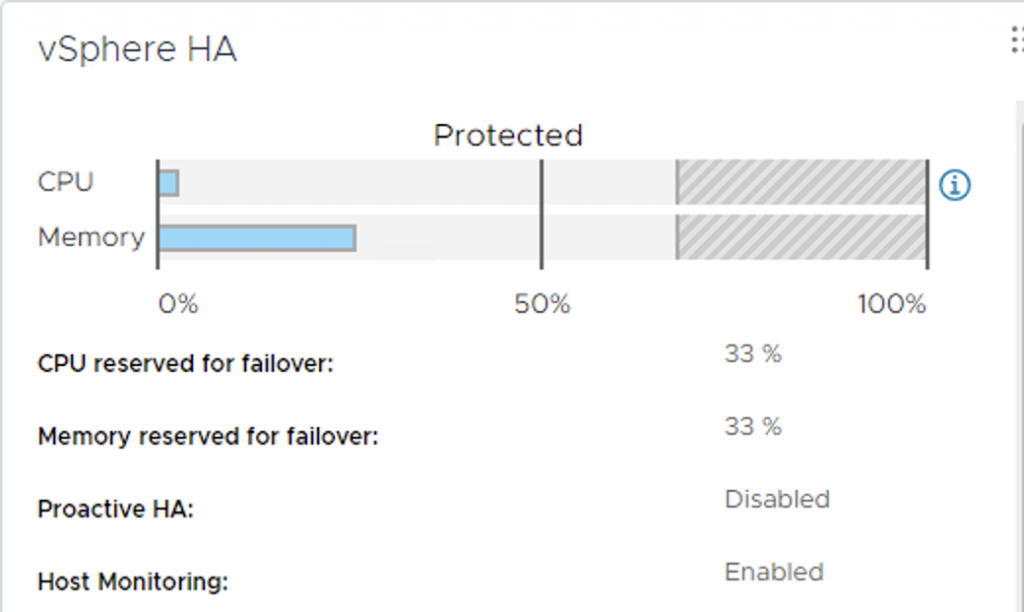
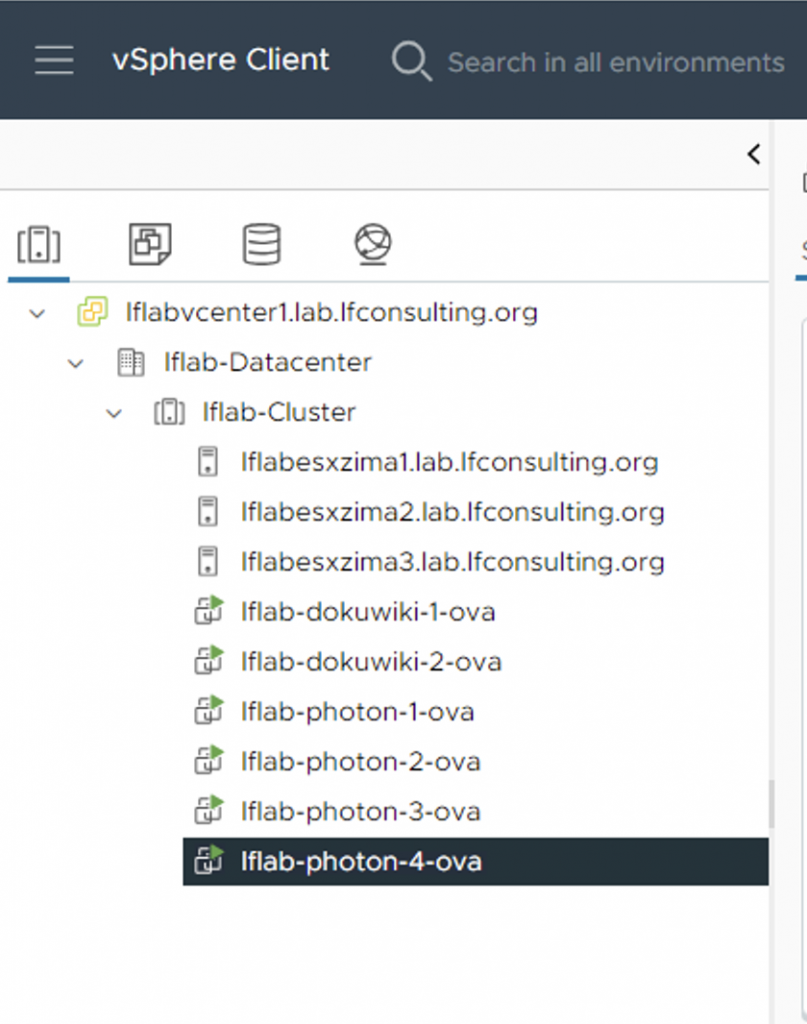
After a few configurations, added those three ESXi hosts into my vcenter instance, create the cluster, and let it build, and…. Voila!
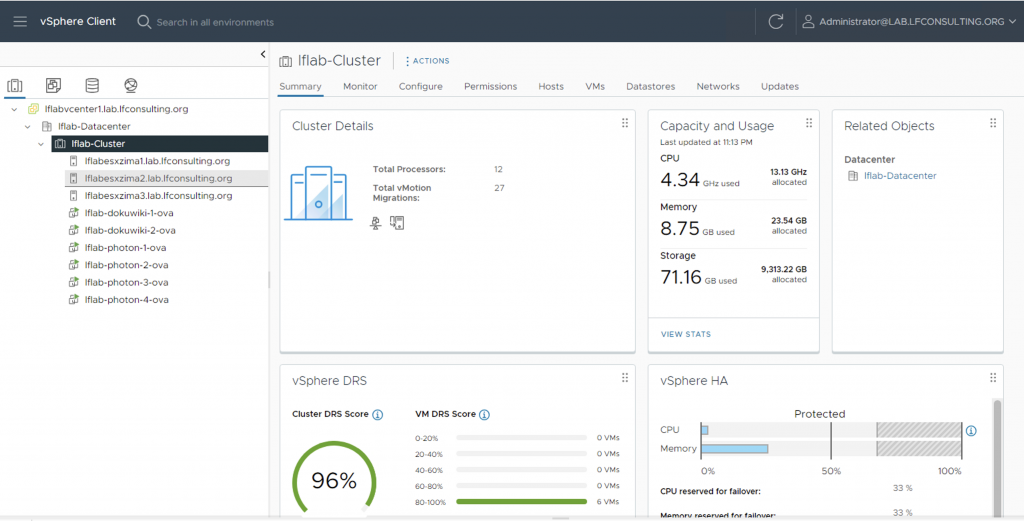
The cluster was up and ready to be used!

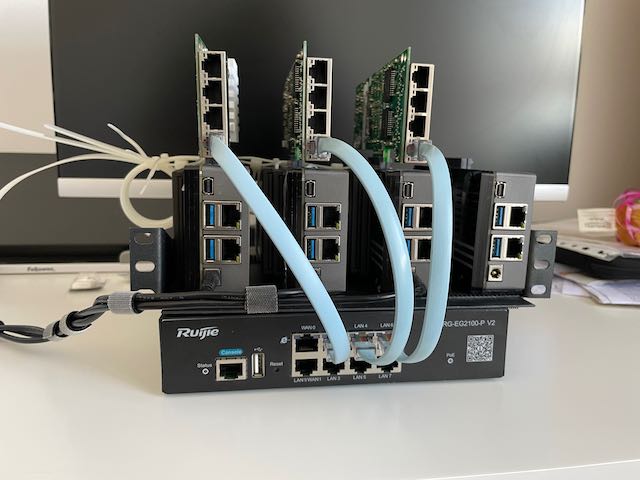
Let me show you a few pics of how it looks now, externally and from the vCenter perspective!
The normal electrical consumption for this little guys is around 6W each, pretty low, a little more with the Ethernet PCI-E card, but nothing overkilling like a full server, and not counting noise and hit!

My overall cost, taking into count that I do own the workstation, switch and I made the Ethernet cables, around 200$ per Zima Server, so around 600$.

if you plan to start low, you can do it with only two Systems, so around 400$ + shipping.

Hope you enjoy it, and don’t hesitate to give them a try and have some fun!
will try to follow this up, and upload some future info, tests and ideas.

cheers!
Better than Just VPN for the Home Lab

Hi everyone!
I wanted to write today about a tool that happily surprised me and now has made my life easier, related to VPN and connectivity, its called Tailscale

The main slogan says :

Secure remote access to shared resources

Tailscale connects your team’s devices and development environments for easy access to remote resources.

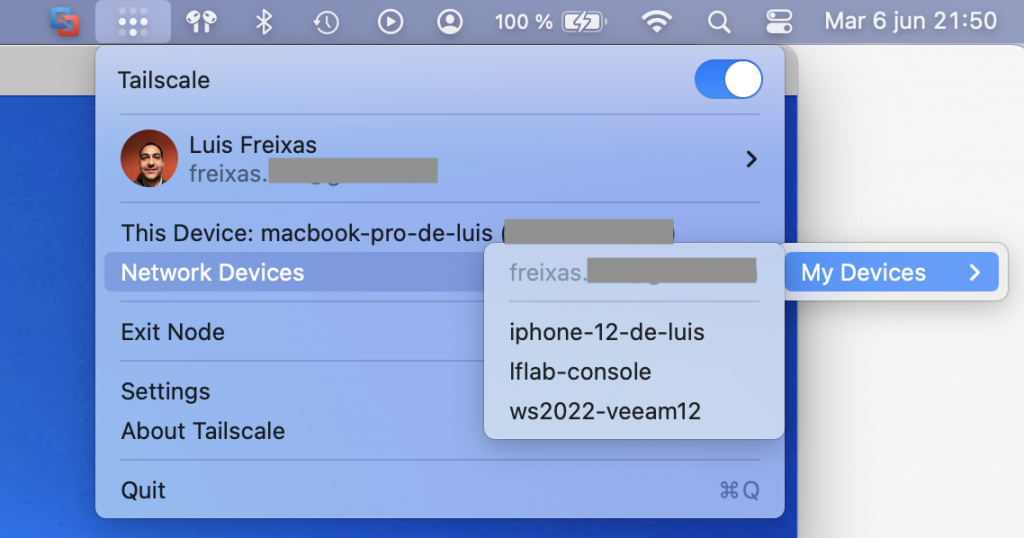
I’ll try to put it on my own words, in my use case, I’ve been using it at the beginning to connect to my Home Lab remotely from my house to my “Jump Station” over RDP, then, I started to use some advanced features:

  • VPN Access to a single client
  • VPN to Remote Site, to access other devices not capable to install the Client
  • Proxy / Traffic router when Im out of the house or in a untrusted network
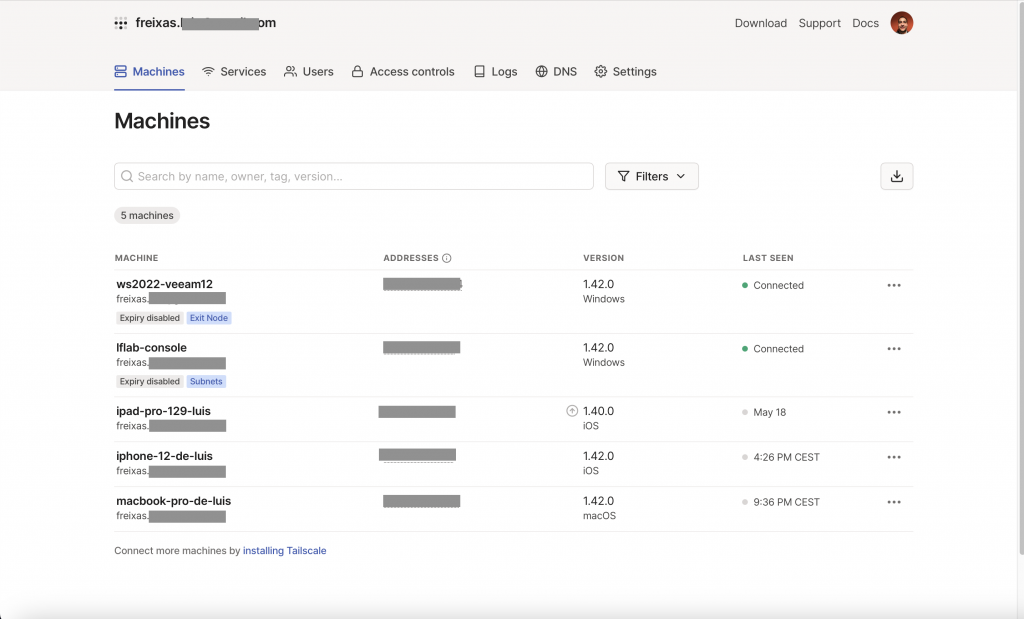
  • Web central console for configurations, users creation and management.
  • Easy to use client for Linux, Windows, Android, OSX, iOS, etc.

The client is very neat, clean and easy to use, 
also the documentation is great!
Im gong to post a few screenshots and will make a future entry with an example setup.

The “Free” version comes with great features to start using it, as I said, in my case, at my home lab,

https://tailscale.com/pricing/

One of the positive things for me, is that I dont need to setup a firewall + opening ports for connecting from / to my hose / homelab, the Iphone / Ipad client works “like a champ” and I can access all I need, and secure my traffic navigating from my home when needed.

Web Main Console
OSX Client
iOS Client

Installing vCenter 8: A Screenshot Walkthrough

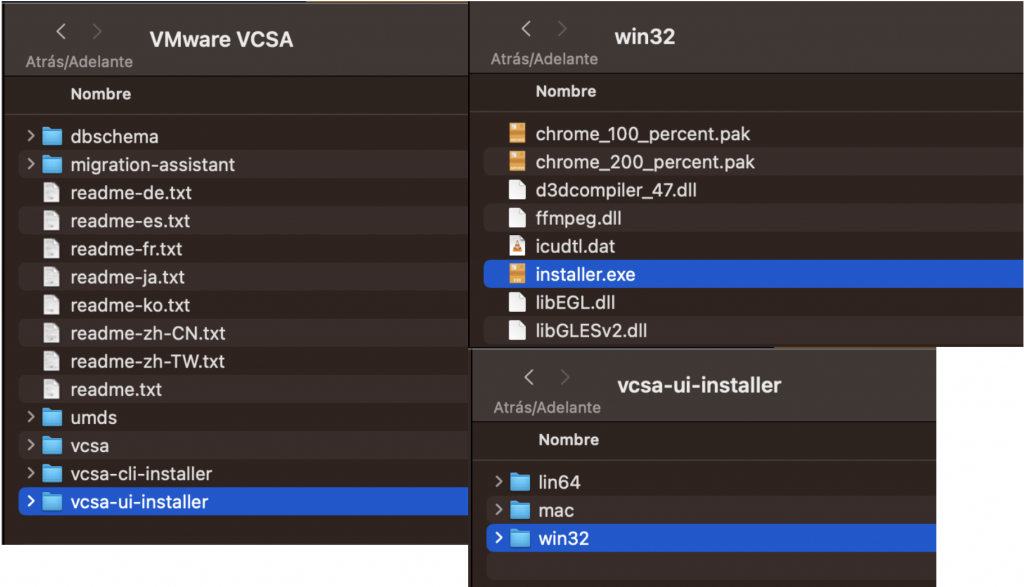
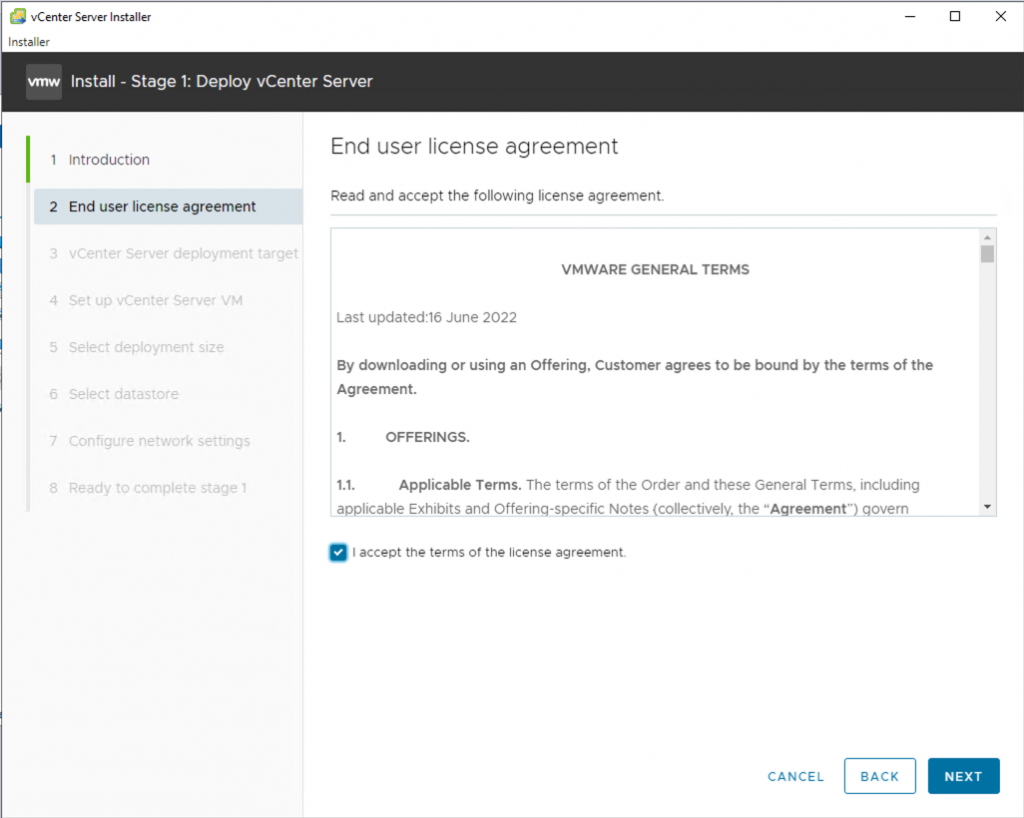
After downloading and opening the vCenter ISO, run the installation executable from Windows with the GUI.

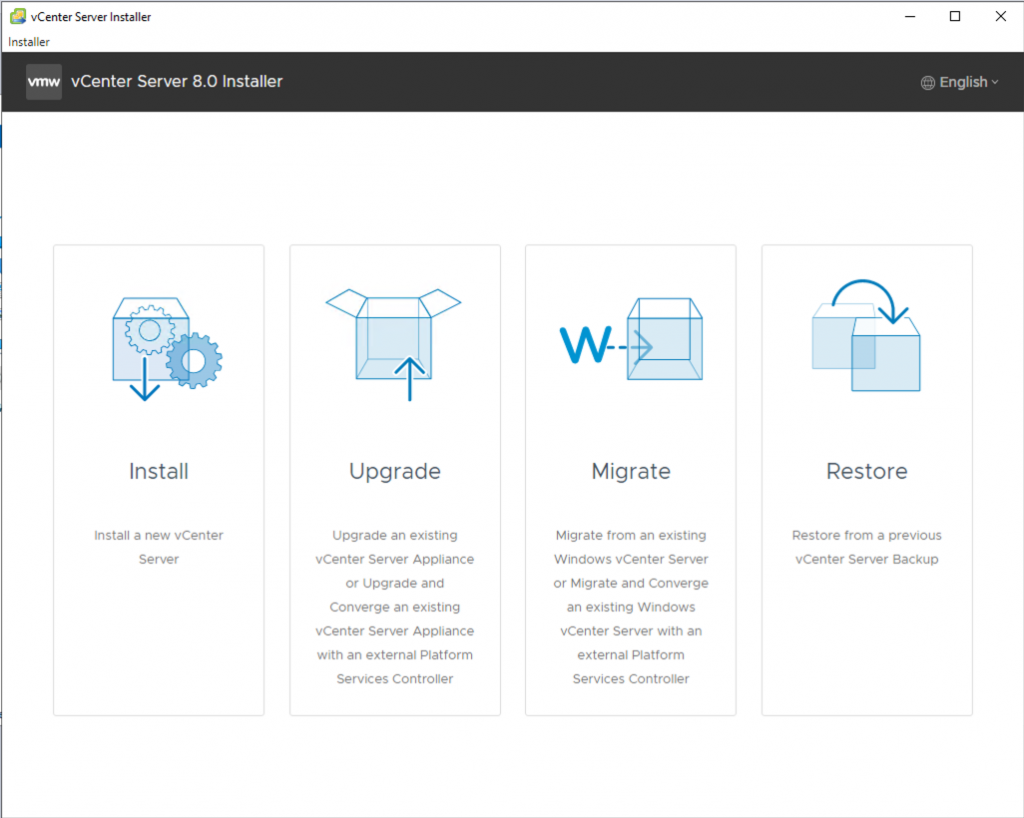
Let’s get started:

Install
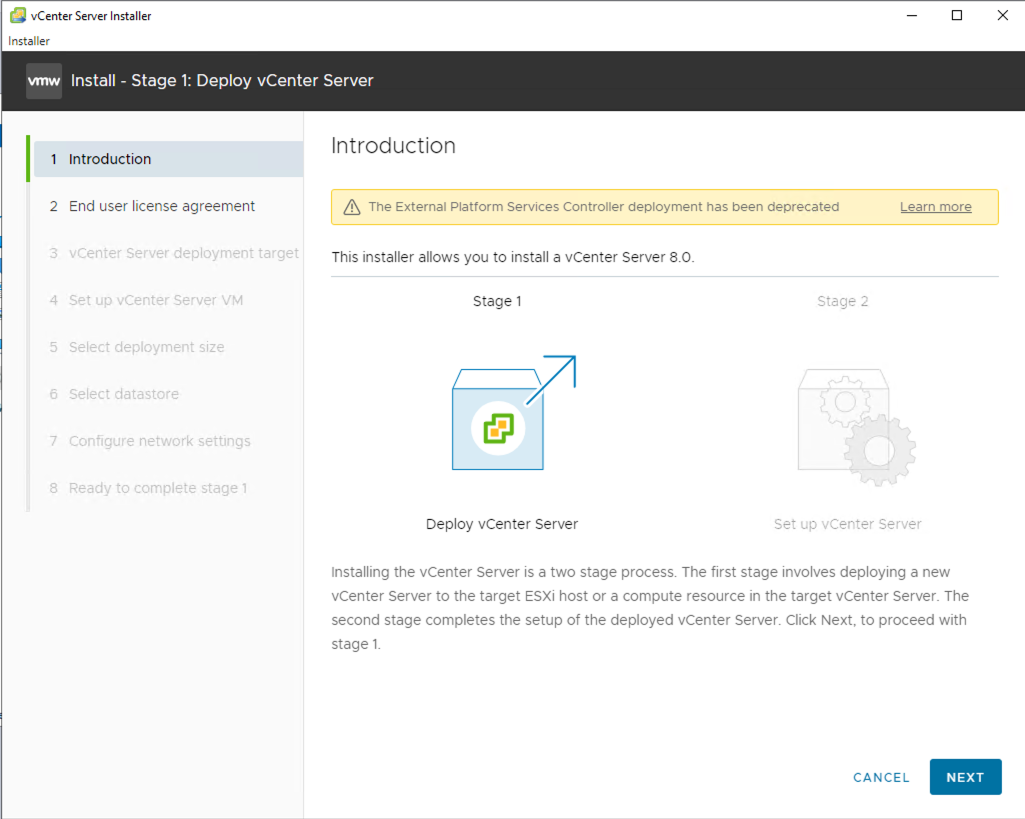
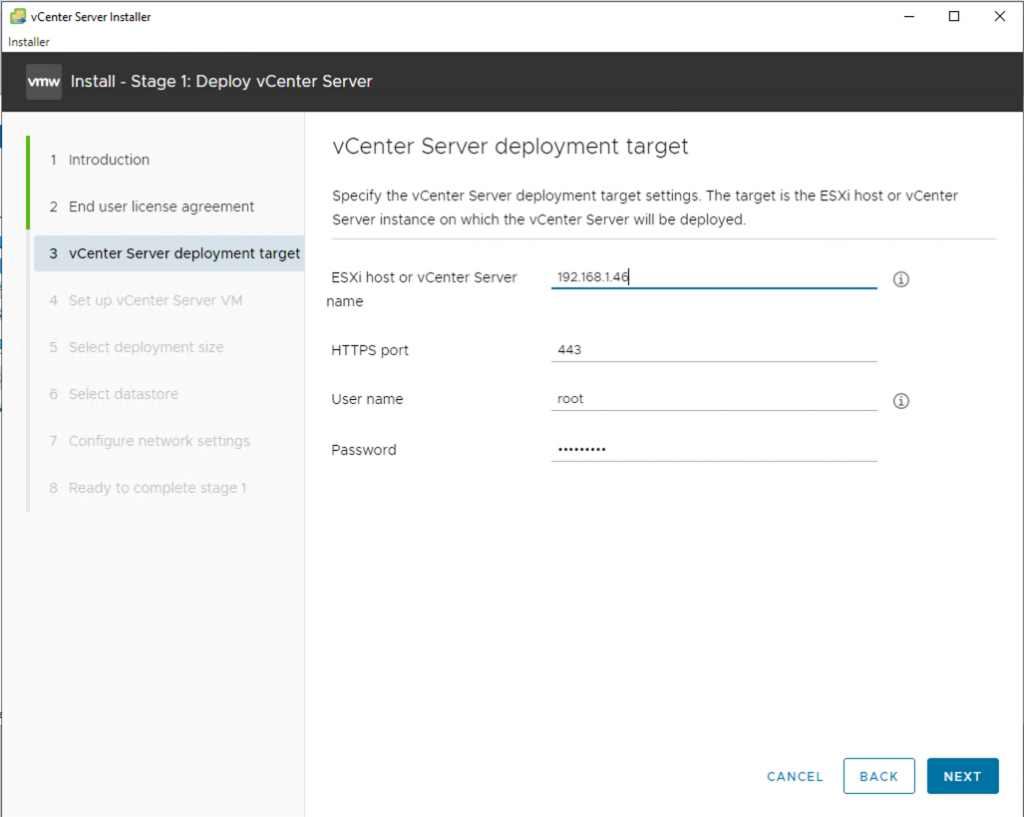
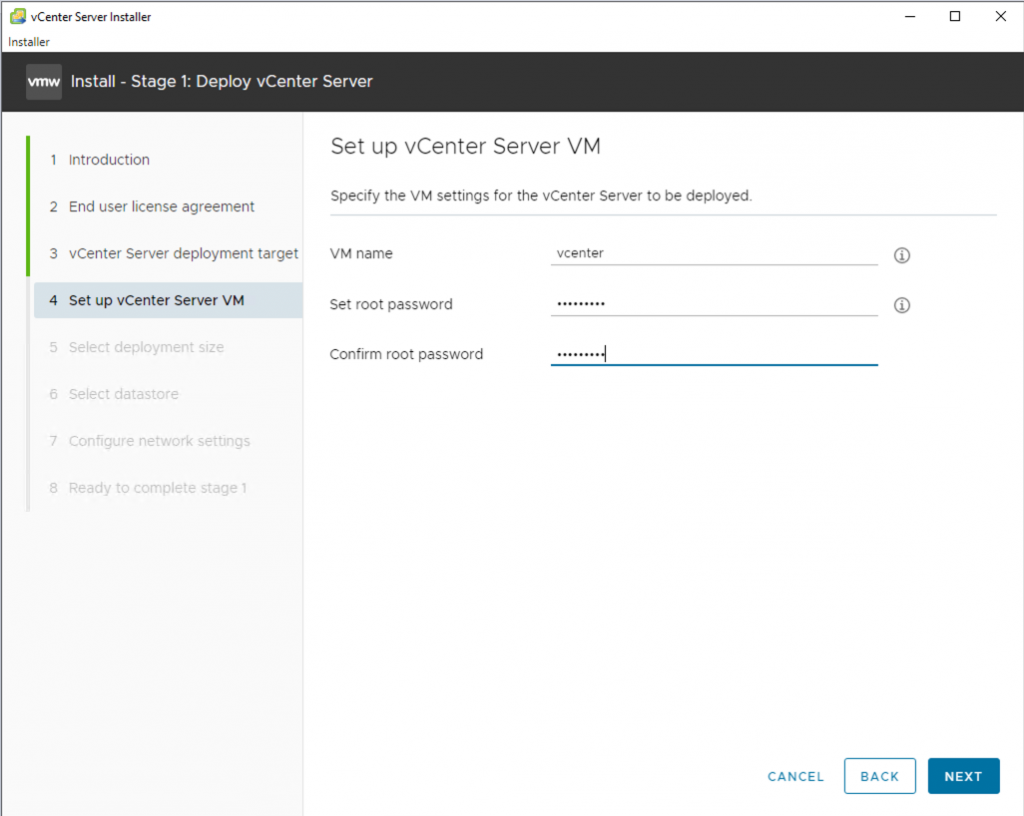
You can now deploy it only as an appliance. Continue.
Choose where to deploy the appliance: the ESXi server.
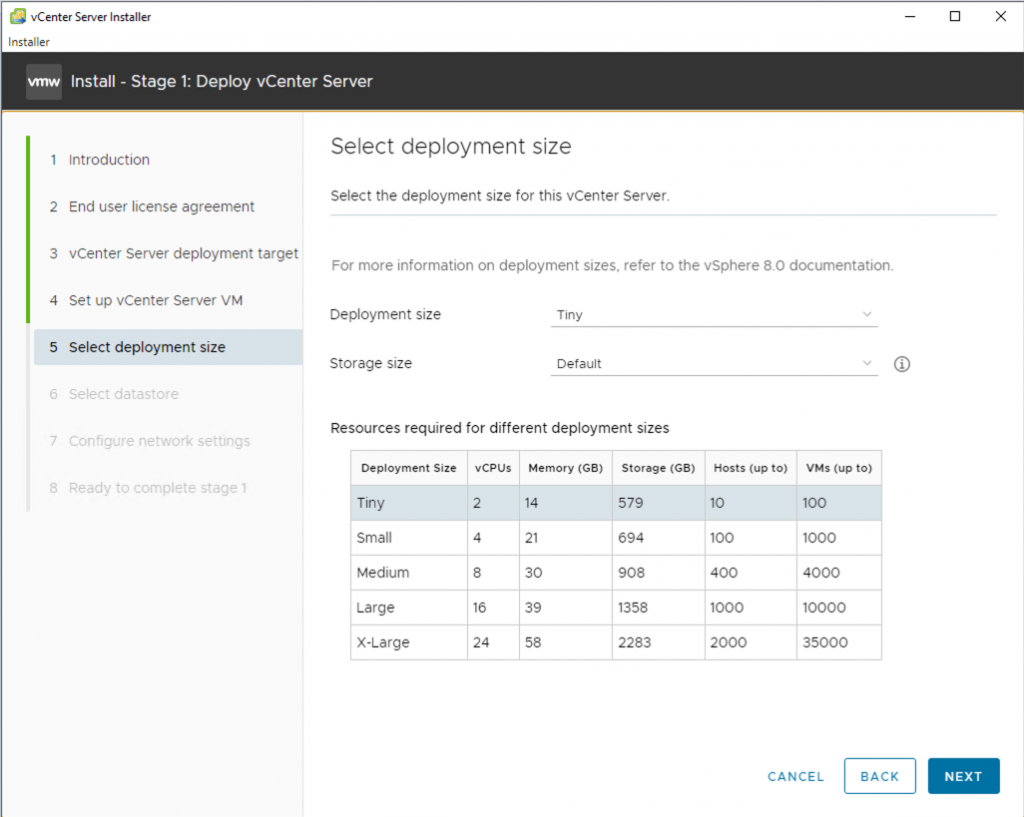
Choose the deployment size that matches your environment. Mine is very small, so I selected Tiny.
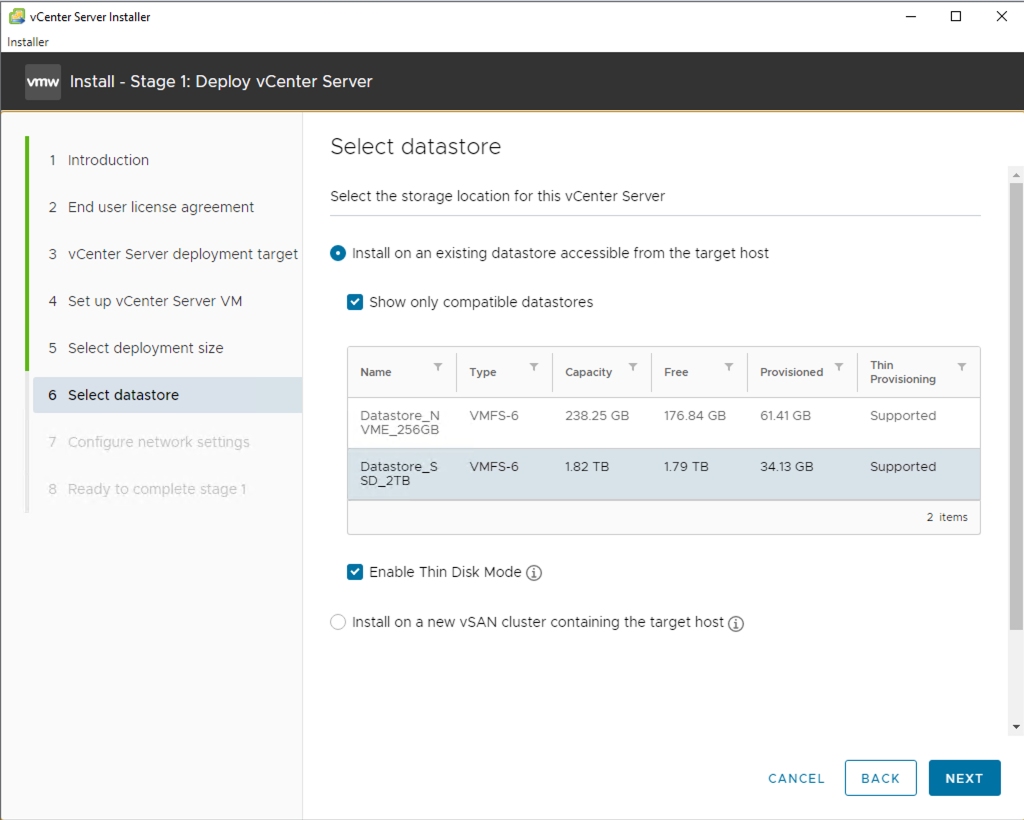
Select the datastore for deployment. In our case, we’ll use thin provisioning for the disks.
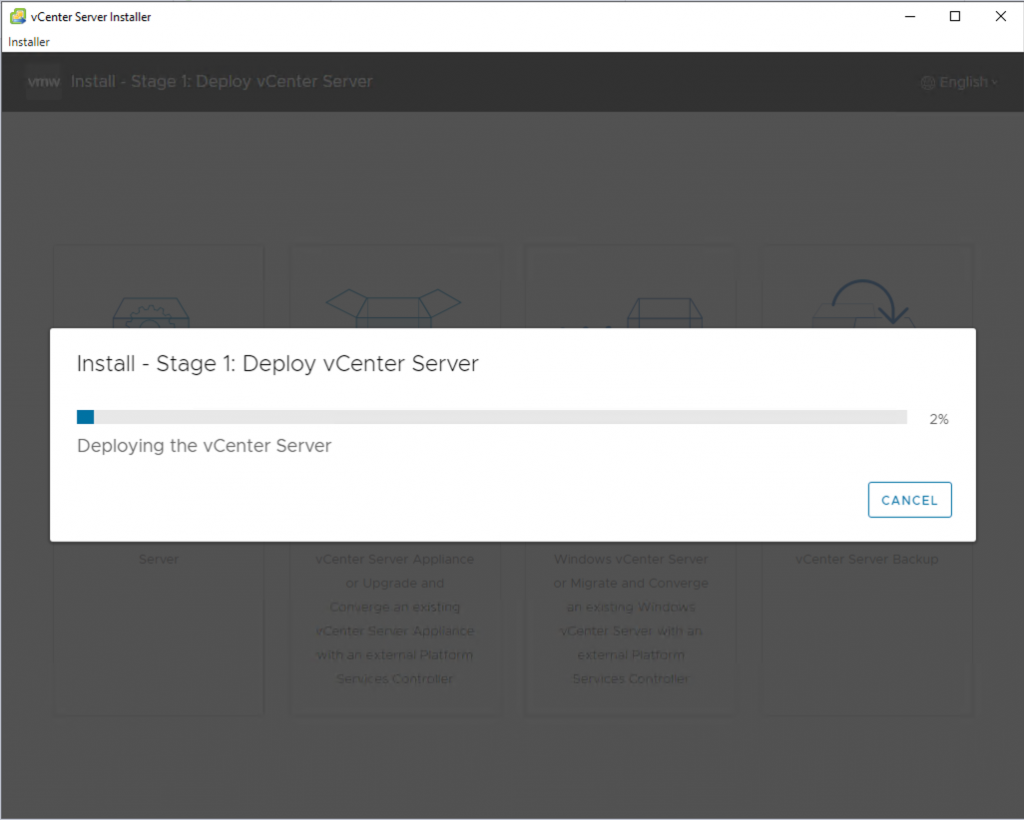
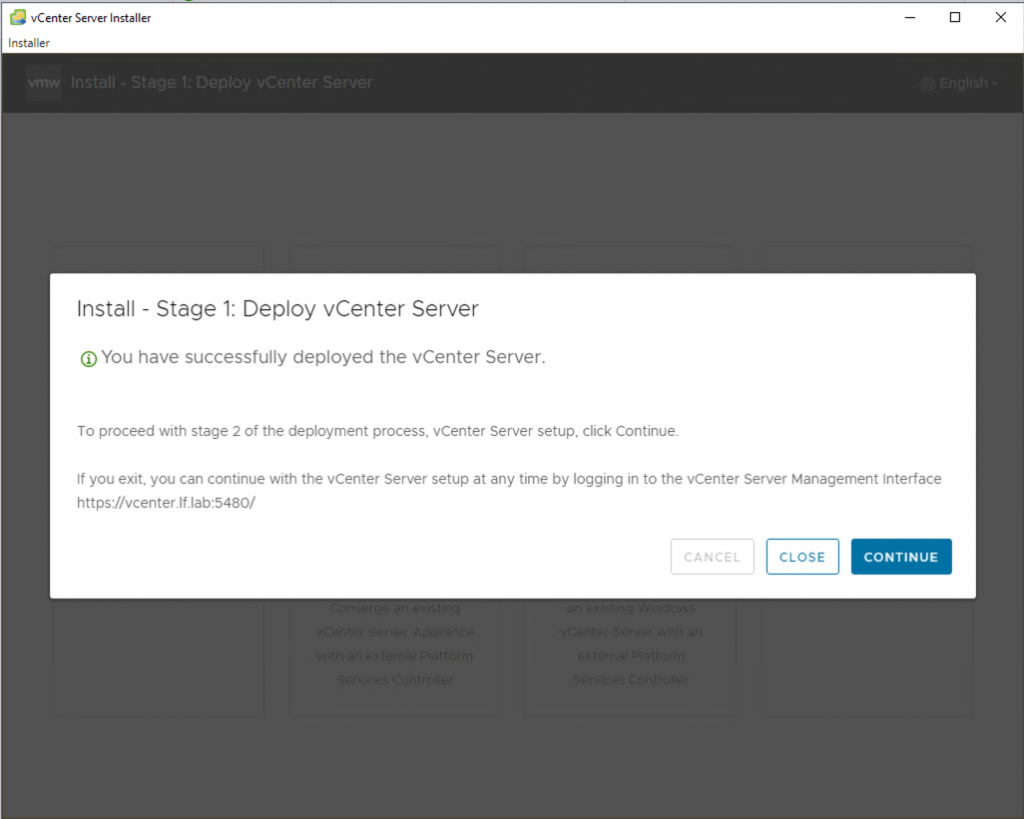
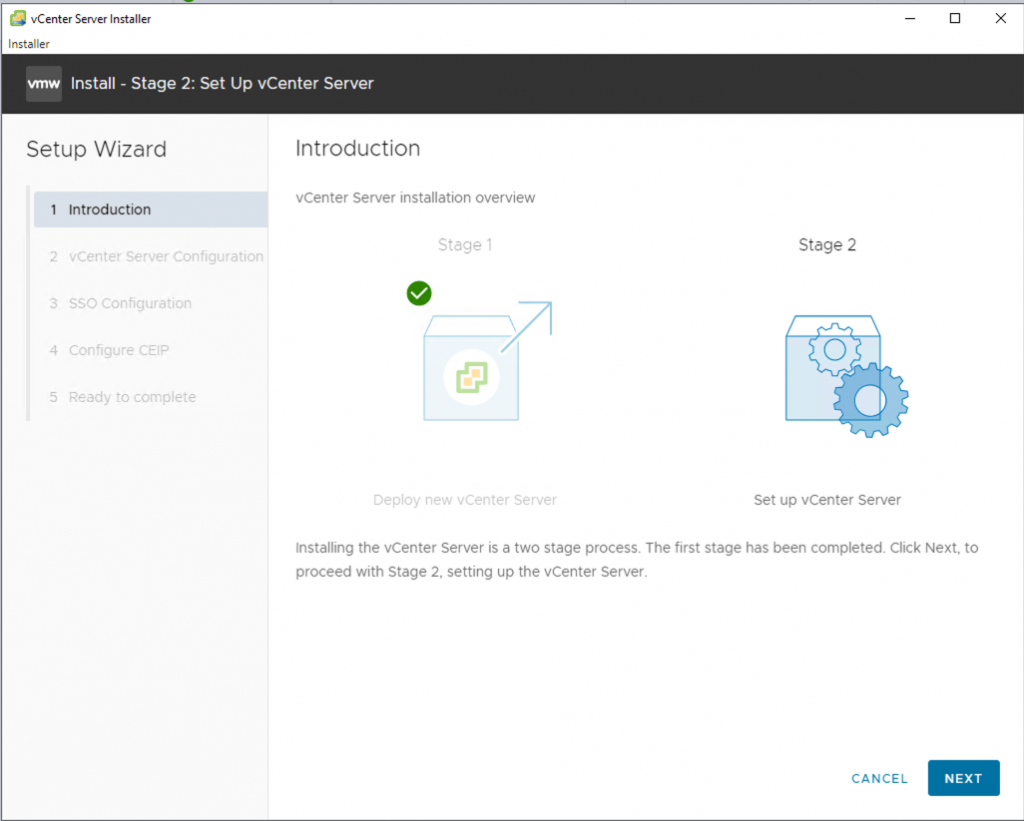
Let’s move on to the second part of the installation.
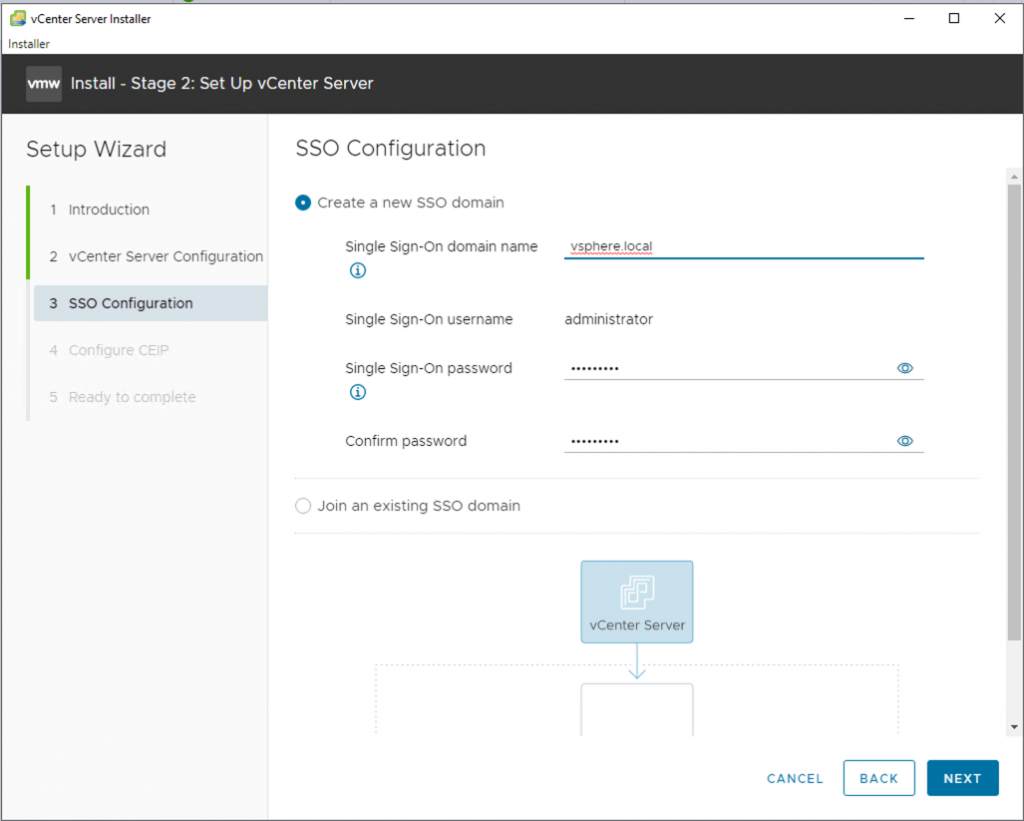
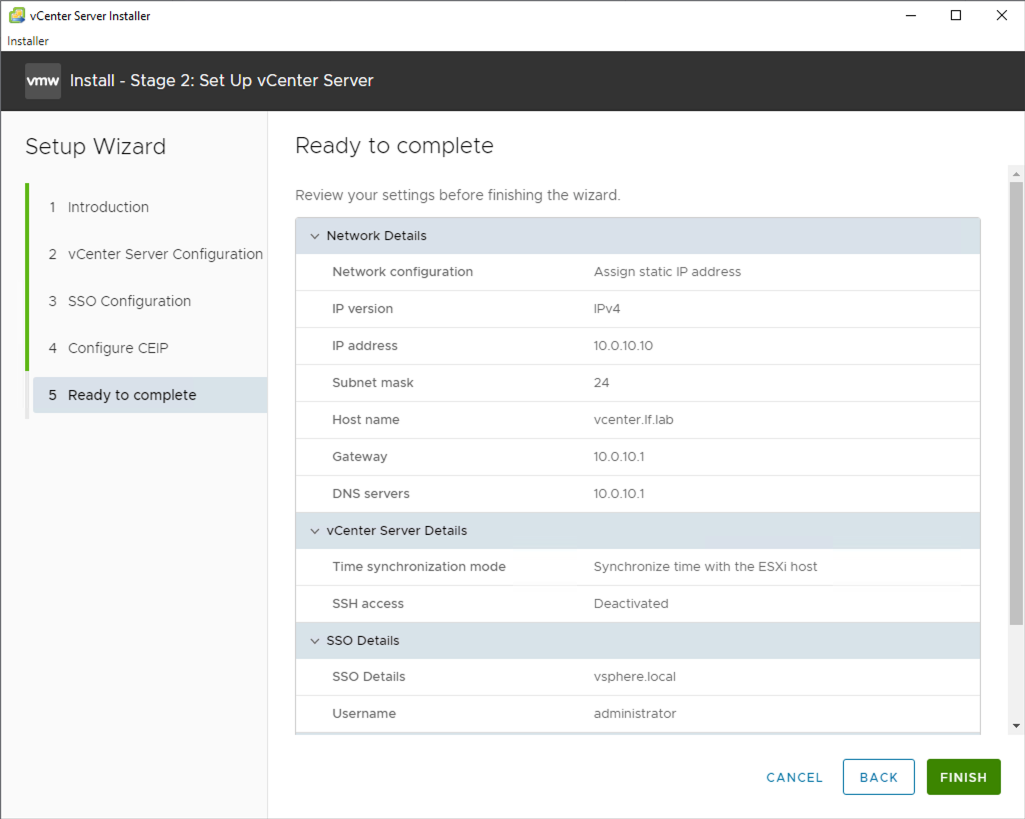
If you’re deploying a single appliance, this is fine. If you’re adding multiple appliances for centralized management, create an SSO domain.
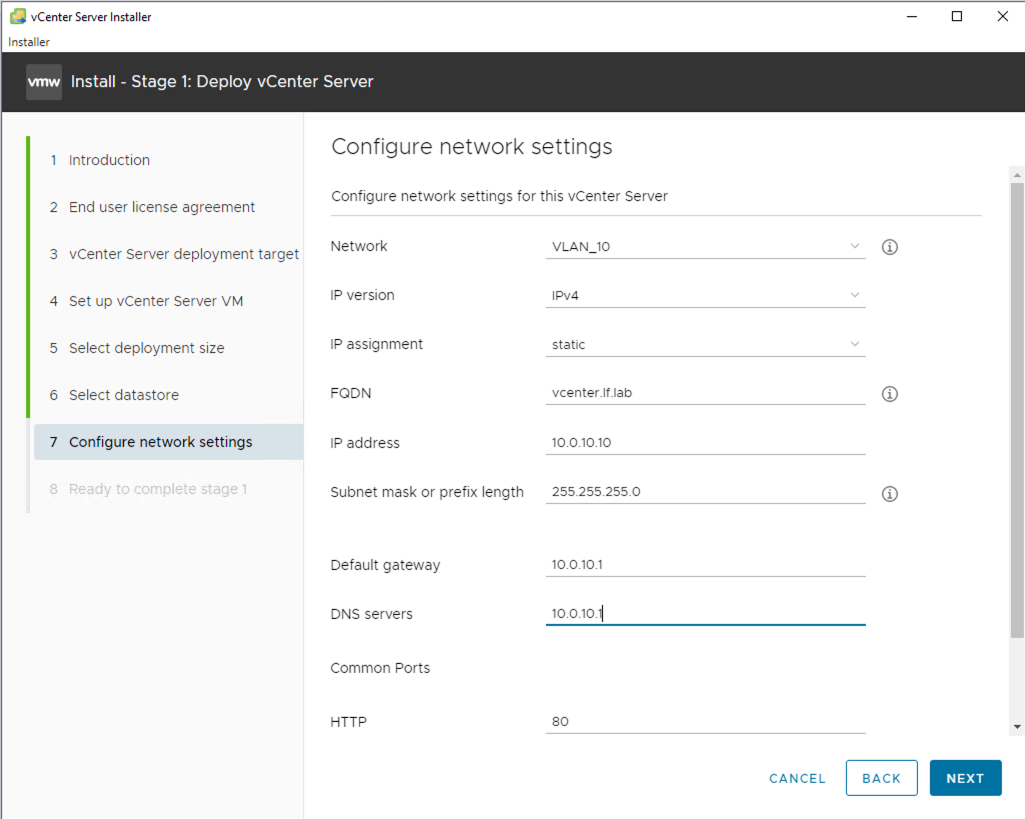
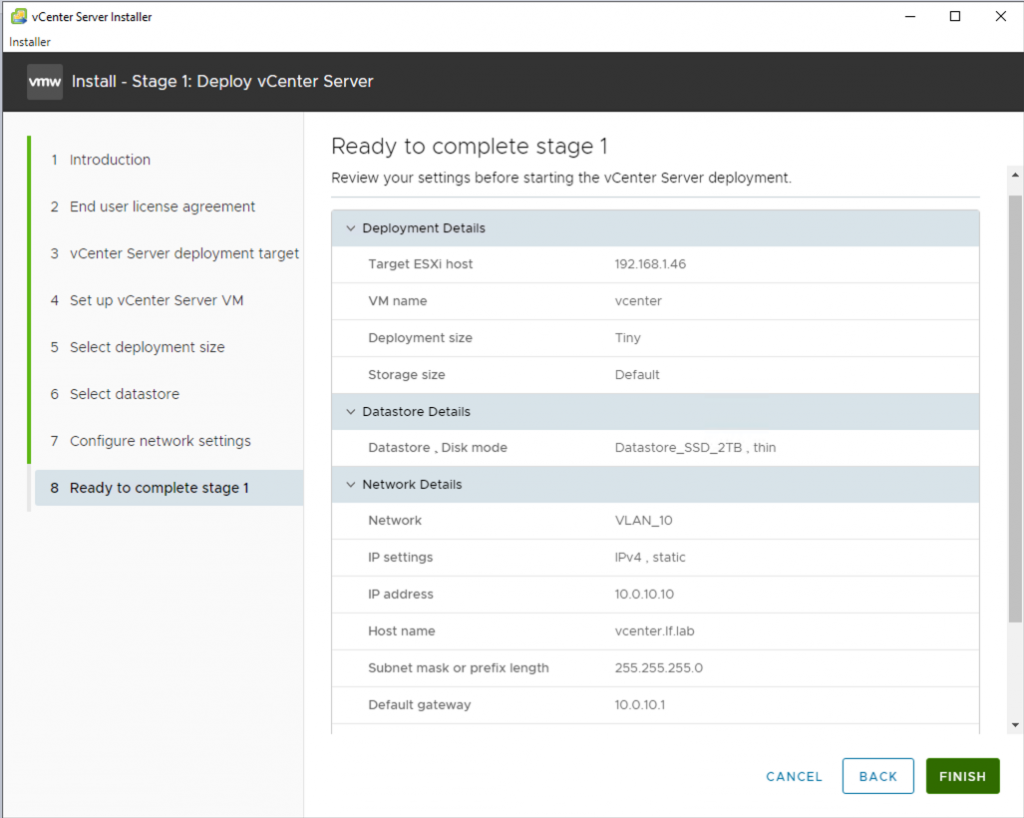
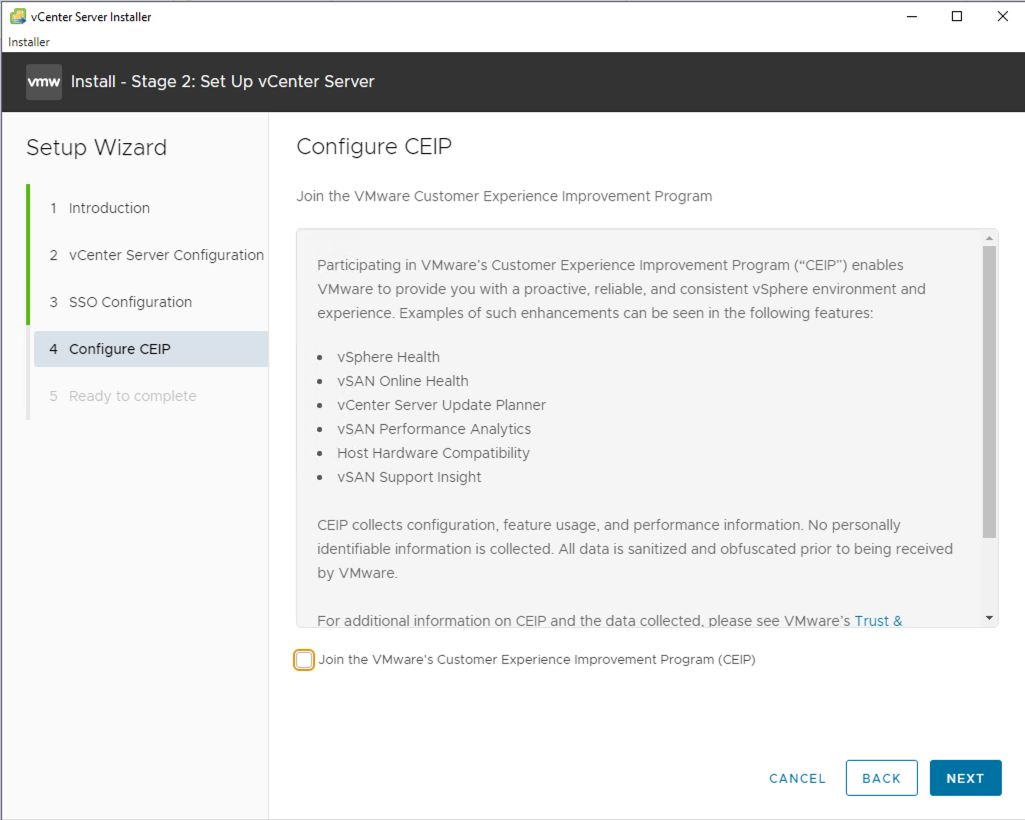
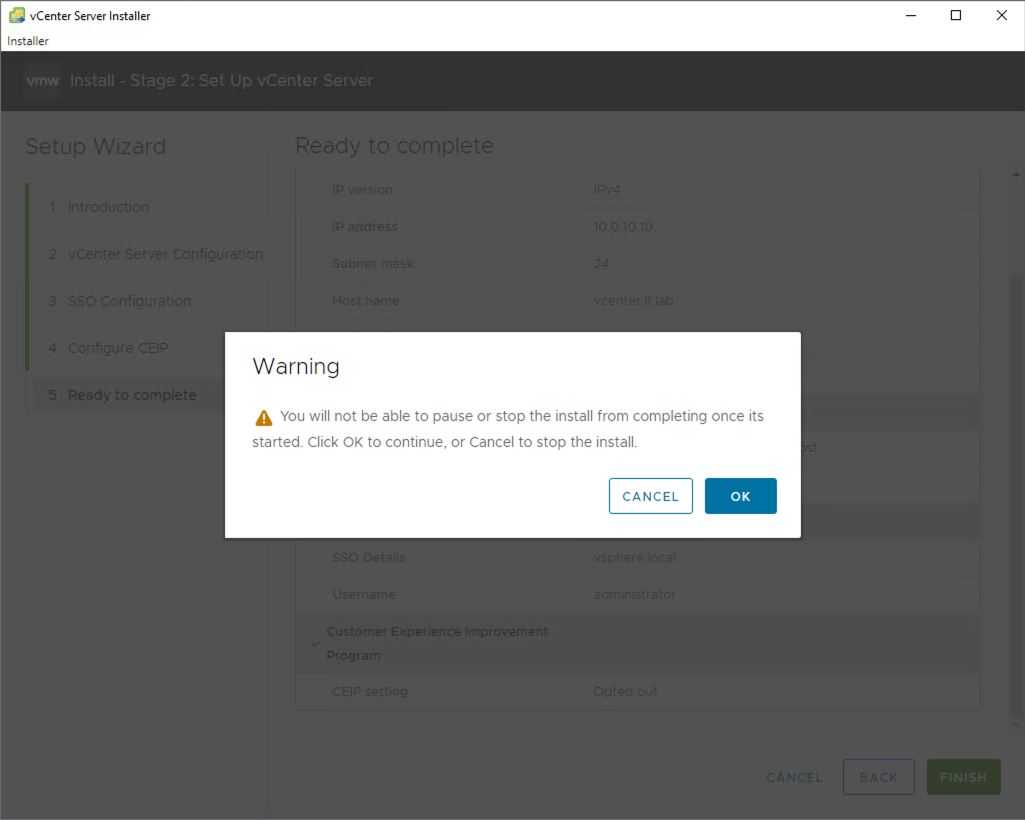
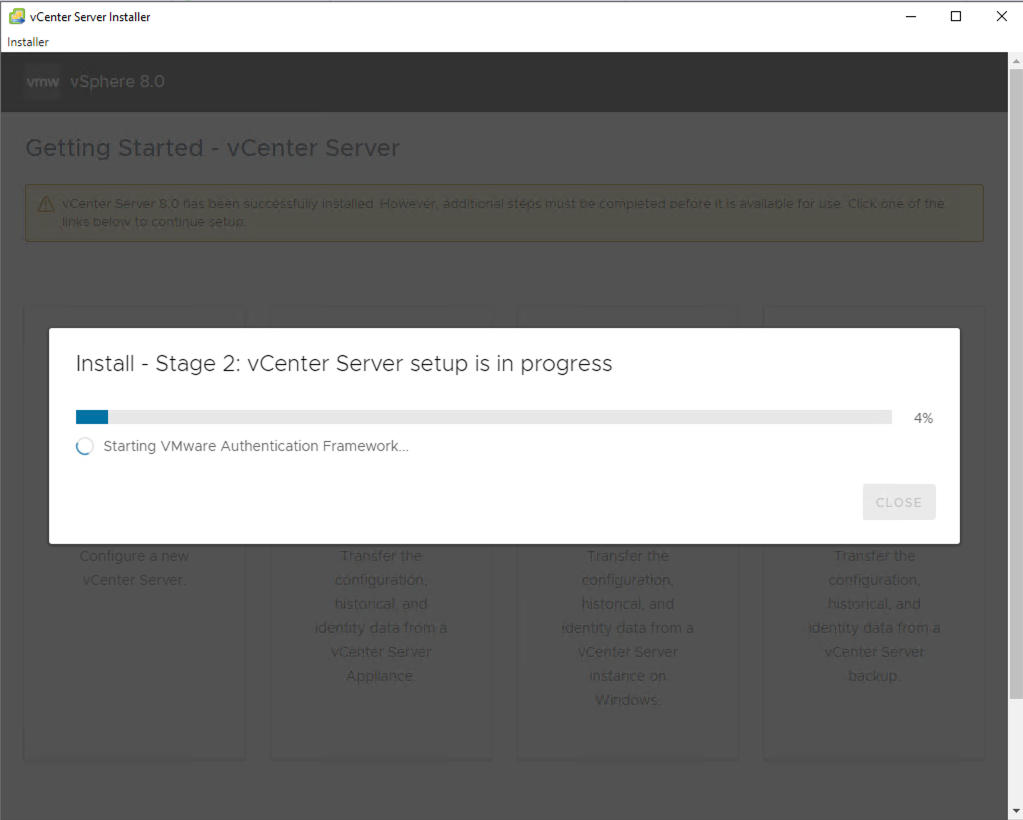
Everything is ready.
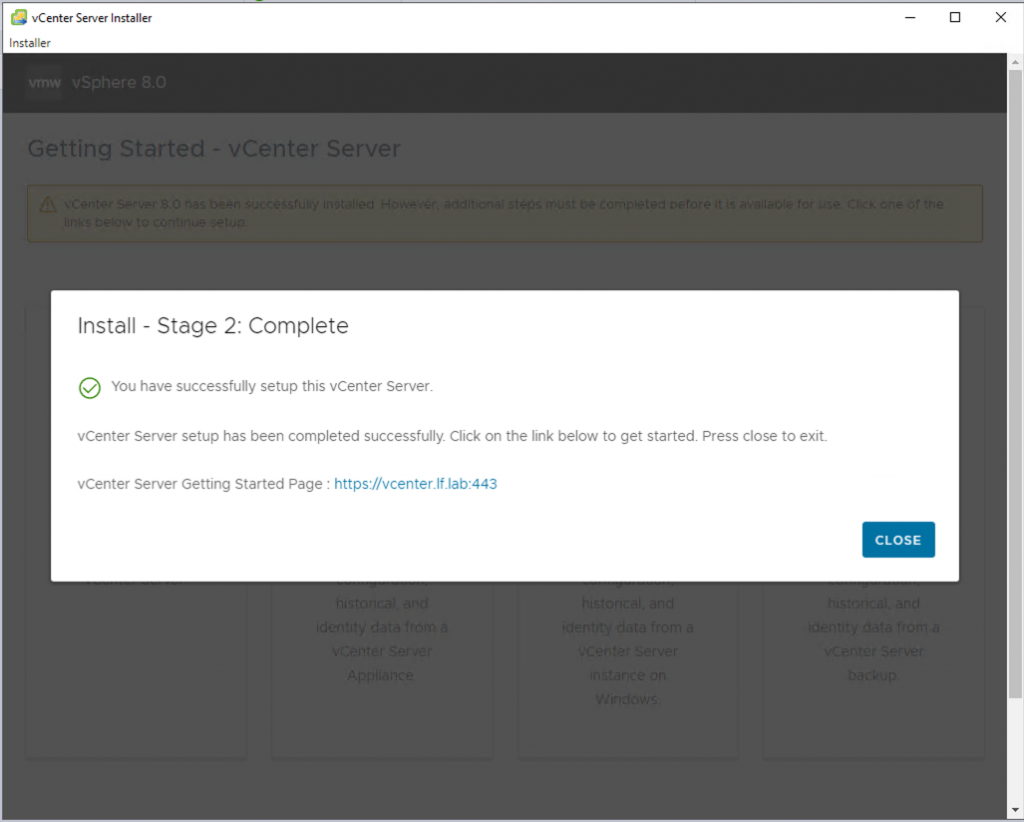
Connect, and then continue by creating your datacenter, cluster, and other settings…

Adding an ESXi Host to Veeam B&R v12

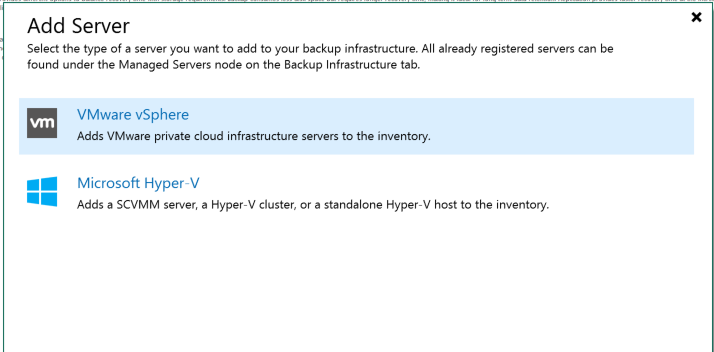
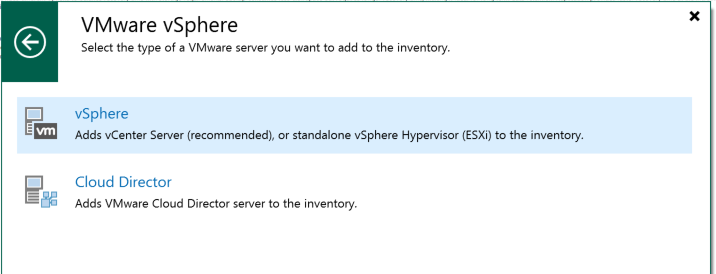
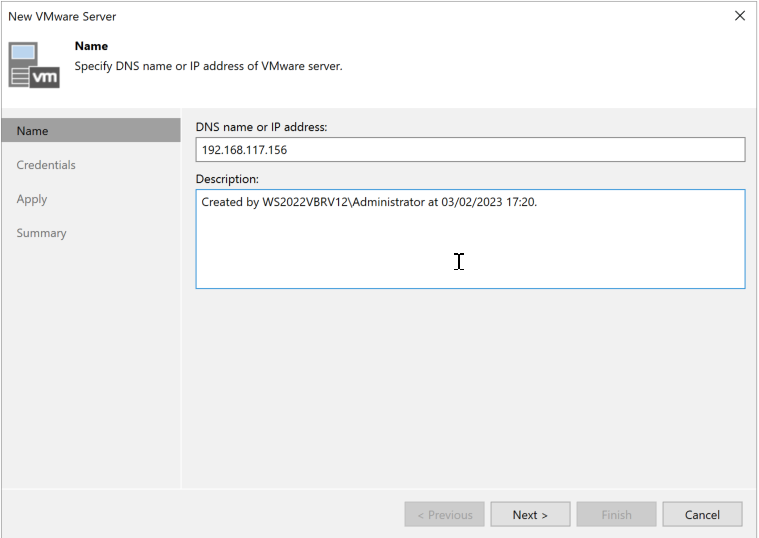
Here’s a simple screenshot walkthrough showing how to add an ESXi server to Veeam B&R v12 so we can back up its virtual machines.
We’ve completed the initial configuration. Now let’s add a source to back up:

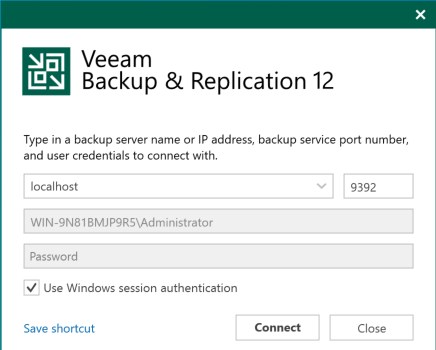
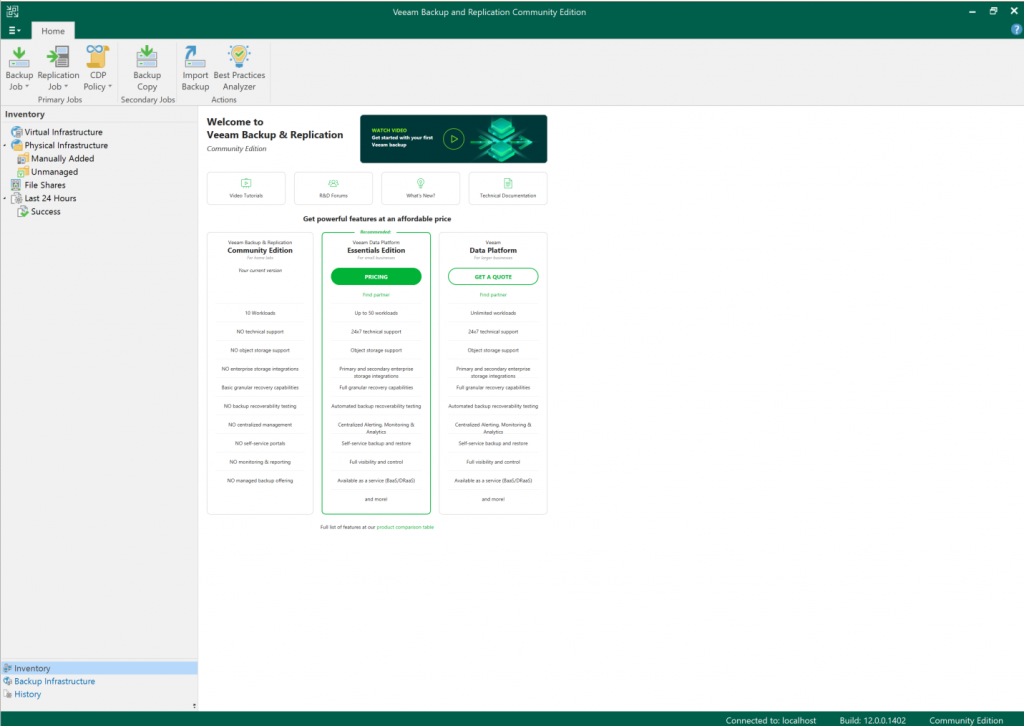
Open the Veeam B&R v12 console.

Home screen

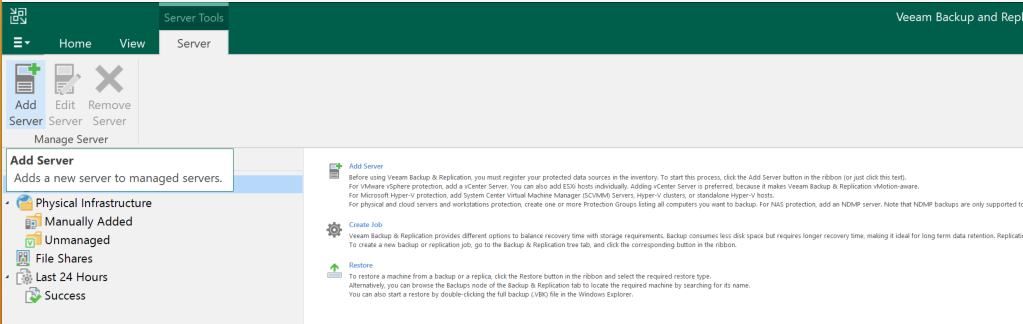
In the Inventory menu at the bottom left, select Servers, then click Add Server at the top.

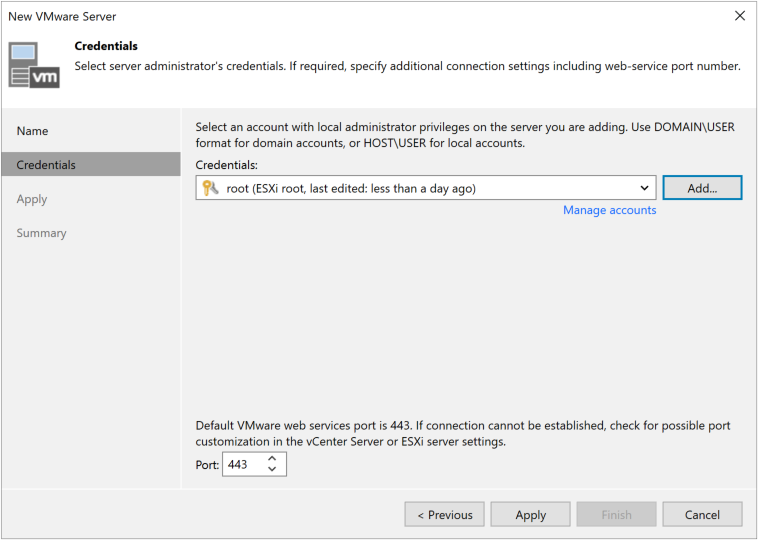
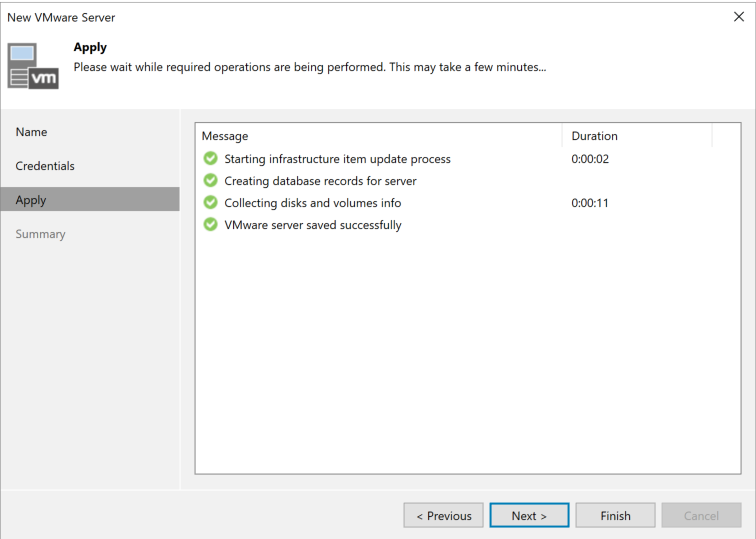
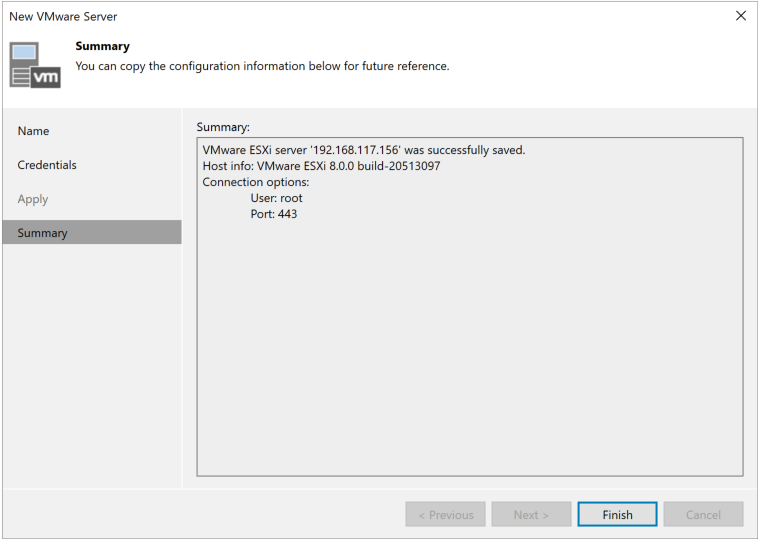
Follow the wizard.

If the password hasn’t been added yet, click Add, enter the username and password, and continue through the wizard.

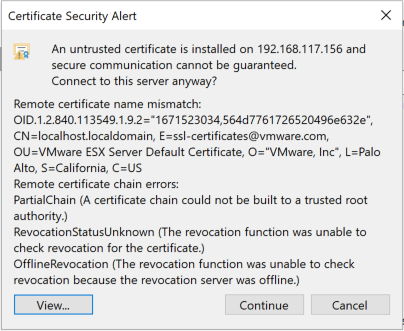
It will ask you to add the certificate. Continue.

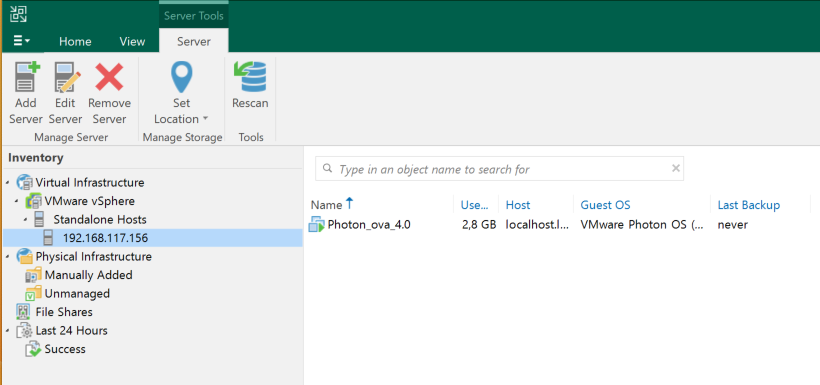
Here it is. In the Inventory menu, under Standalone Hosts, you can see the added host. Click it to view the virtual machines it contains!
Now we can start creating backups, replicas, and more.

More next time.

VMware Tanzu Vanguard

VMware Tanzu Vanguards are active customers, cloud users, and other users who are passionate about VMware products and services. They openly share their experiences and knowledge with the community and others.

Member benefits

Access to VMware Tanzu products and services

Exclusive invitations to our conferences and user group meetings

Networking with a small group of experts who can help with technical questions

Recognition and rewards for contributing and achieving goals

Digital Tanzu Vanguard badges

Community-branded merchandise

Join in and take full advantage of everything VMware Tanzu offers for learning, experimenting, and advocating for TANZU.

When you do, please say you heard about it from me,
@Luis Freixas.

Thank you.

Initial ESXi 8 Configuration

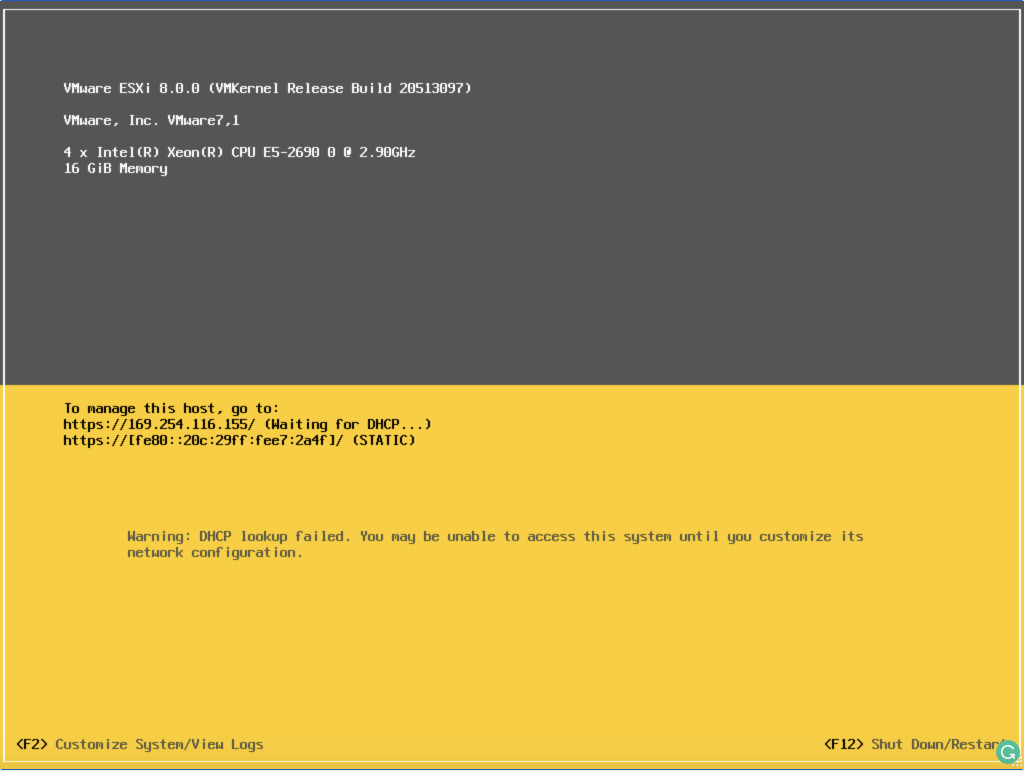
We’ve deployed and installed our first ESXi 8 host. Here’s the link to that post.Now we’ll configure the basics so we can start using it:

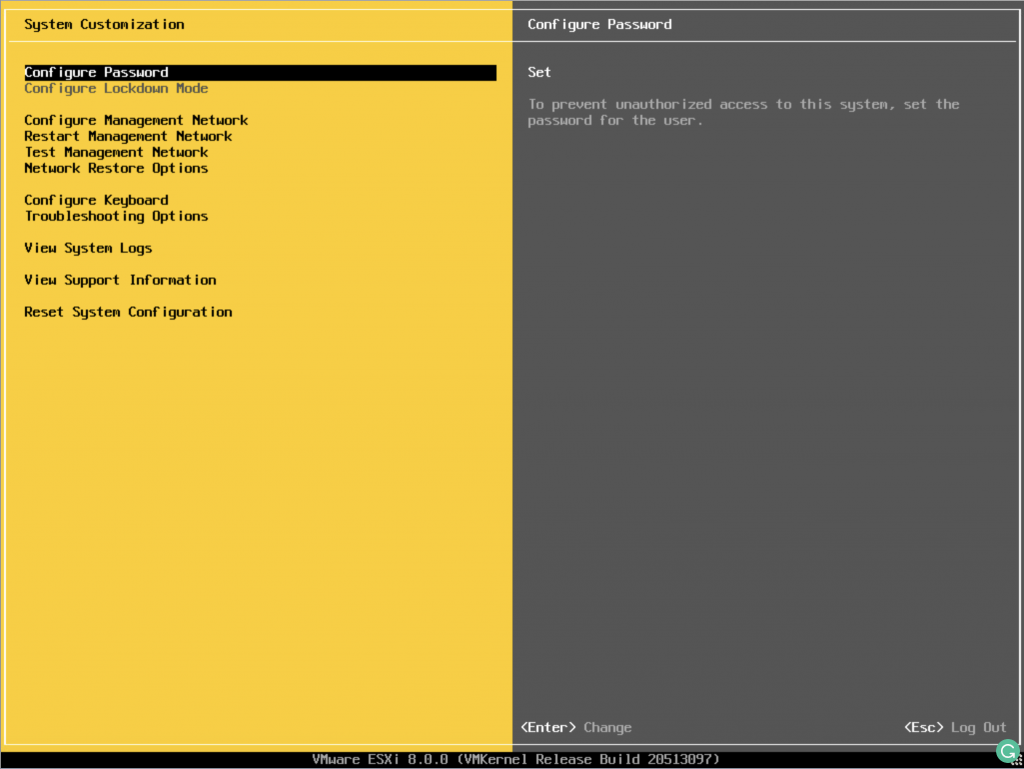
Press F2 to open the configuration menu.
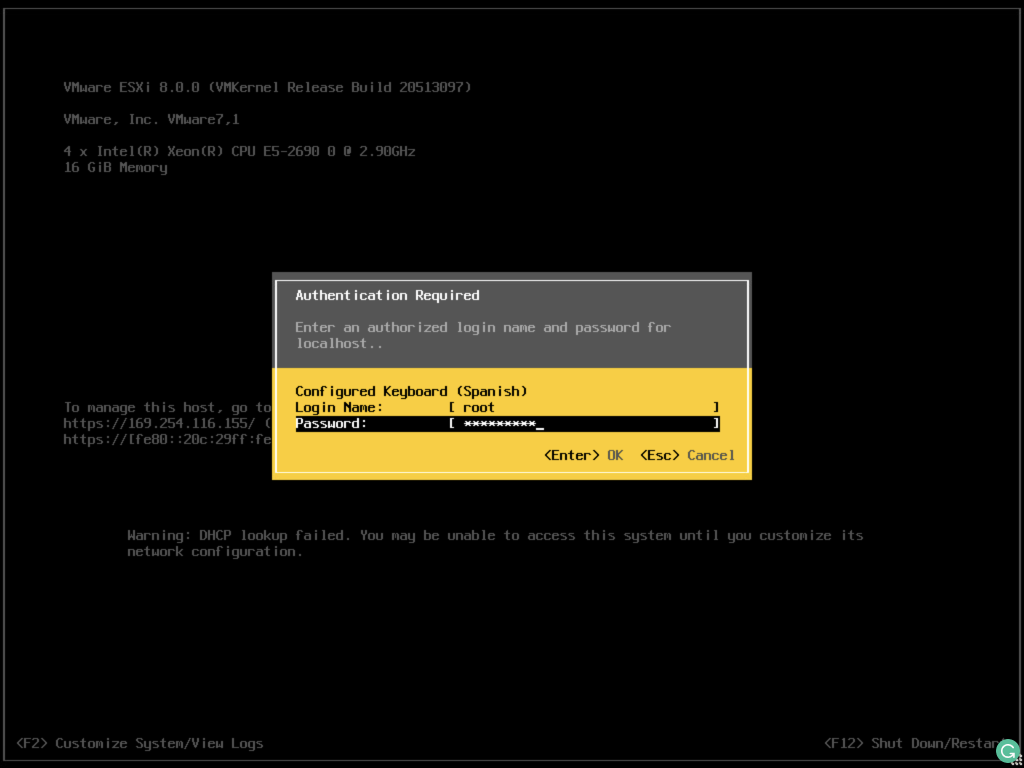
Enter the root password.
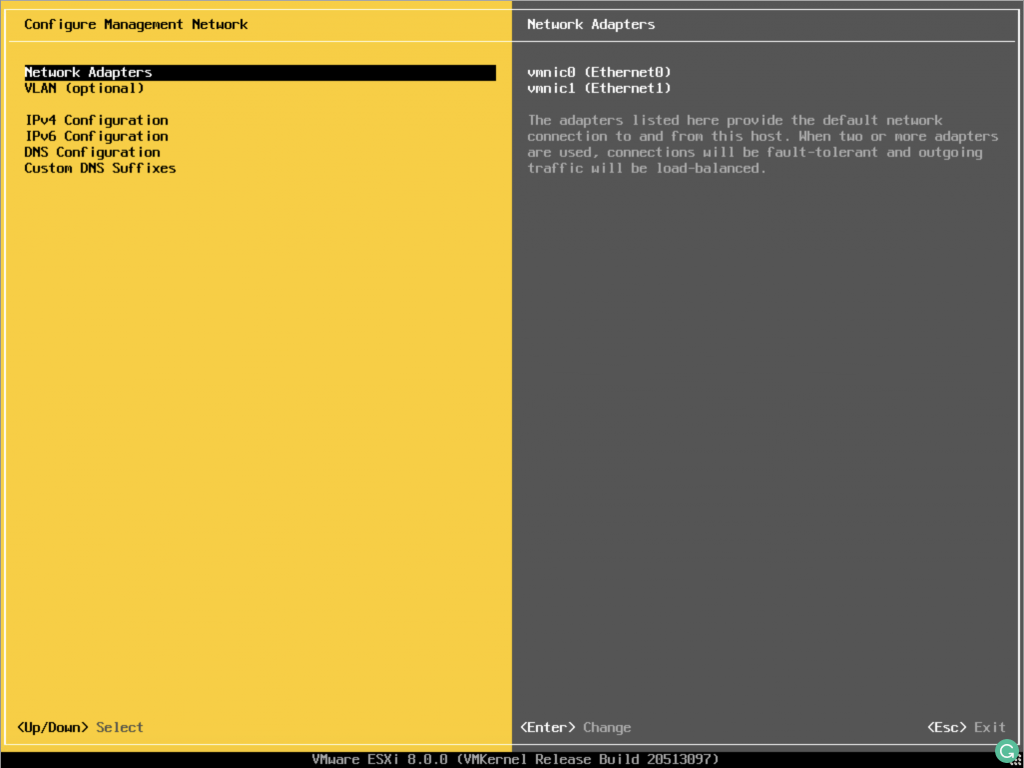
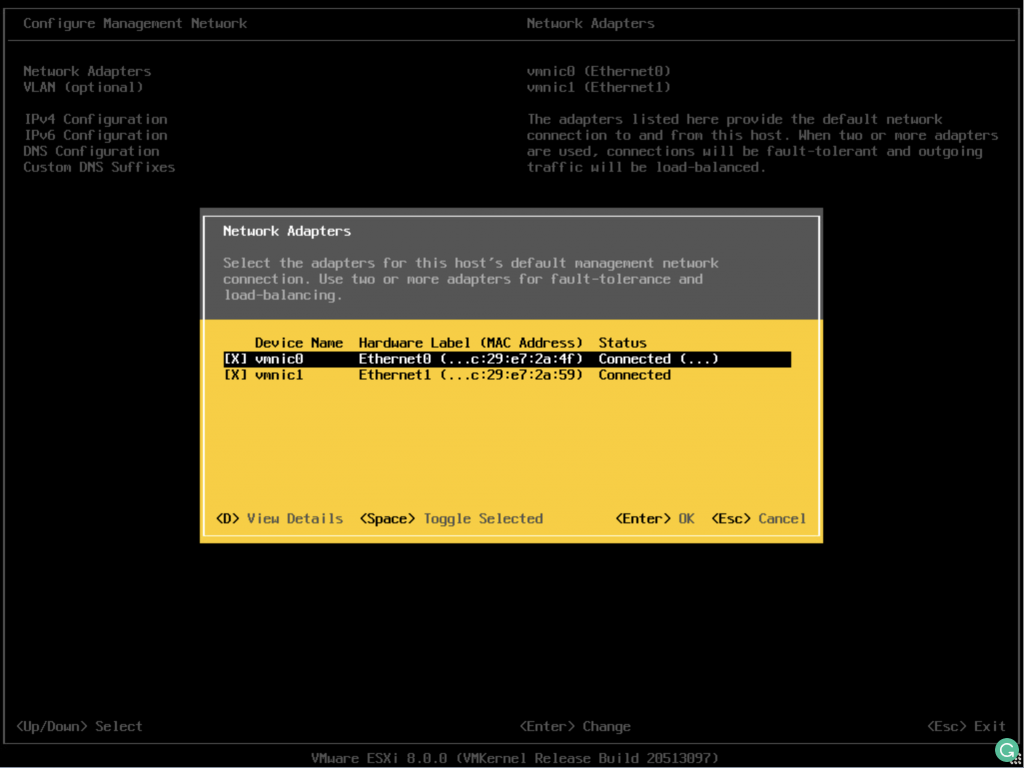
We’ll configure the management network so we can access ESXi through the web interface.
Select the network adapters.
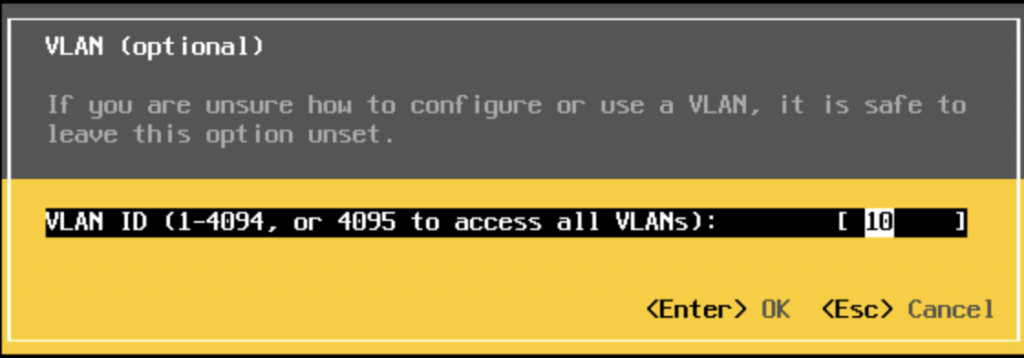
In my case, I assigned VLAN 10 to management.

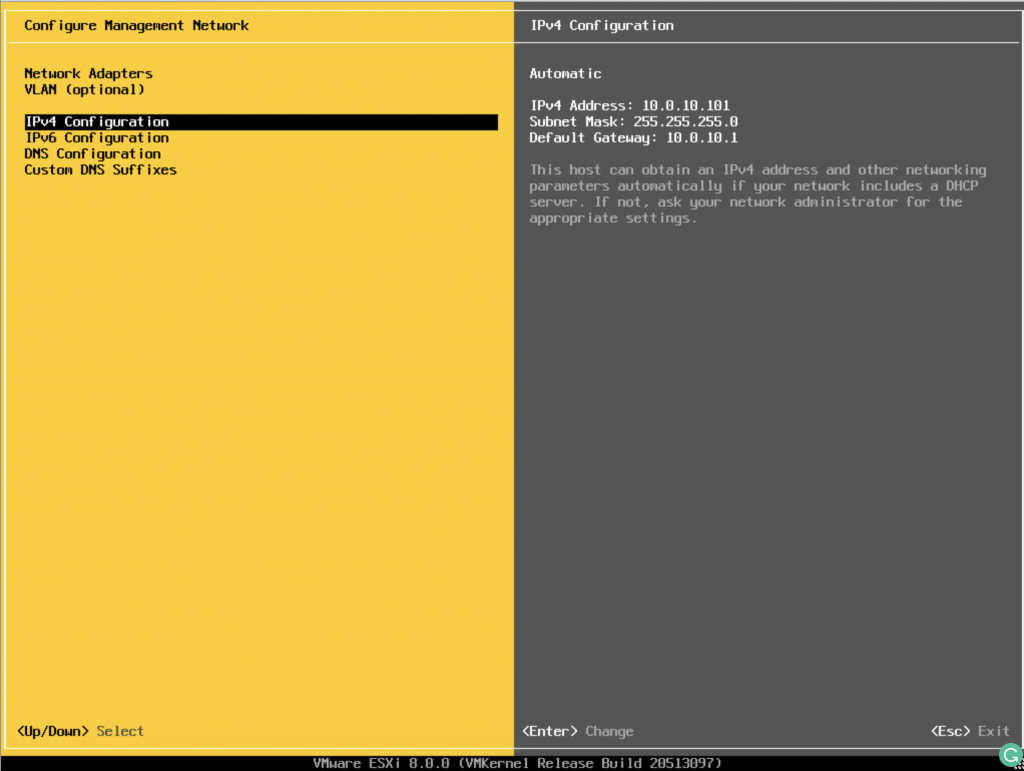
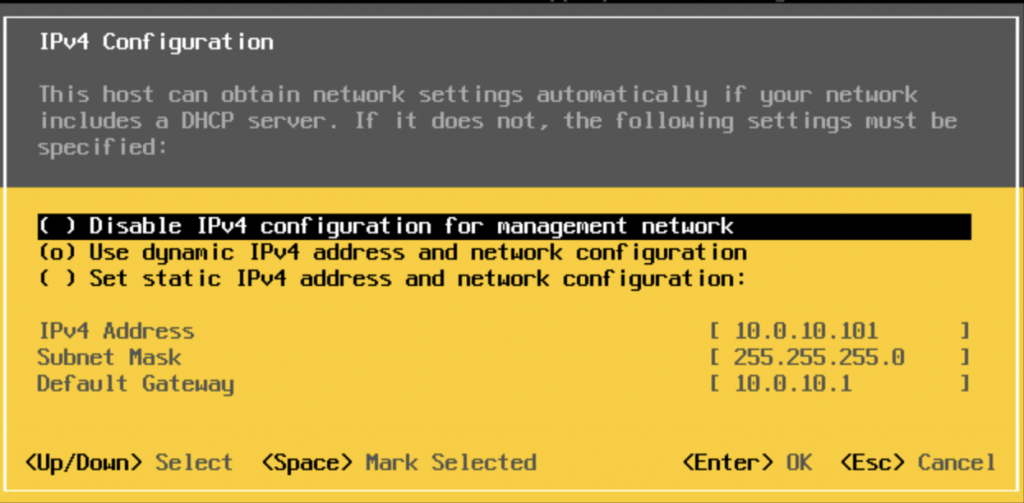
Return to the network menu. Under configuration, set a static IP address for the management interface.

Stay in the network menu and configure DNS and the suffix. That’s it.

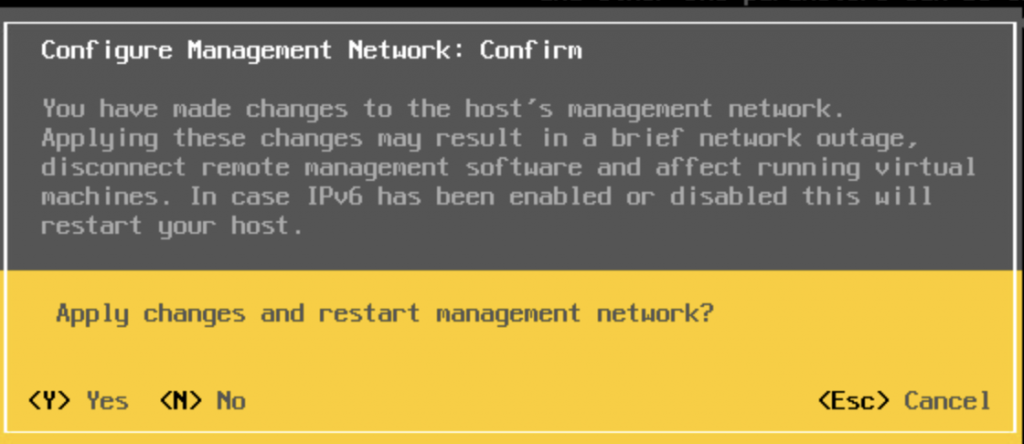
When the configuration is complete, press Esc to exit. It will ask if you want to save the settings.

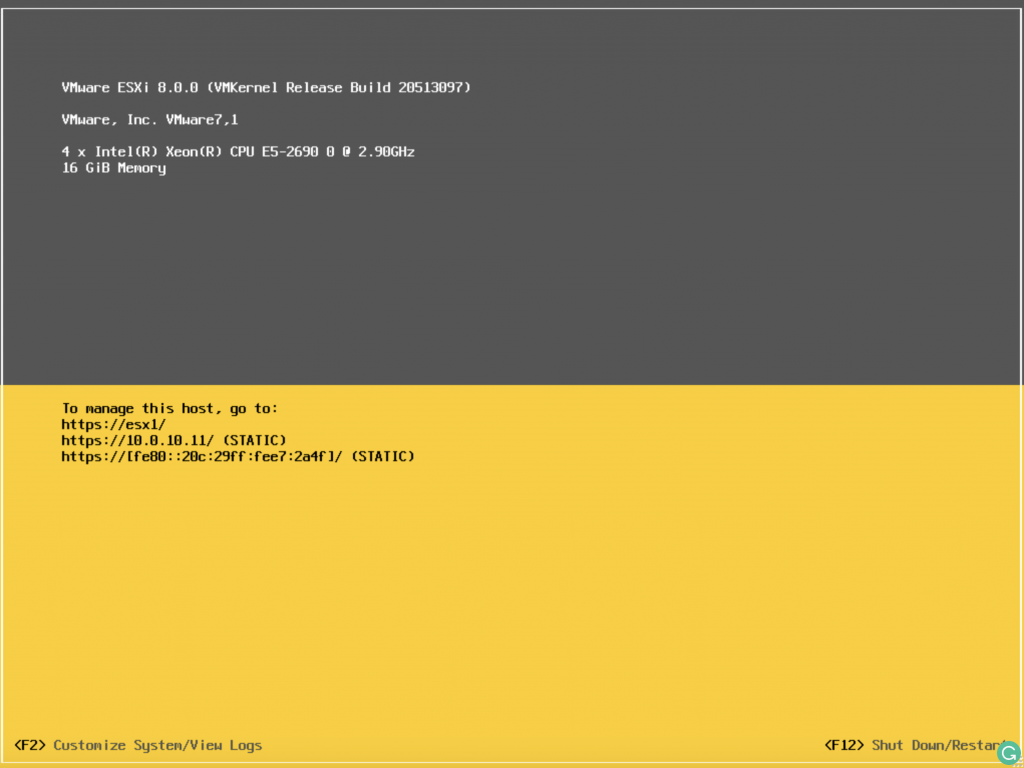
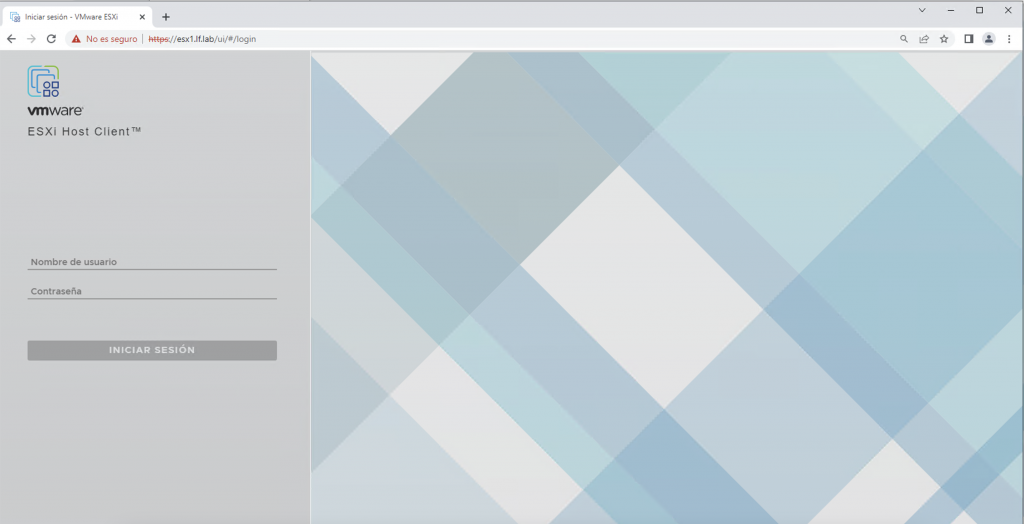
The network is configured. Now let’s open the web console to test it.

Next, we’ll cover the first host setup steps, the most important settings, and then vCenter and storage deployment.

Regards.

Installing ESXi 8

We’re going to perform a clean installation of ESXi 8.
Keep in mind this is a lab, so we’ll skip steps such as configuring disks in RAID.
This ESXi will run nested (virtualized) in my lab. If you’d like to know how to do that,
let me know and I’ll be happy to help.

To download the ISOs, I recommend joining VMUG ADVANTAGE

Boot from the ISO to start the installation.

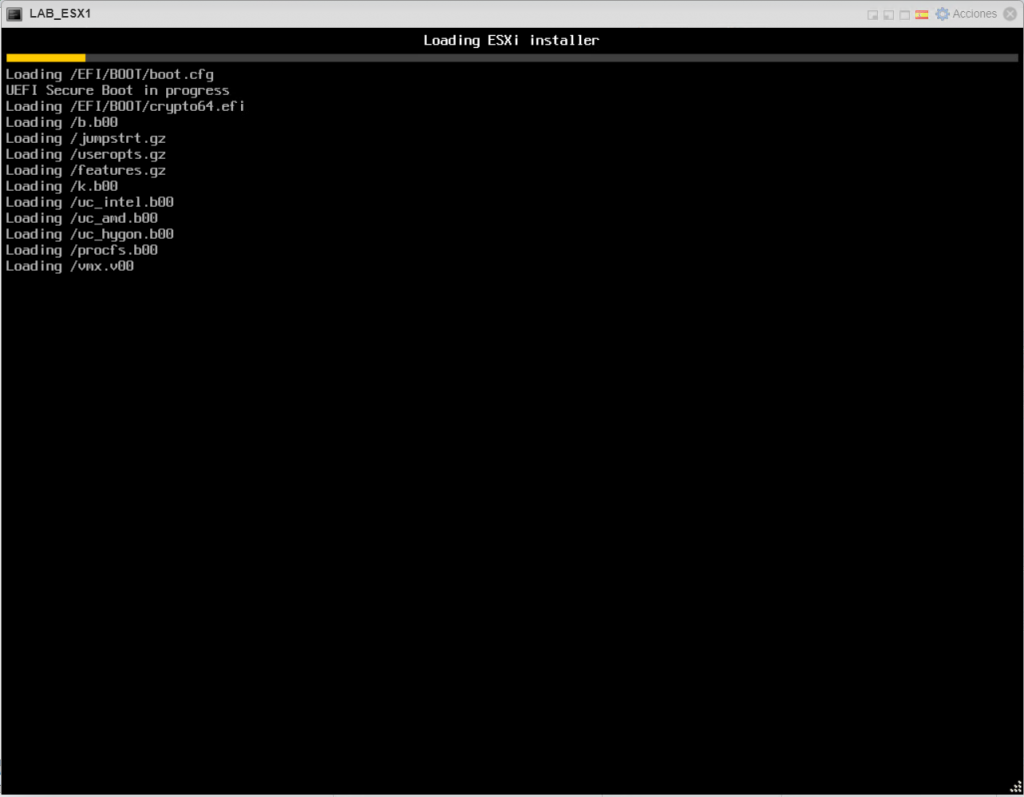
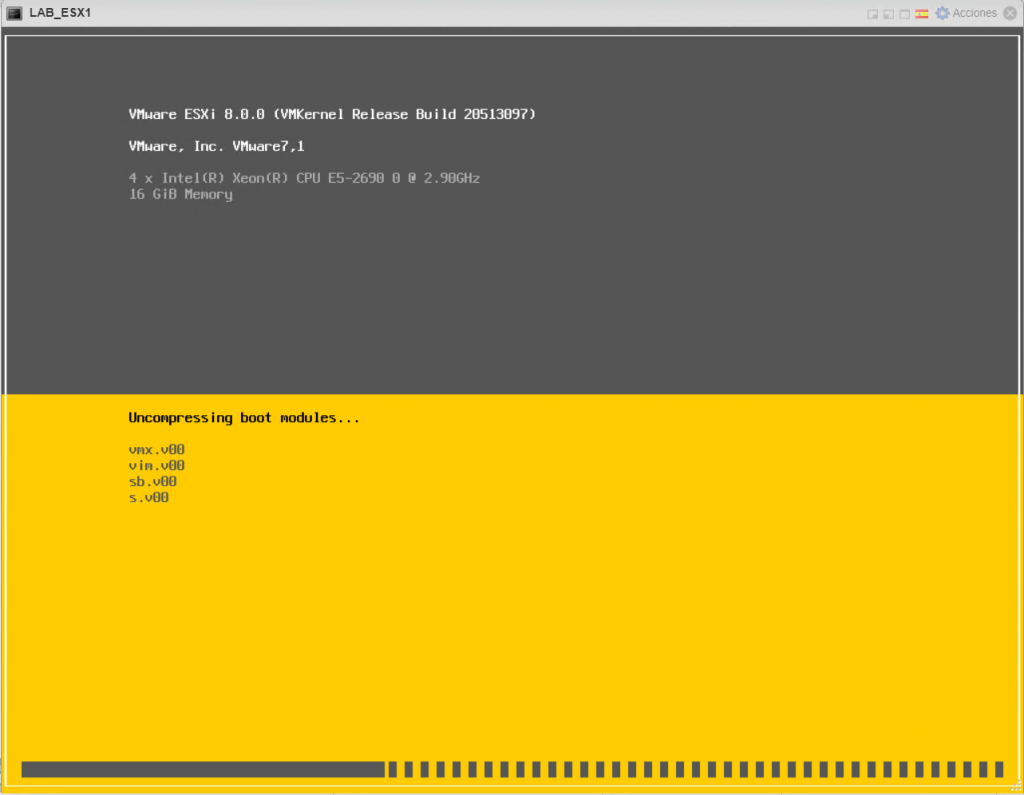
Continue loading. So far, we’re just booting the ISO and loading the files needed for installation into RAM.

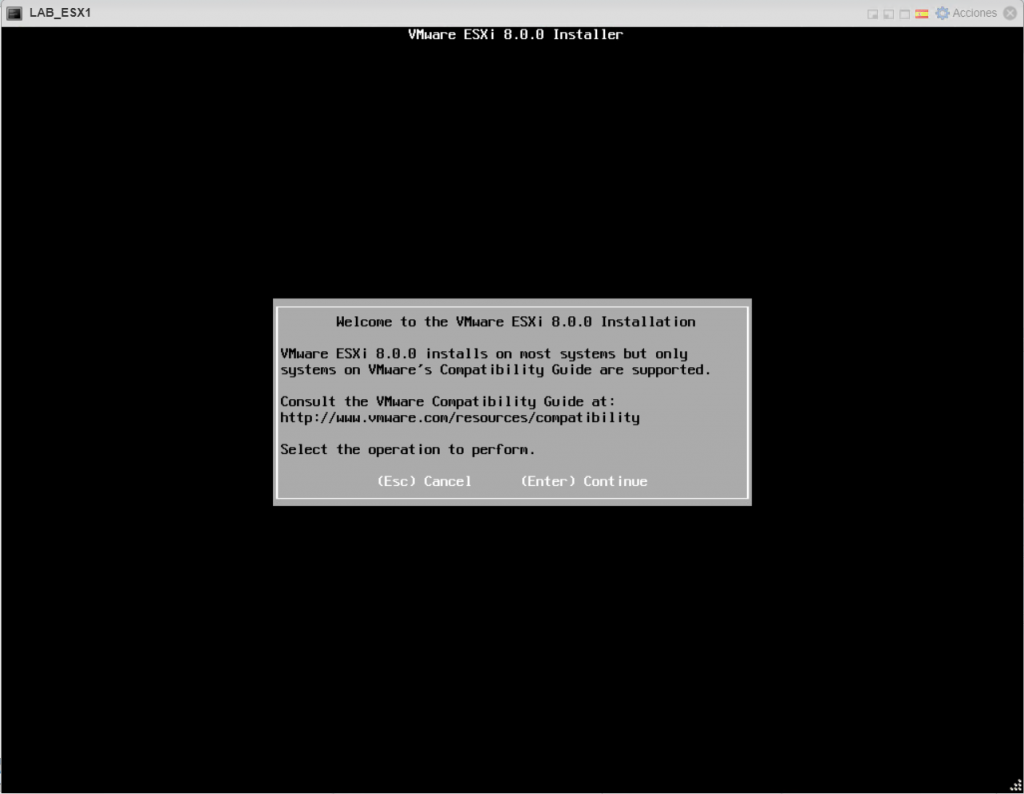
Press Enter to continue.

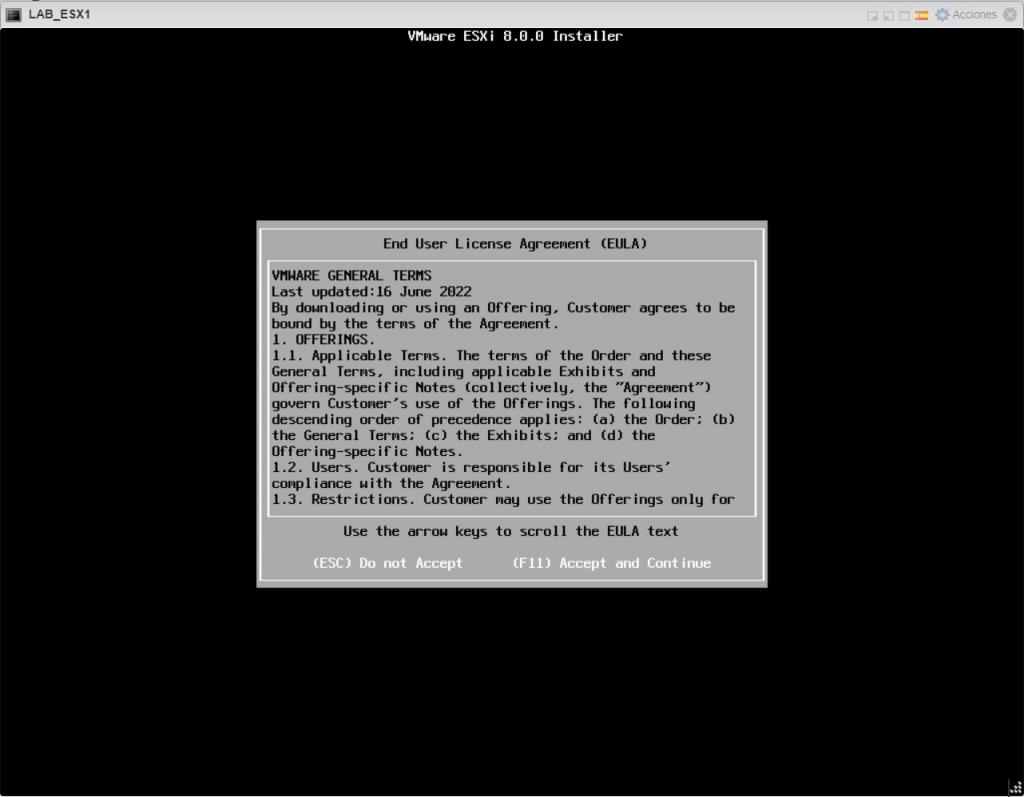
Press F11 to accept the EULA.

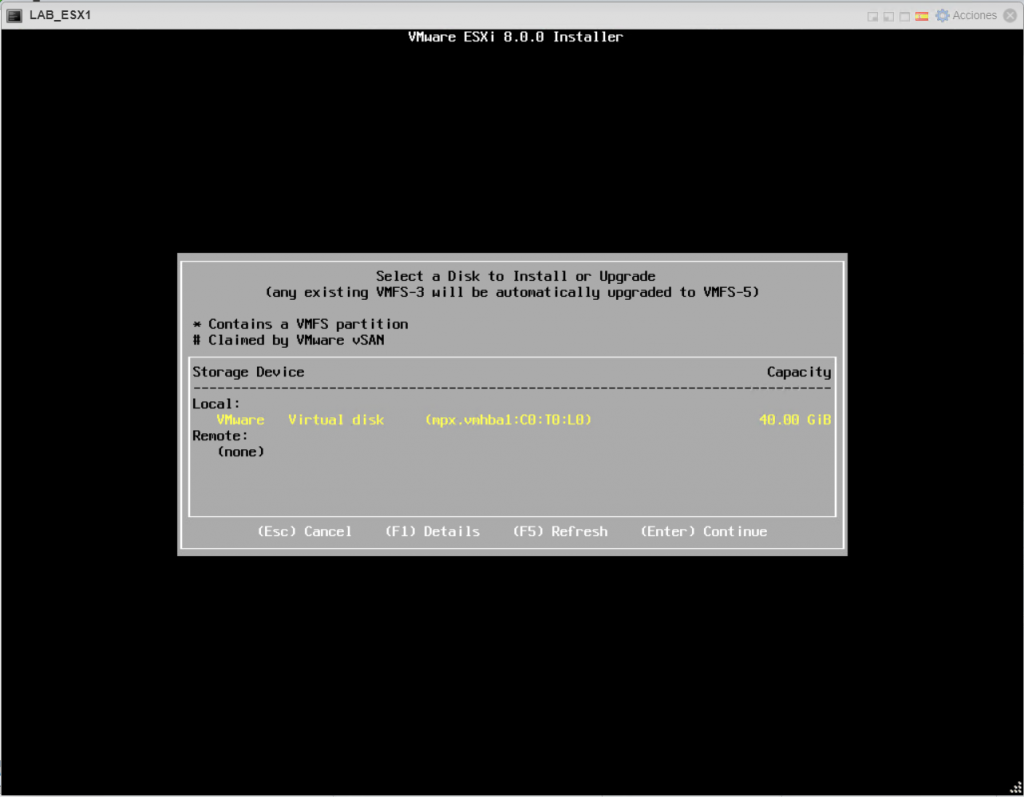
Select the disk where ESXi will be installed and press Enter.

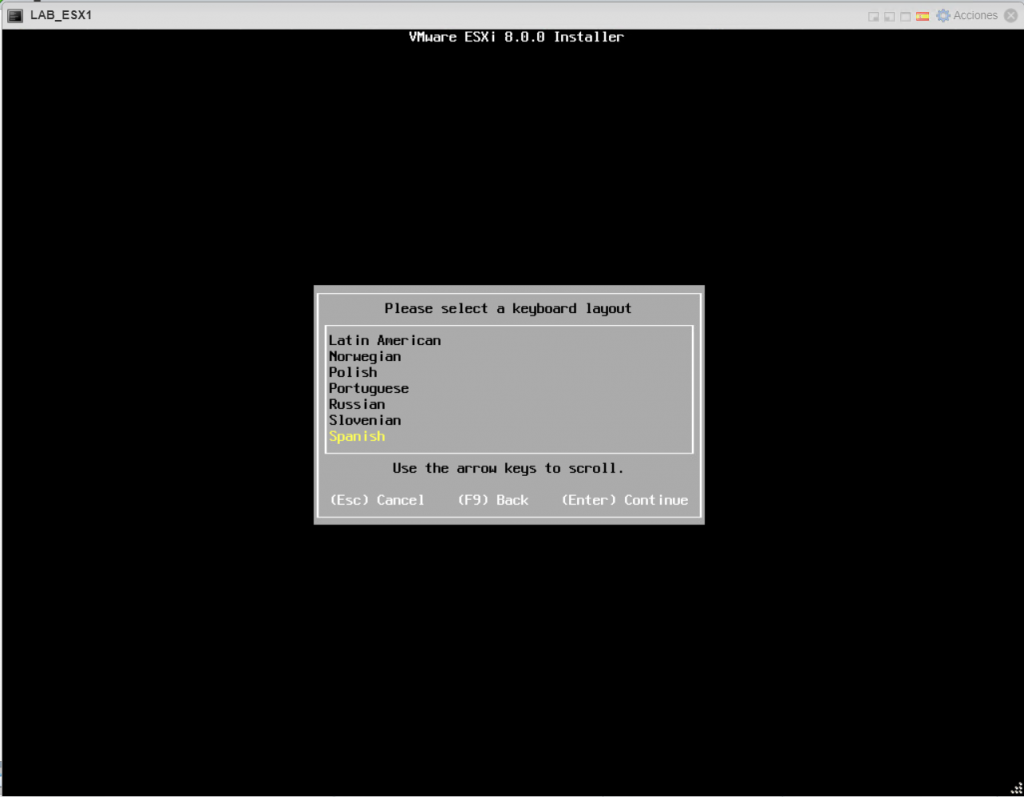
Select the language. In this example, I chose Spanish. You can change it later without rebooting.

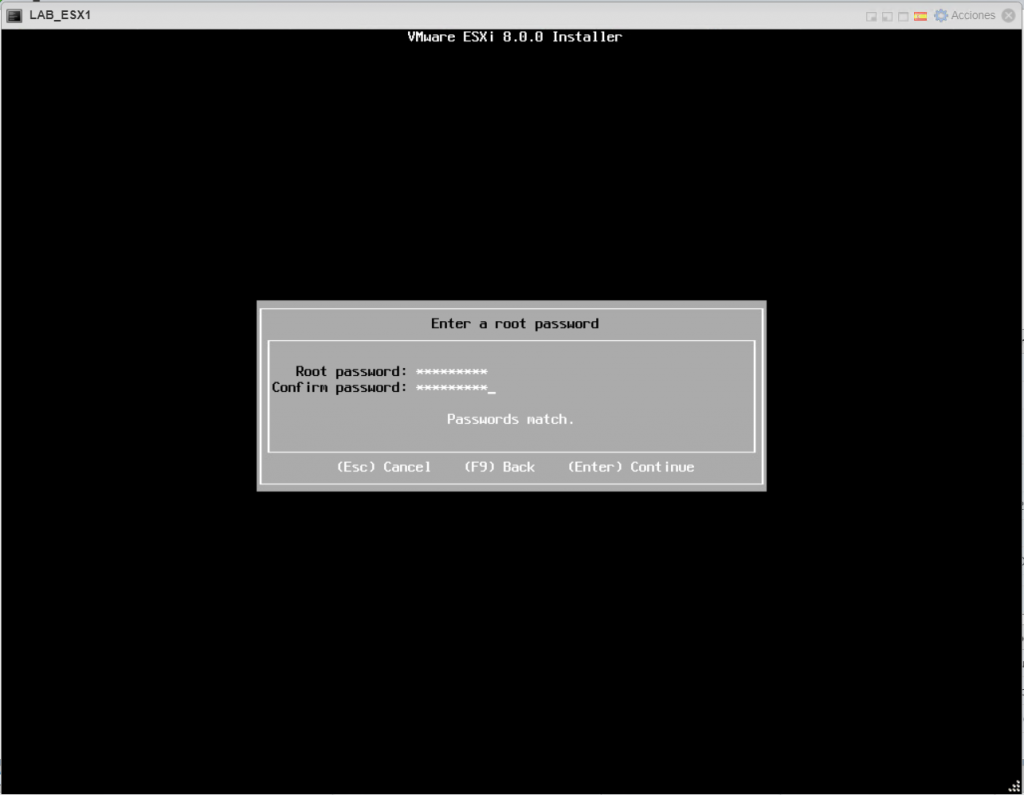
Enter the password for the ROOT user.

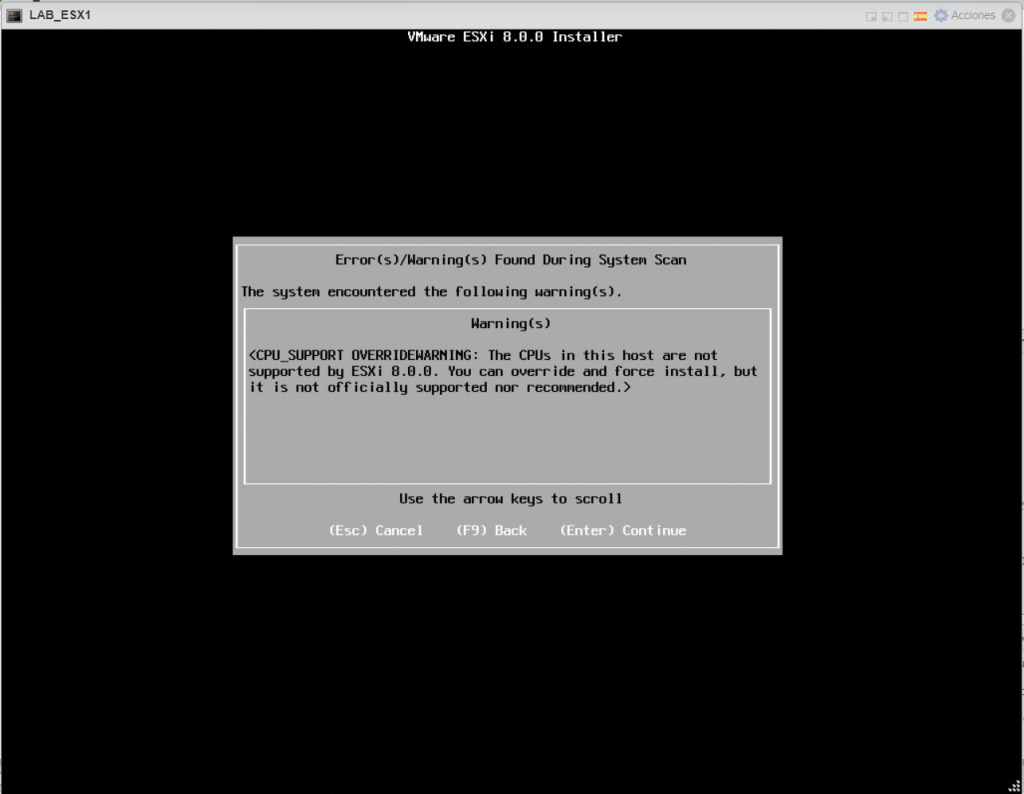
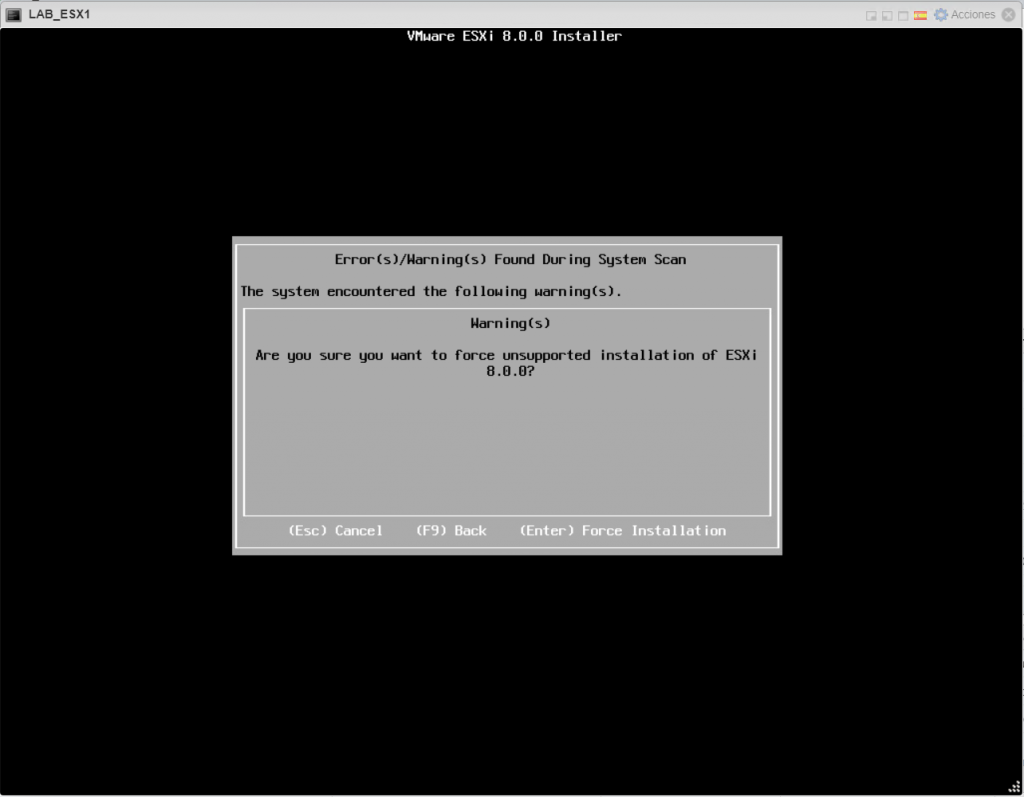
If you see the following warning, that’s expected because we’re installing on older hardware for a lab, not a production environment.

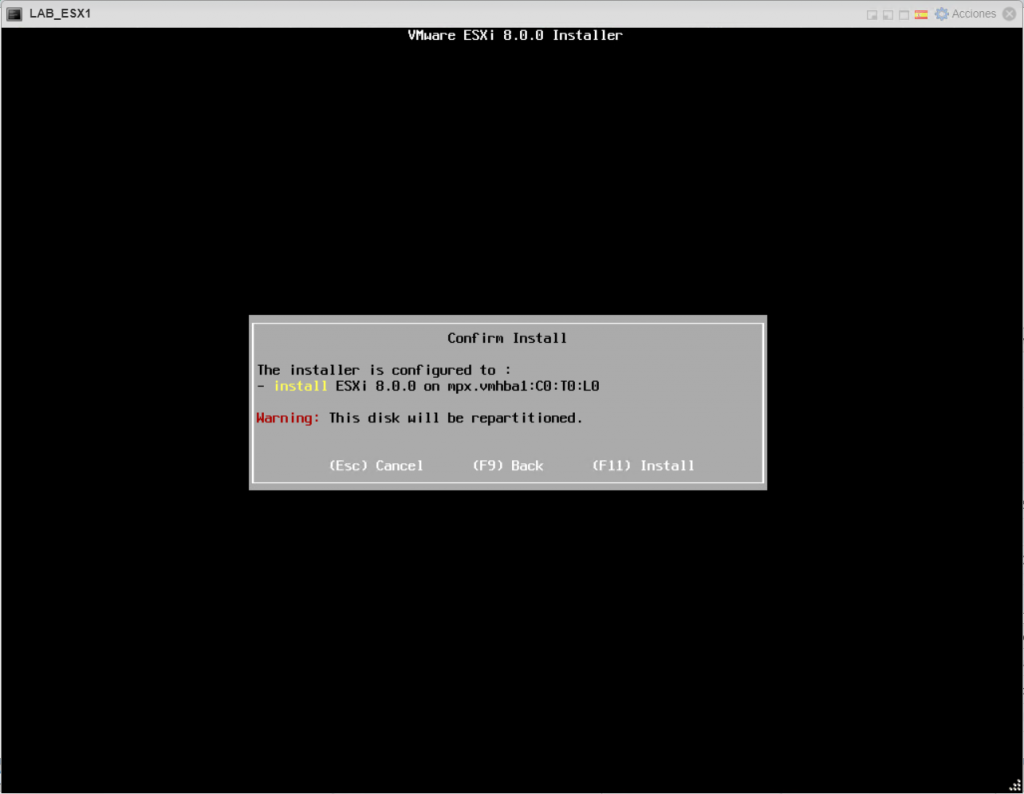
Now press F11 to install to the disk. Note that you’ll be warned that the disk will be repartitioned for the system.

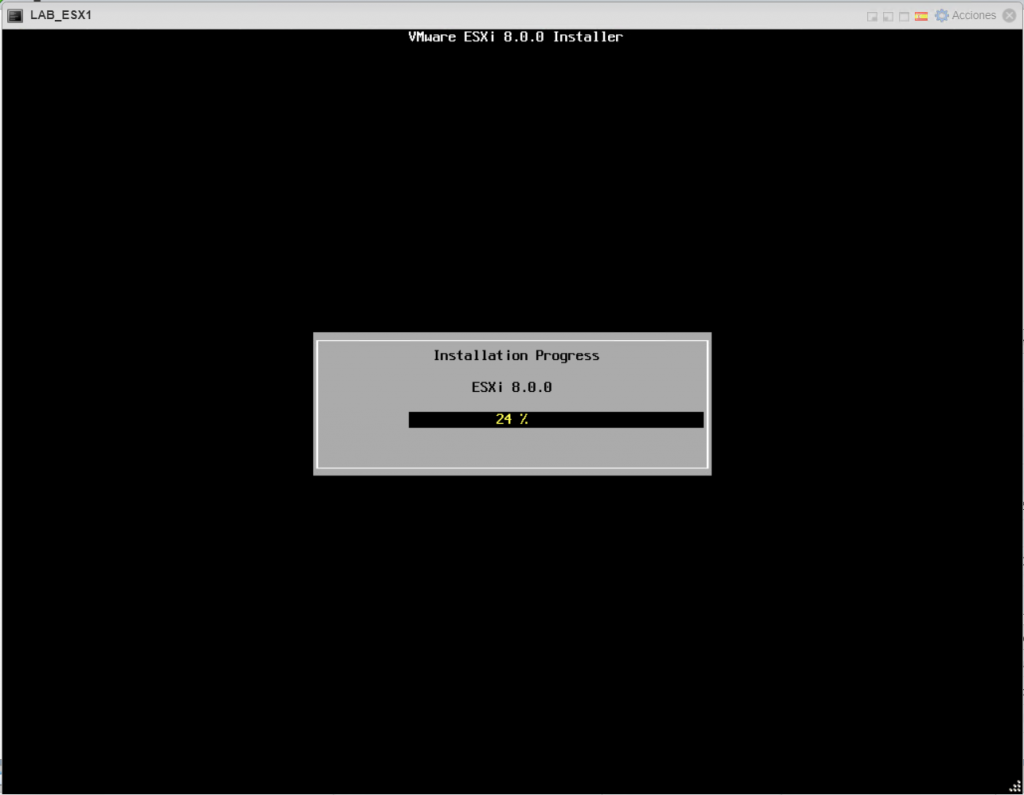
Installation in progress…

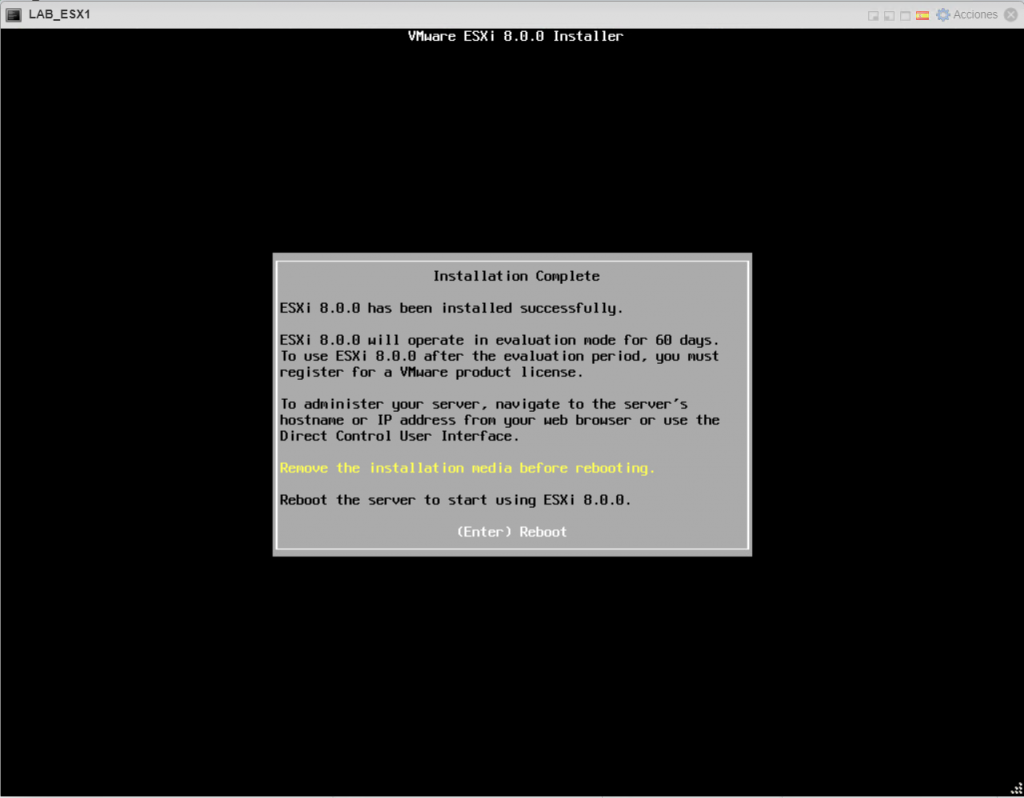
Done! Installation is complete.
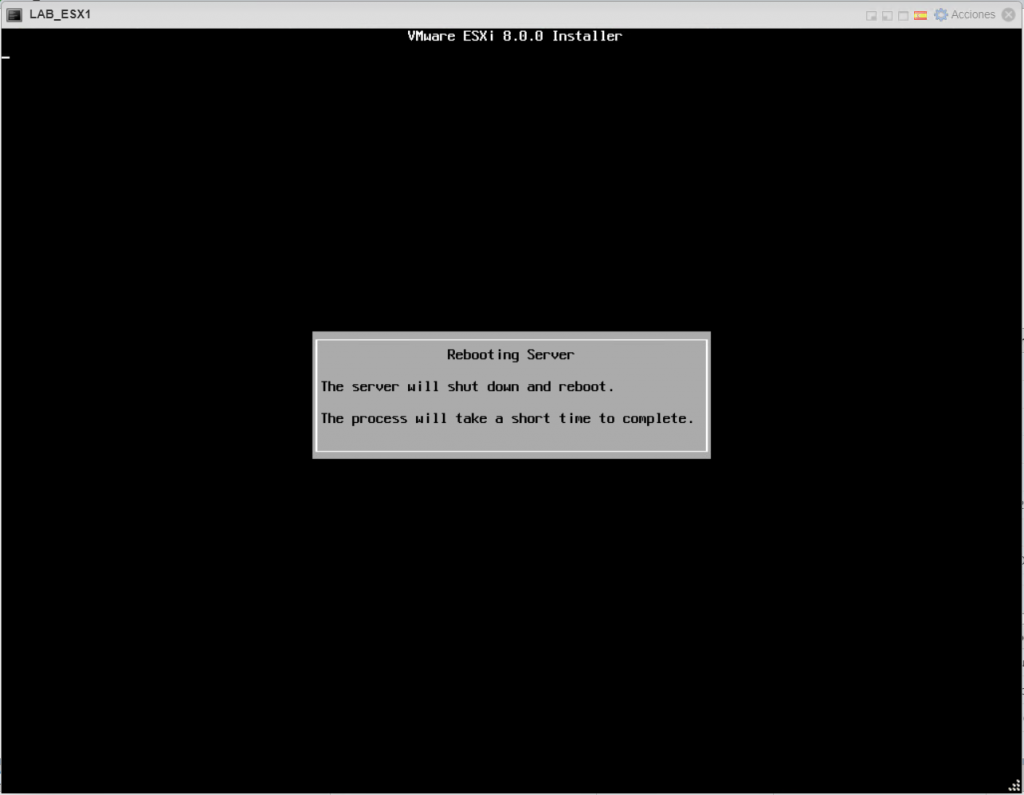
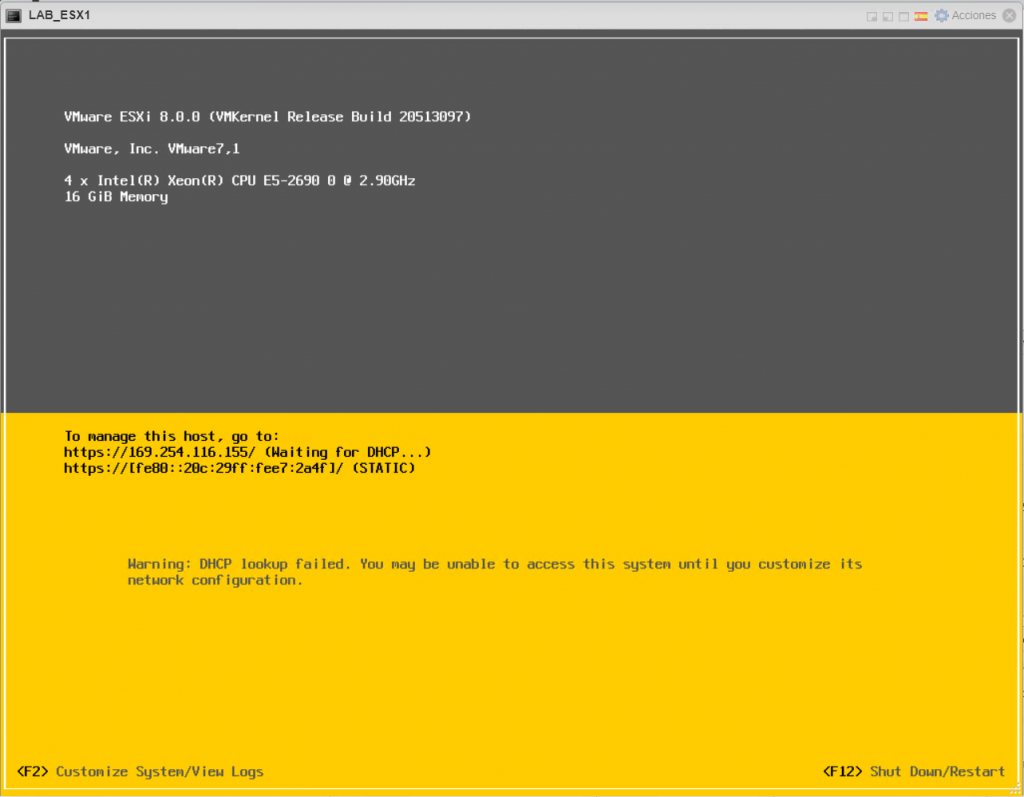
Remove the ISO, USB drive, or other installation media, then press Enter to reboot and start ESXi.

Important: if it doesn’t boot as expected, check that the BIOS boot device matches the one you selected during installation.

Installation is complete.
Next, we’ll move on to step 2: initial setup and access to the web console.

Regards.

VMUG Advantage

Hi! There’s a program for members of the VMware user group called VMUG Advantage.

For less than $200 a year, it gives you access to many VMware product licenses, including VMware Fusion, Workstation, the full vSphere suite, and more.

All you need to do is register with your local VMUG. There are many VMware user groups, so choose the one closest to you. Once you’re registered, visit this link to purchase it.

There are often discounts, so check social media and the VMUG website.

Deploying the Apache Guacamole OVA on vSphere

Hi,
I’ll give you a high-level walkthrough of deploying the Apache Guacamole virtual appliance and performing an initial setup of a user and RDP/SSH connections.

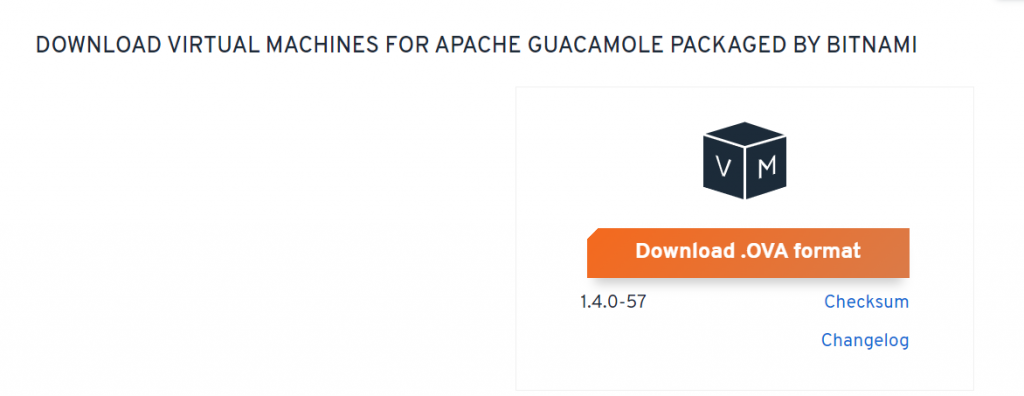
First, download the virtual appliance from Bitnami here  It is an OVA for vSphere.

Once downloaded, deploy it—in my case, on an ESXi host.

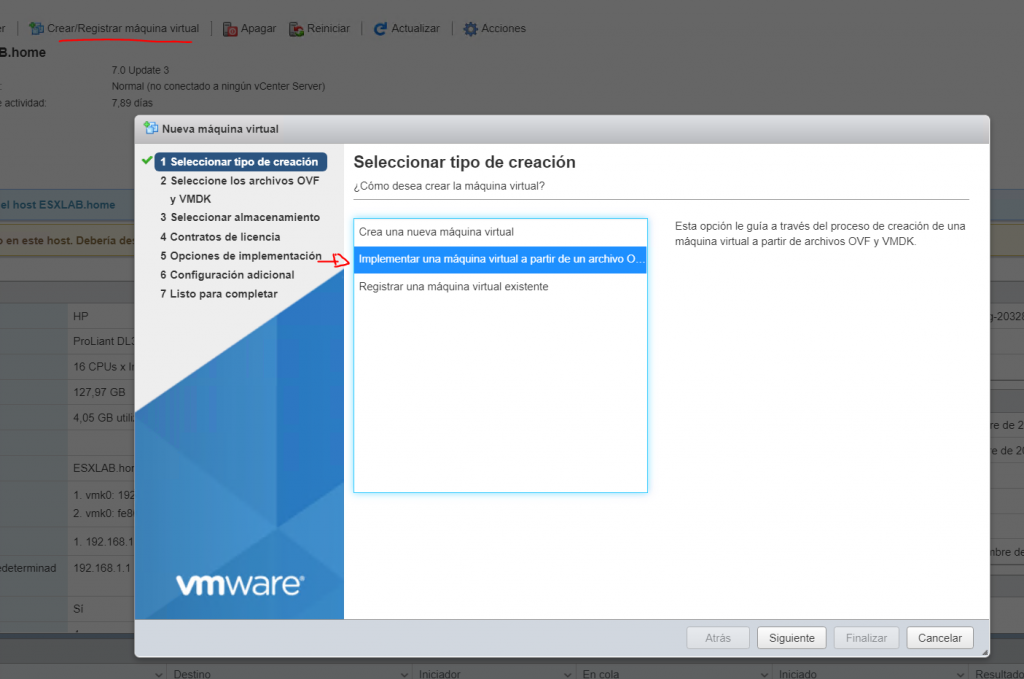
Create VM > Deploy from OVF or OVA file > Next

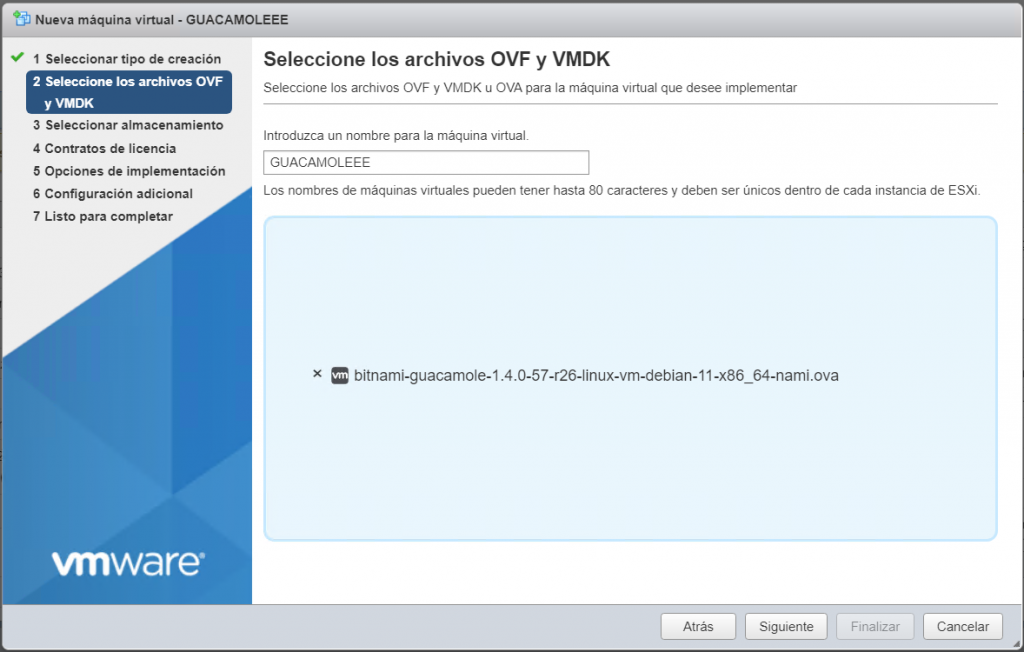
Name the VM, select the downloaded OVA, and click Next.

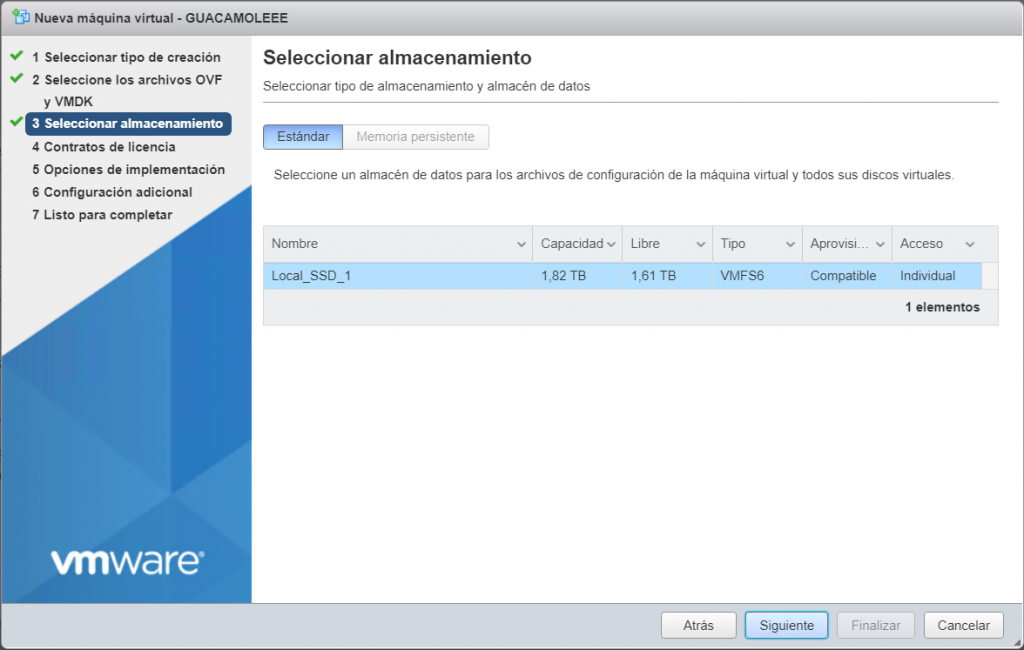
Select the datastore where you want to deploy it, then click Next.

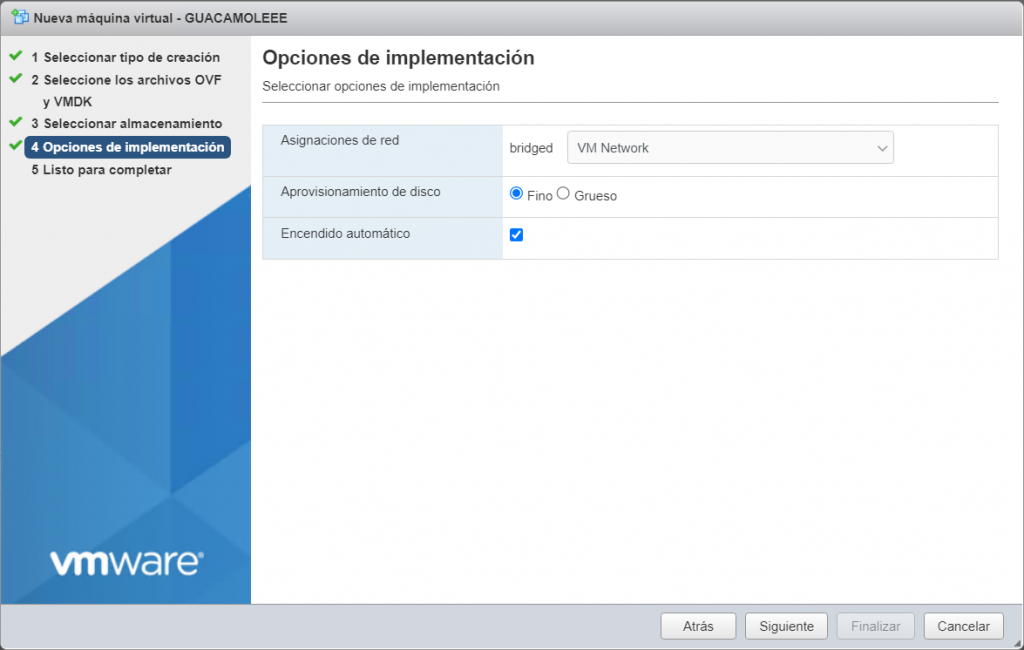
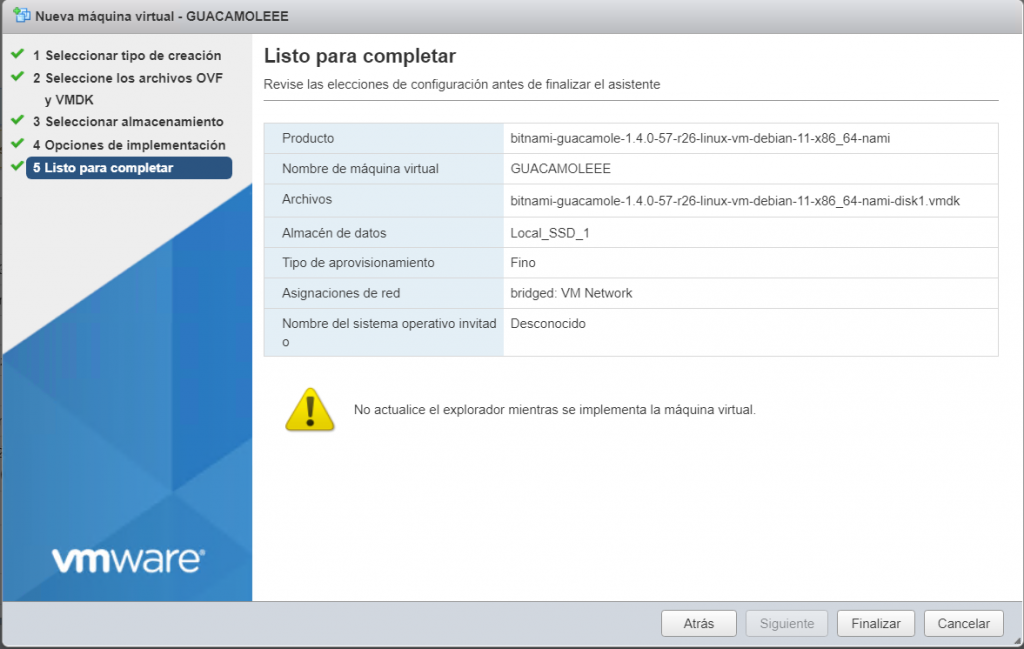
Select the network to connect it to and the disk provisioning option.

One detail: select a network that lets you reach the machines for which you’ll configure RDP, SSH, and VNC access.

Review the summary and finish.

After deployment, open the vSphere console to perform the initial setup.

It has received an IP address through DHCP.


Open the remote console.

Sign in to the console with the username bitnami and password bitami.

It will ask you to change the password after signing in.

If you want to configure a static IP address for your appliance, follow these instructions.

Now let’s secure it with a Let’s Encrypt SSL certificate.

To do this, we’ll use Bitnami’s Let’s Encrypt SSL tool

As a prerequisite, open ports 80 and 443 to the appliance’s IP address.
If you configured a static IP earlier, or a DHCP reservation, make sure those ports are open.

In the Apache Guacamole console, run this command:

sudo /opt/bitnami/bncert-tool

The process takes a couple of minutes. It will ask for the fully qualified domain name (FQDN) where Apache Guacamole is published (Domain List), for example, guacamole.yourdomain.com.

The domain must point to the public IP address where Apache Guacamole is published.

Answer the simple prompts:
Redirect HTTP to HTTPS: Yes
Email address for notifications
Accept the changes

Then finish.
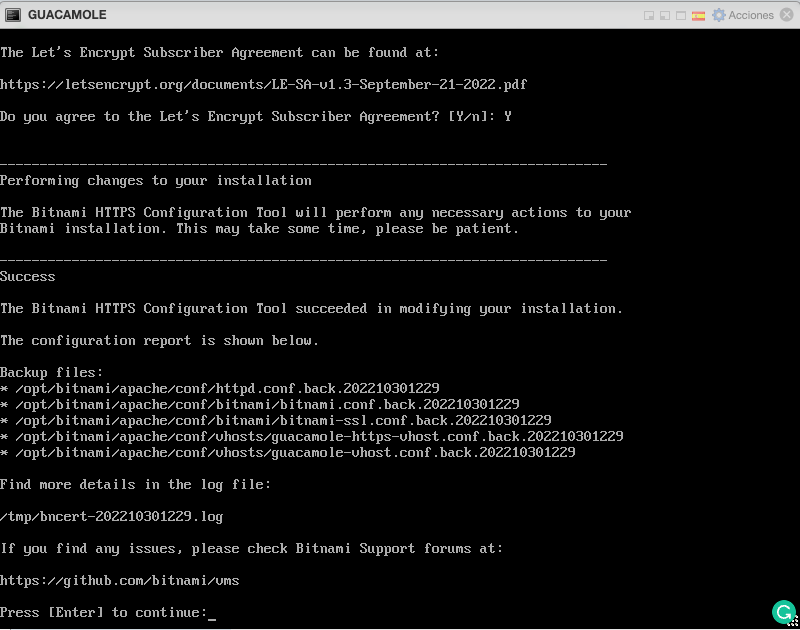
Here is the final process summary:


The process restarts the required services and enables Apache Guacamole over SSL!
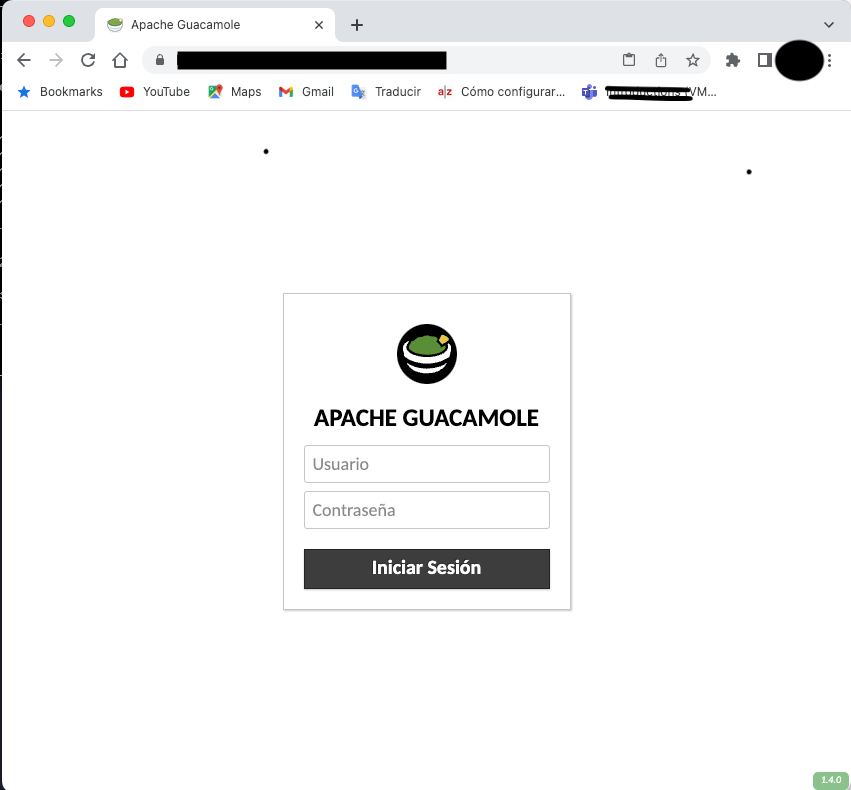
 We now have secure web access!

In the next post, I’ll show you the console and how to add an RDP and SSH connection.


Regards!