Installing Nutanix CE in Supermicro E300-9D – Initial Configuration

In our previous post, we installed the Nutanix CE in our Supermicro E300-9D server,
Now, is time to config initial aspects, to then continue running and setting up our Server.

This is how it looks right now:

Now, we are going to go to settings, top left menu, click and select Settings

Here, on the left, we can see all settings, lets navigate through them and configure some important aspects as shown on the screenshots:

I added the following details to my cluster:

We already know that the CVM is the Controller VM with takes care of all aspects of our Cluster, Storage, Compression, Dedup… etc.
From here, we can choose the memory size of our CVM, for now, 20GB to keep it “light” for the lab

Pulse
NTP
email alerting and digest

These were the “common” settings I normally touch / check the very beginning, now, lets jump into something super important, Inventory.
This means, looking for cluster updates, software, AHV, firmwares, drivers, etc.
Easy to use, Simple run an Inventory, if detects anything to be updated, follow the wizard….

We go to the menu top left, LCM, Perform Inventory,
follow the screenshots for more info:

Performing Inventory
Inventory done, lets check what is contains
We goto Updates menu, Software, and select the software we would like to update
Next
Warning before updating
wow, an error, lets check it out….
OK, is telling to us to perform an NCC Update, then check, and continue with the updates, so in this particular case, we select only NCC; and proceed with the update.
After the update, we come back to the LCM Menu, Pre-Upgrade check, NCC check.
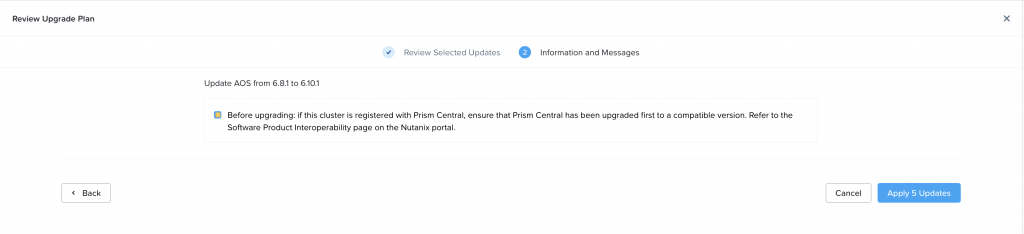
Now that this is done, we run a new inventory, and continue the process as described before, selecting the things to be updated, and running the shown update plan.
Boom! everything has been updated successfully, without any stress or complicated procedures.
This is how our main console looks after the update.

As you saw, there was an “error” in the update,
Just simple as a pre requirement to continue with the rest.
The menu is super user-friendly, well explained, and just with a few click, you can have your cluster updated and up and running, with no stress, no complex commands or consoles, etc.

Ah, one more thing, if you want to see your cluster status from the SSH console, simply login to the CVM, and run this command:

cluster status

We are almost there to start creating our first vm

see you in the next one.

Installing Nutanix CE in Supermicro E300-9D

After some time trying and playing around with the Nutanix CE in Nested mode in my lab,
I finally put my hands into a little monster able to handle a Single Node Cluster, My Supermicro E300-9D!

Im going to show you the process of Installation, cluster (Single node) creation, in future posts, we will continue seeing new stuff, step by step.

Let’s get started:

First of all, as we already know, lets download the Nutanix CE from the community portal, to do so, you must be registered, and after installation, you will need your restoration to make it work properly.

after downloading the CE ISO, lets boot from the ISO and get started…

Server Specs
Boot from USB
Nutanix CE Boot
Booting, loading the necessary files
Now is time to add some data,
I havee 3 disks, Boot, CVM and Data, choose the ones you would like to use, and then,
configure the IP Details as shown,
You need 1 IP for the AHV Host, One for the CVM, gateway and subnet mask.
EULA….
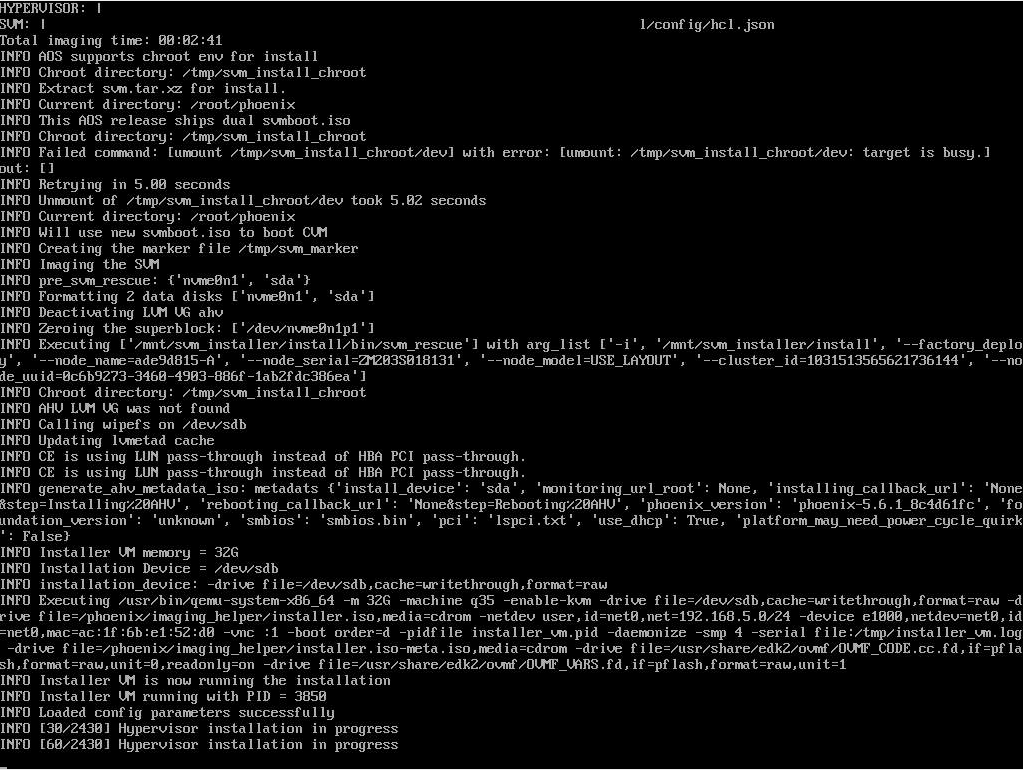
Installation process
after few minutes, done!
Now, is time to remove the boot media, answer with a Y, and continue…

Now, after the first boot of the server,
we are going to ssh to the AHV host, with the IP we setup earlier
username: root
password: nutanix/4u

then, from the AHV host, we are going to ssh to the CVM to the IP we also setup earlier,
in this case
username: nutanix
password: nutanix/4u

Now, we are into the CVM via ssh, its time to create the Cluster,
in this case, Single node cluster
the command I used is the following:

cluster -s <CVM IP> —-redundancy_factor_1 —-dns_server 1.1.1.1 create
Cluster creation process started
Cluster created successfully!!

Now, the cluster has been created successfully, lets see the server console.

Now, lets connect to the web UI to continue working on our new cluster

to connect, we will use the CVM IP Address and the port 9440

Default username: admin
Default password: nutanix/4u
Now, is time to change the admin password
And login
Here is an important step, we need to provide our Nutanix Community credentials, as we created them before to download the ISO, if you don’t have any, its time to create an account, 😉

Done!

Here is our beautiful WebUI of our Nutanix CE Single Node Cluster!!

I hope you like it,

this setup is in a physical server,
Supermicro E300-9D, 128GB RAM, 3 SSD disks.

In the next entry, initial config and run.

cheers!

Creating a Nutanix CE 2.1 Cluster

Hi, in this post I’ll show you how I created a three-node Nutanix CE 2.1 cluster nested on ESXi 8 in my lab, using a straightforward approach.

To download the software and start the cluster, you must be registered with Nutanix Community.

Sign in and open the following link, where you’ll find the files needed for installation. In my case, I used the CE 2.1 ISO.

Once downloaded, upload it to your ESXi host, as I did, so you can install the software.

Now let’s create the virtual machines that will become our three nodes.
Here are the specifications for the three VMs:

In the advanced configuration, I added a line so the virtual disks would have serial numbers:

In the VM settings, go to Edit > Options > Advanced > Edit Configuration and add the parameter.

Let’s continue with the screenshots and explanations.

One more detail: configure the vSwitch running the lab as shown below:
Enable promiscuous mode and forged transmits; otherwise, networking will fail.

Boot the CE installer on each VM and install the system, entering the requested settings. As you can see, the disks show serial numbers on all three nodes:

Accept the EULA and continue.

The installations are complete. Now reboot the last node, wait a little, and then create the cluster. Let’s get started:

Connect over SSH to one of the CVMs using one of the IP addresses we configured. From there, we’ll orchestrate the installation. The default username is nutanix and the password is nutanix/4u.

I’ve prepared the command. I’ll paste it below and explain it as clearly as I can:

cluster -s 192.168.101.21,192.168.101.22,192.168.101.23 --dns_servers=192.168.101.1,1.1.1.1 --cluster_name=NTX-LAB-1 --cluster_external_ip=192.168.101.20 create

This command creates a cluster named NTX-LAB-1 with external IP address 192.168.101.20 and the DNS servers shown. It will include the three CVMs ending in .21, .22, and .23.

Here you can see the tasks running on the different nodes and the services being created.

After a while, we get this result: the cluster was created successfully!

Here you can see the three running nodes, each with 32 GB of RAM, their disk usage, and more.

Now let’s open Prism and complete the initial setup so we can access the cluster. In a browser, enter the IP address of one of the CVMs or the external cluster IP configured in the command above:

It asks us to change the default password to one of our own.
After that, as mentioned, it will ask for your Nutanix community credentials. Enter them and continue.

Done!
We’re in our cluster!

Keep in mind that this is a test and learning lab, so the cluster is running nested and uses quite a lot of resources.
Each node has 32 GB of RAM and 4 vCPUs. The disk uses thin provisioning, but it still takes up space.

Next, we’ll start tuning it before deploying our first VM and more.

The first change I like to make is to set the NTP server so everything has the correct time from the start:

Go to the top menu and select Settings.
Scroll down to Networking and select NTP Servers.
Add a trusted server, and you’re done.

Regards.

Initial Configuration of Our Nutanix Community Edition Single-Node Cluster

In the previous post, we covered the installation and first boot of our Nutanix Community Edition single-node cluster. You can find it here.

Now let’s go through the initial settings I applied to get everything configured before deploying our first VM.

Let’s connect to the cluster using the CVM IP address, sign in, and get started:

On the home screen, open the menu in the upper-right corner and go to Settings.
Change the cluster name to one you prefer. You can also set an FQDN and virtual IP address.
Here you can see how much RAM is allocated to the CVM.
Pulse is important. It reports cluster issues to Nutanix. Even though we’re using the Community Edition, it’s useful to report problems and receive information about future issues, KB articles, and more.
Review the DNS servers. We added one in the previous post, but we can change it or add another now.
Configure NTP to keep the time and date accurate.
I like to receive email reports and alerts. The cluster sends them through Nutanix, and everything looks good!

Now let’s personalize the system further by running an inventory.

In AHV, this scans the system’s software and firmware for updates, issues, fixes, and more.

Open the menu again and go to LCM.
Click Perform Inventory.
It takes a little while, but that’s fine. When it finishes, we can review the results.
In my case, the menu shows a software update is available.
Open it and select the update to apply.
It shows the update plan. Let’s apply it.

Once complete, everything has been updated successfully. Great!

Finally, the system flags a few warnings, including prompts to change the passwords for system users such as admin, root, and Nutanix.

We changed the admin password after installation so we could access the web administration interface, so we can consider that warning resolved.

To change the root user’s password, connect to the host over SSH and run the standard Linux command: passwd root. Then follow the prompts.

For the Nutanix user, connect to the CVM over SSH using the IP address configured during installation, and change the password in the same way: passwd nutanix. Then follow the prompts.

Regards.

Nutanix Community Edition: Single-Node Cluster

Hi!
I’ve been looking at other virtualization options for a while, and this one caught my interest.

Nutanix developed its own CVM (Controller VM), which runs the services needed for HCI, as well as its own hypervisor, AHV.

They have also made the Community Edition available to the public,

which includes the hypervisor, CVM, and Prism management. It supports up to four disks per node and up to four nodes in a cluster—great for trying out and learning the product.

Now I’ll show, with screenshots and explanations, how to deploy Nutanix CE in my lab. In my case, it is nested on an ESXi 8 host as a single-node cluster.

A single-node cluster is a one-node cluster with the CVM, Prism, and network and storage management capabilities. It’s a cluster with just one member, which is useful for certain applications and, in our case, for an initial introduction.

Let’s go…

Open the following link and follow the simple steps: register with the community, download the ISO from a forum post, and continue with the setup.

Nutanix requires resources. In my case, the machine running the single-node cluster had
4 vCPUs, 32 GB of RAM, and three disks: 64 GB for the system, a 200 GB SSD, and a 400 GB HDD.

Let’s start by creating the VM in ESXi.
Here are the initial specifications: disks, NICs, vCPUs, and so on.
The installer boots from the ISO.
At this step, the installer selects the disks automatically. Leave its selections in place, then enter the IP addresses: one for the host and another for the CVM (Controller VM) on each node, along with the DNS server.
Accept the terms and conditions.
Done! After a while, the installation completes. Eject the ISO, answer yes, and let’s continue.
Our AHV is now running inside the VM.
It takes a while because it needs to start all the services in the CVM and then run the post-installation scripts. I left it alone until these results appeared in the VM console.
Let’s get started. In a browser, enter the CVM IP address we configured earlier, using HTTPS.
It will ask us to change the predefined password, nutanix/4u, to a different one.
Here it asks for our community credentials to license the node or cluster.
Boom! There’s an error: no DNS server is configured on the CVM, so it cannot register. Let’s fix that.
Connect to the node over SSH using the IP address configured at the start. The username is root and the password is nutanix/4u.
From the node, connect to the CVM over SSH. Use the IP addresses configured earlier; the username is admin and the password is nutanix/4u.
Here’s the command to add a DNS server to the CVM network configuration:
ncli cluster add-to-name-servers servers=1.1.1.1

I chose 1.1.1.1 as an external DNS server. If you have an internal DNS server, you can use that instead.

Now it accepts the configuration. Let’s continue.
Here it is: the first screen of our working single-node cluster!
This is a single-node cluster with one host and one block, running the AHV hypervisor.

That’s all for this post. In a future post, we’ll tune the environment and create our first inventory to check that everything is up to date and apply any available updates.

We’ll also try different network and disk configurations.

It’s a great way to try AHV and get an introduction to Nutanix features.

Regards.