Hi there: After months of thinking, I took the step to switch my lab to Proxmox, I’ve been a Vmware «guy» for many years, but I knew the time came to give it a try, after many companies switching to it.
I decided to re-use the hardware I had from previous projects, to see the capabilities and «how tiny» the setup could be.
After some time trying and playing around with the Nutanix CE in Nested mode in my lab, I finally put my hands into a little monster able to handle a Single Node Cluster, My Supermicro E300-9D!
Im going to show you the process of Installation, cluster (Single node) creation, in future posts, we will continue seeing new stuff, step by step.
Let’s get started:
First of all, as we already know, lets download the Nutanix CE from the community portal, to do so, you must be registered, and after installation, you will need your restoration to make it work properly.
after downloading the CE ISO, lets boot from the ISO and get started…
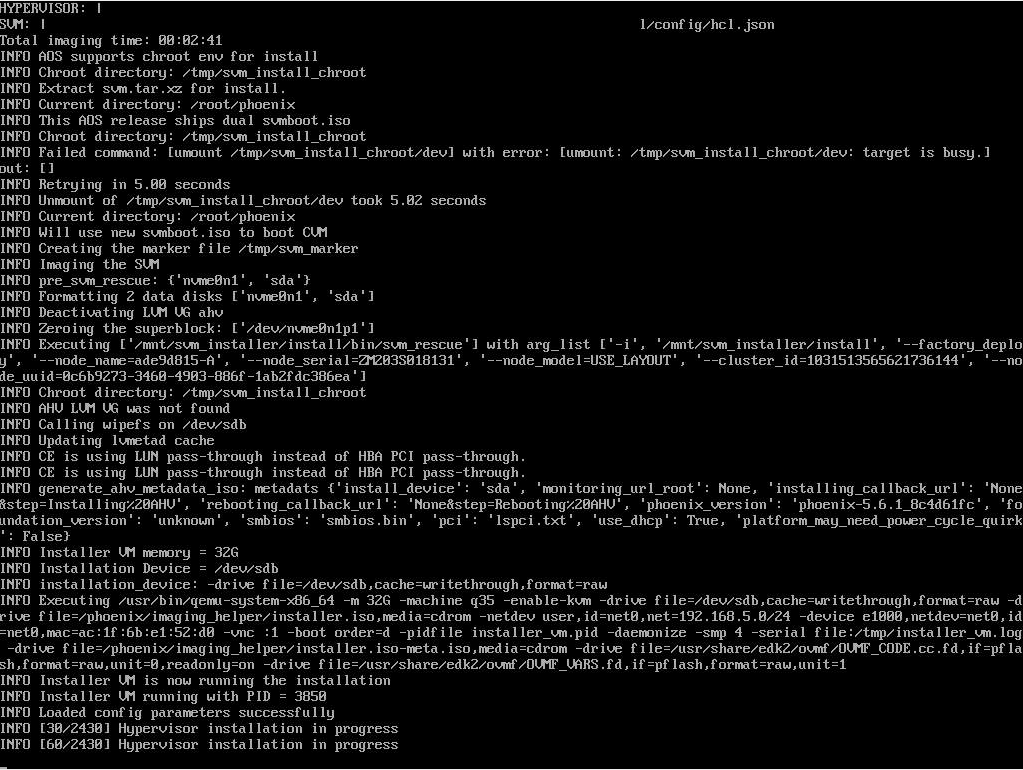
Server SpecsBoot from USBNutanix CE BootBooting, loading the necessary filesNow is time to add some data, I havee 3 disks, Boot, CVM and Data, choose the ones you would like to use, and then, configure the IP Details as shown, You need 1 IP for the AHV Host, One for the CVM, gateway and subnet mask.EULA….Installation processafter few minutes, done! Now, is time to remove the boot media, answer with a Y, and continue…
Now, after the first boot of the server, we are going to ssh to the AHV host, with the IP we setup earlier username: root password: nutanix/4u
then, from the AHV host, we are going to ssh to the CVM to the IP we also setup earlier, in this case username: nutanix password: nutanix/4u
Now, we are into the CVM via ssh, its time to create the Cluster, in this case, Single node cluster the command I used is the following:
Cluster creation process startedCluster created successfully!!
Now, the cluster has been created successfully, lets see the server console.
Now, lets connect to the web UI to continue working on our new cluster
to connect, we will use the CVM IP Address and the port 9440
Default username: admin Default password: nutanix/4uNow, is time to change the admin password And loginHere is an important step, we need to provide our Nutanix Community credentials, as we created them before to download the ISO, if you don’t have any, its time to create an account, 😉
Done!
Here is our beautiful WebUI of our Nutanix CE Single Node Cluster!!
I hope you like it,
this setup is in a physical server, Supermicro E300-9D, 128GB RAM, 3 SSD disks.
Tras estar de remodelación en el Laboratorio, que se ha convertido en un «borrón y cuenta nueva», estaba echando de menos un servidor DNS, simplemente DNS, para poder hacer pruebas, resolver interno y a la vez usarlo en casa con un poquito de filtrado.
Primera idea, un Windows server, pero era demasiado, y VM siempre corriendo, y la idea es poder apagar el laboratorio (Consumo de luz, y que sino me echan de casa!)
Así que me puse a mirar a mi alrededor, y Boom!!!!
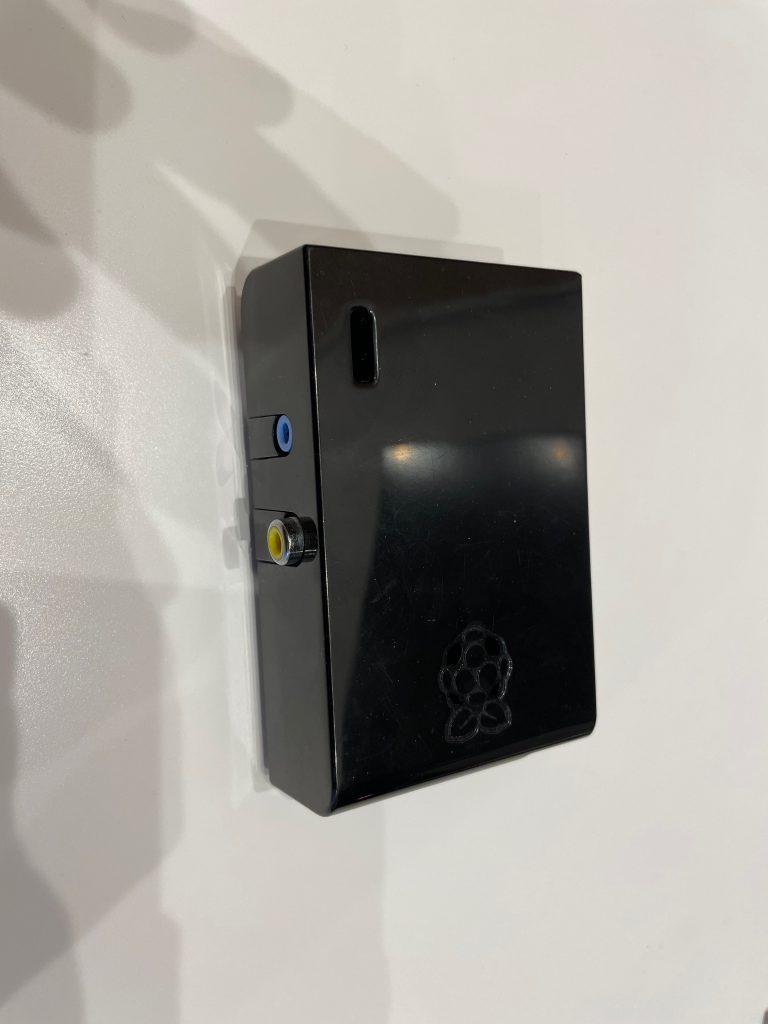
Raspberri Pi vieja vieja…. HDMI «Grande» y salida RCA de video!!!
Ahí me dije, si solo quiero un DNS, y que no meta ruido y consuma poco, a ver si podemos echarla a andar….
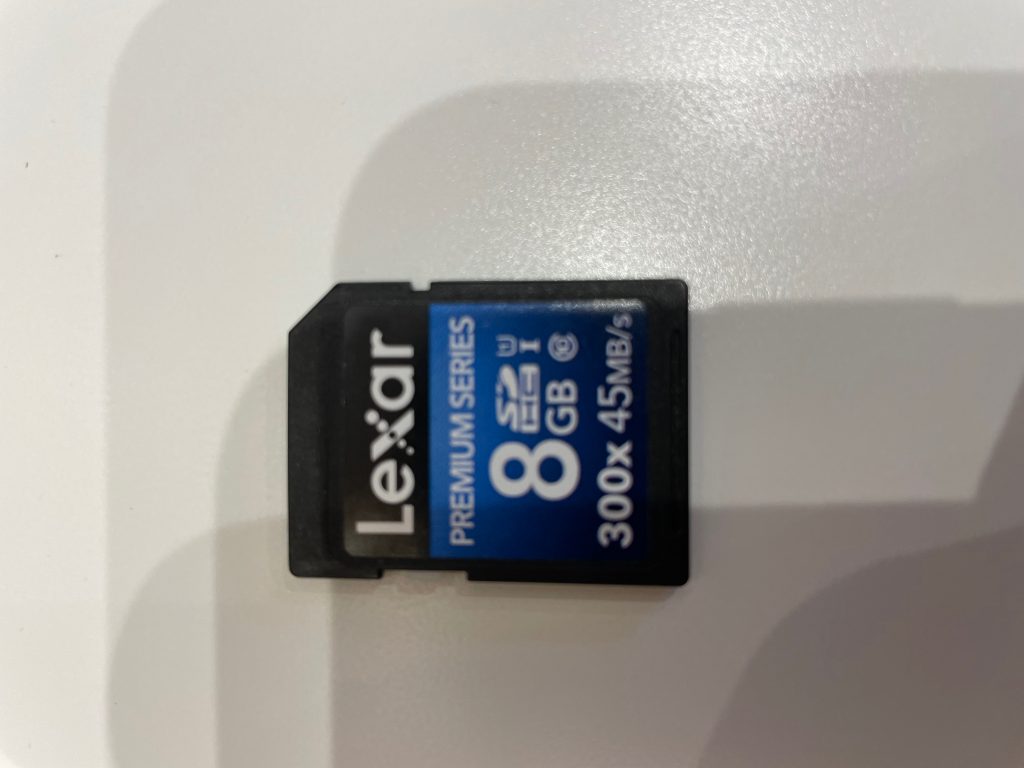
Muy noble mi Pi, arrancó, ahora, a buscar una SD «grande» para poder hacer algo.
Os acordais de esto? XD una SD!!
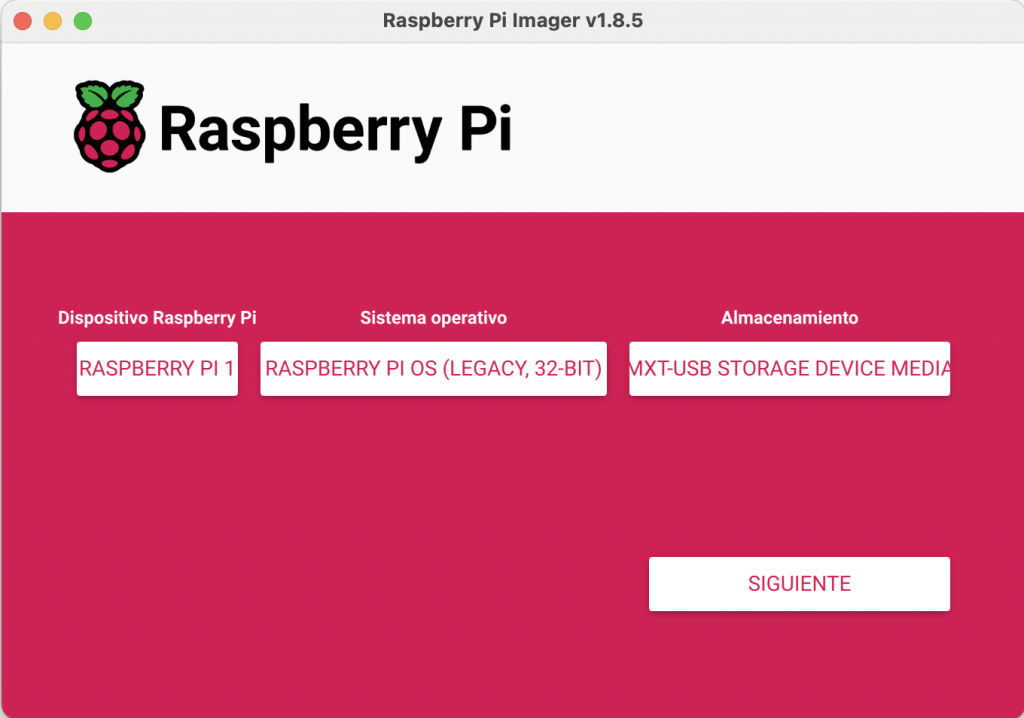
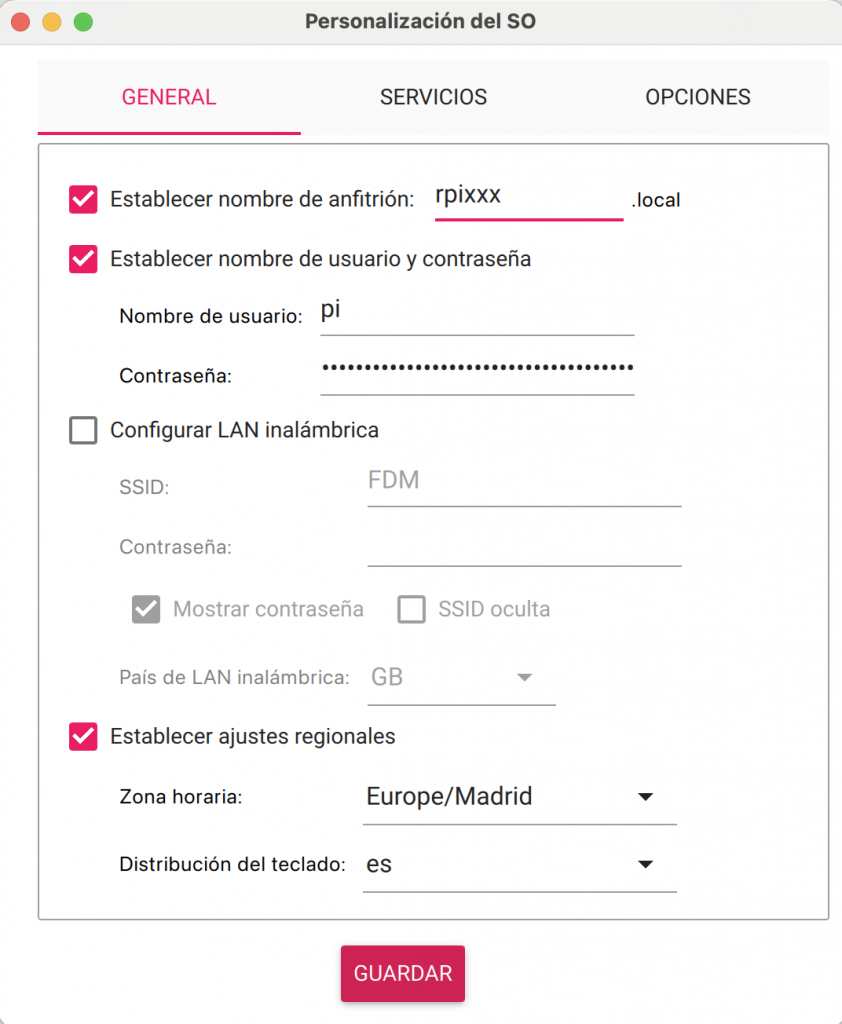
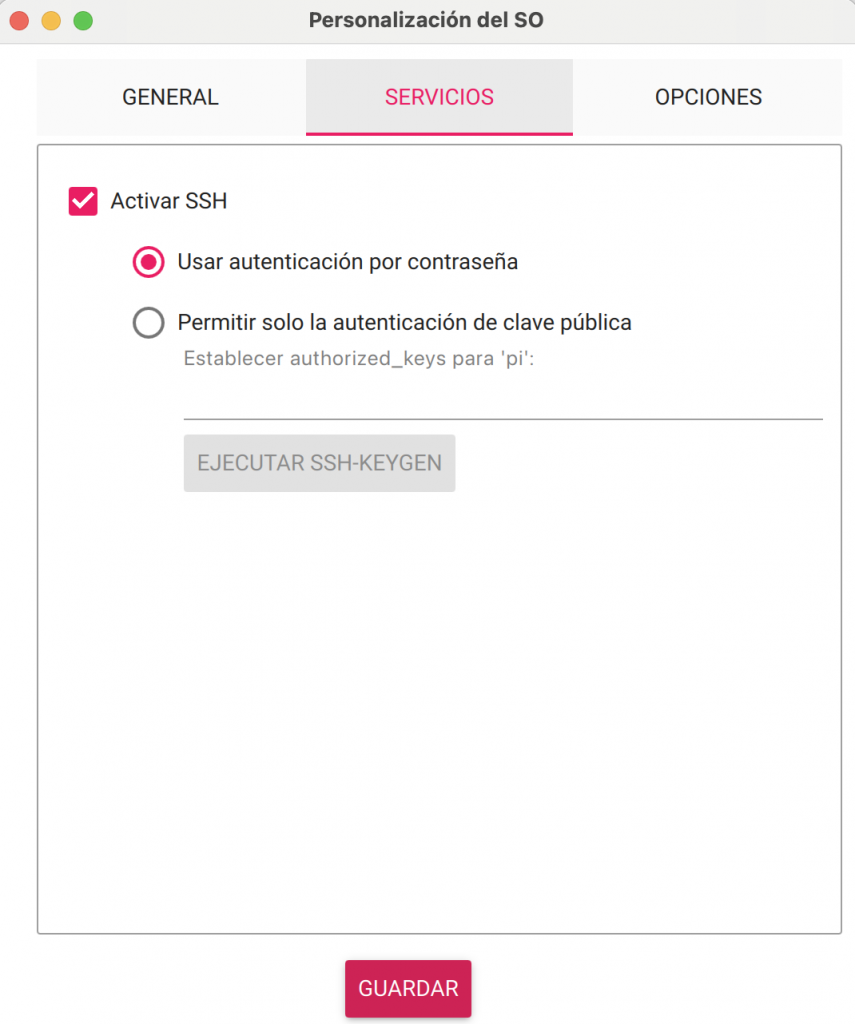
Ahora, solo quedaba bajarse la app para preparar la tarjeta, en mi caso, uso Mac, por tanto usaremos el Raspberry Pi Imager:
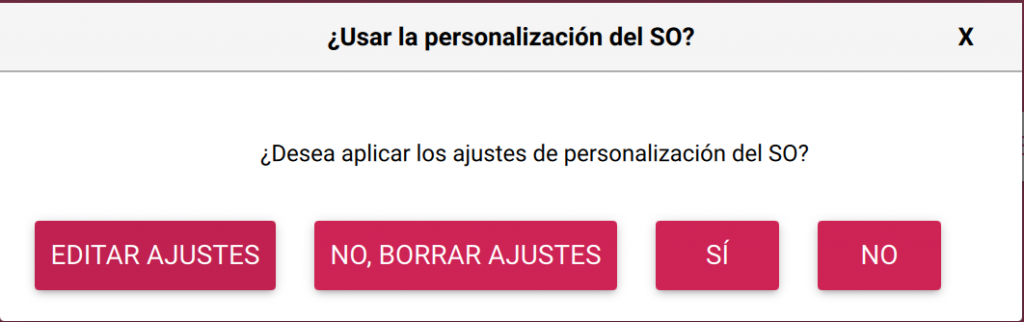
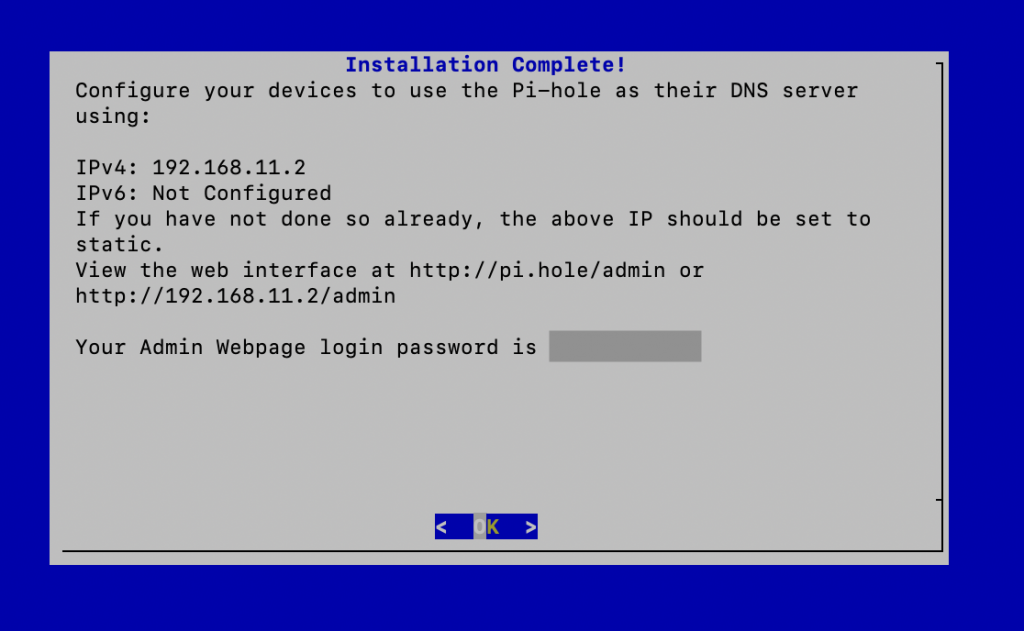
Con unos sencillos pasos, llegamos a una ventana final, en la cual , nos indica el password de acceso a la consola web, el cual debemos guardar, ya que luego desaparece, y si queremos volver a acceder, debemos resetearlo. Leer las pantallas, ya que son preguntas muy sencillas, como la consola de administración web, etc. Recalcar que desde el wizard podemos poner IP estática a la raspberri, o dejarla por DHCP, dependerá de vosotros, en mi caso tiene IP estática, ya que más adelante, la usaré como servidor DHCP también!
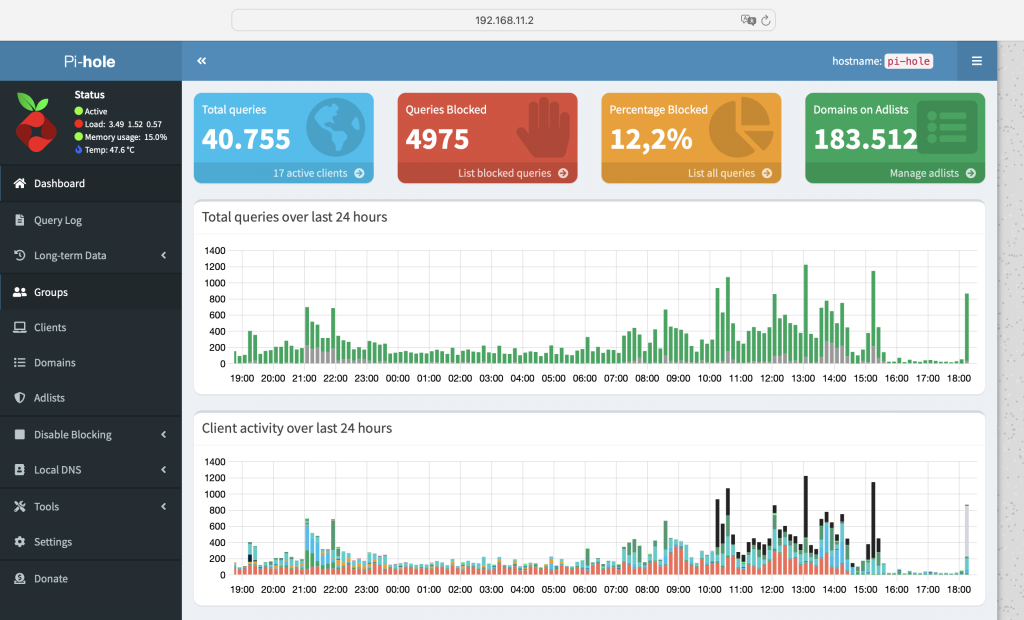
Accedemos, y se verá la consola así:
Ahora ya solo queda que cambies en tu DHCP el DNS que entrega por la IP de tu Pi-Hole, y estarás en marcha.
Es muy intuitiva y fácil de usar, podemos activar varios proveedores de DNS, como Comodo, OpenDNS, Google, etc. Bloquear dominios listados en adlists, añadir nosotros blacklisted domains, hacer entradas DNS propias, etc…
I had a case during this week, and I wanted to share my experience / workaround with y’all.
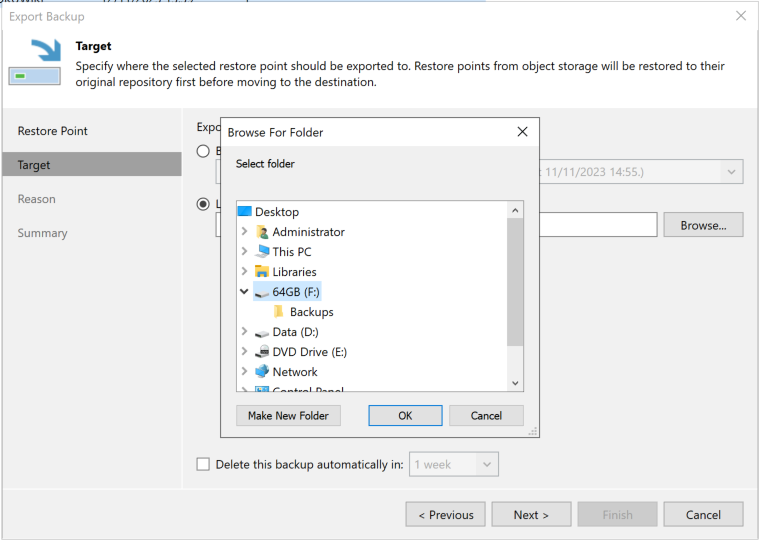
I wanted to export a backup to an external drive, the VBR was a virtual machine, and no access to the Hypervisor to plug the USB and push it to the vm.
Now you may think, mount it somewhere and share it over the network as a shared folder…
I did, and was not working, some windows stuff that we were not allowed to share any unit, and was driving us crazy!
We did some research, and remembered that there was a way to share / mount remote USB Devices over the Network! now, time to give it a shot!
The idea is very straight forward, a Server machine, where the USB Devices is located at, and a client, to mount the remote resource as “local”.
USB SERVER(Local USB Drive)→NETWORK→USB CLIENT“Remotely mounted USB Drive”
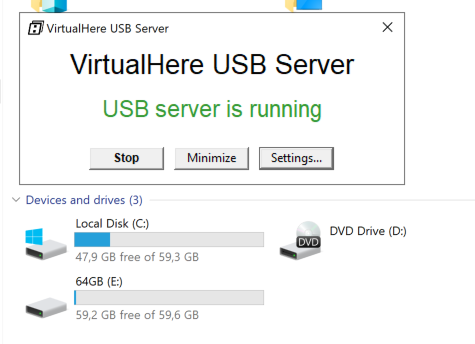
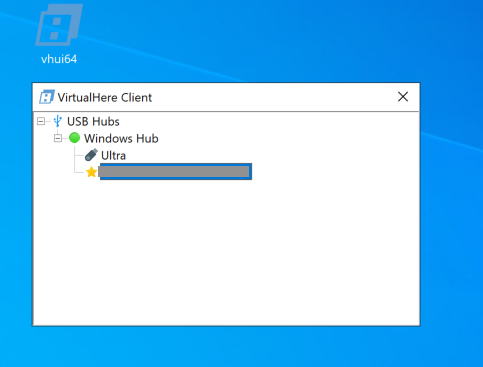
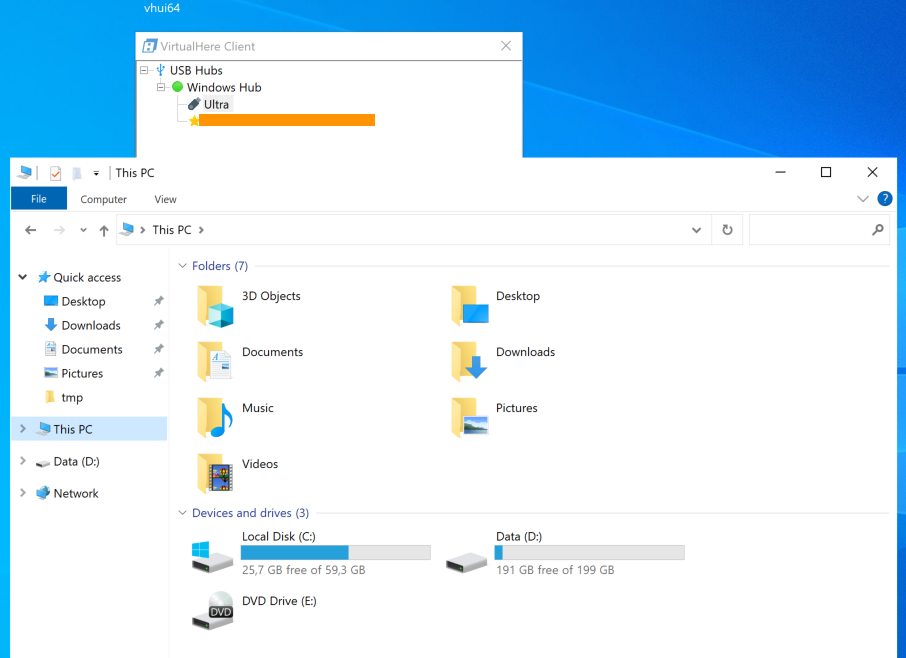
You simply download the Server and client, and execute them in the decided machines, couple of easy configs, and you are good to go, let me show you some screenshots.
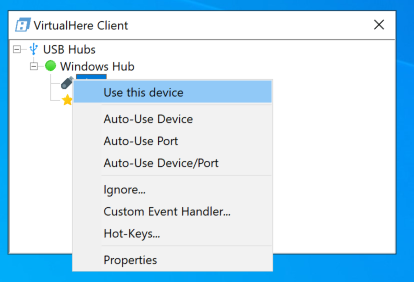
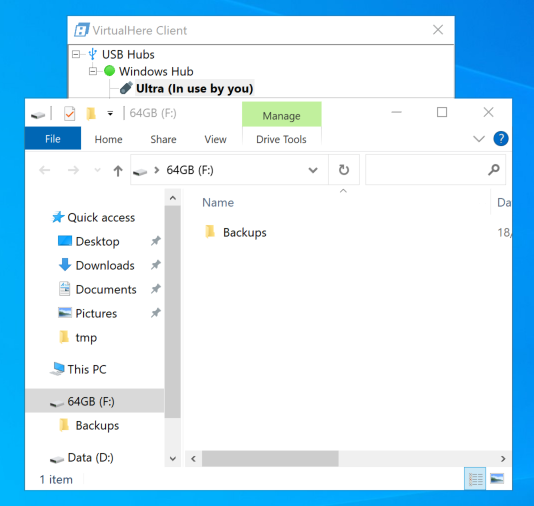
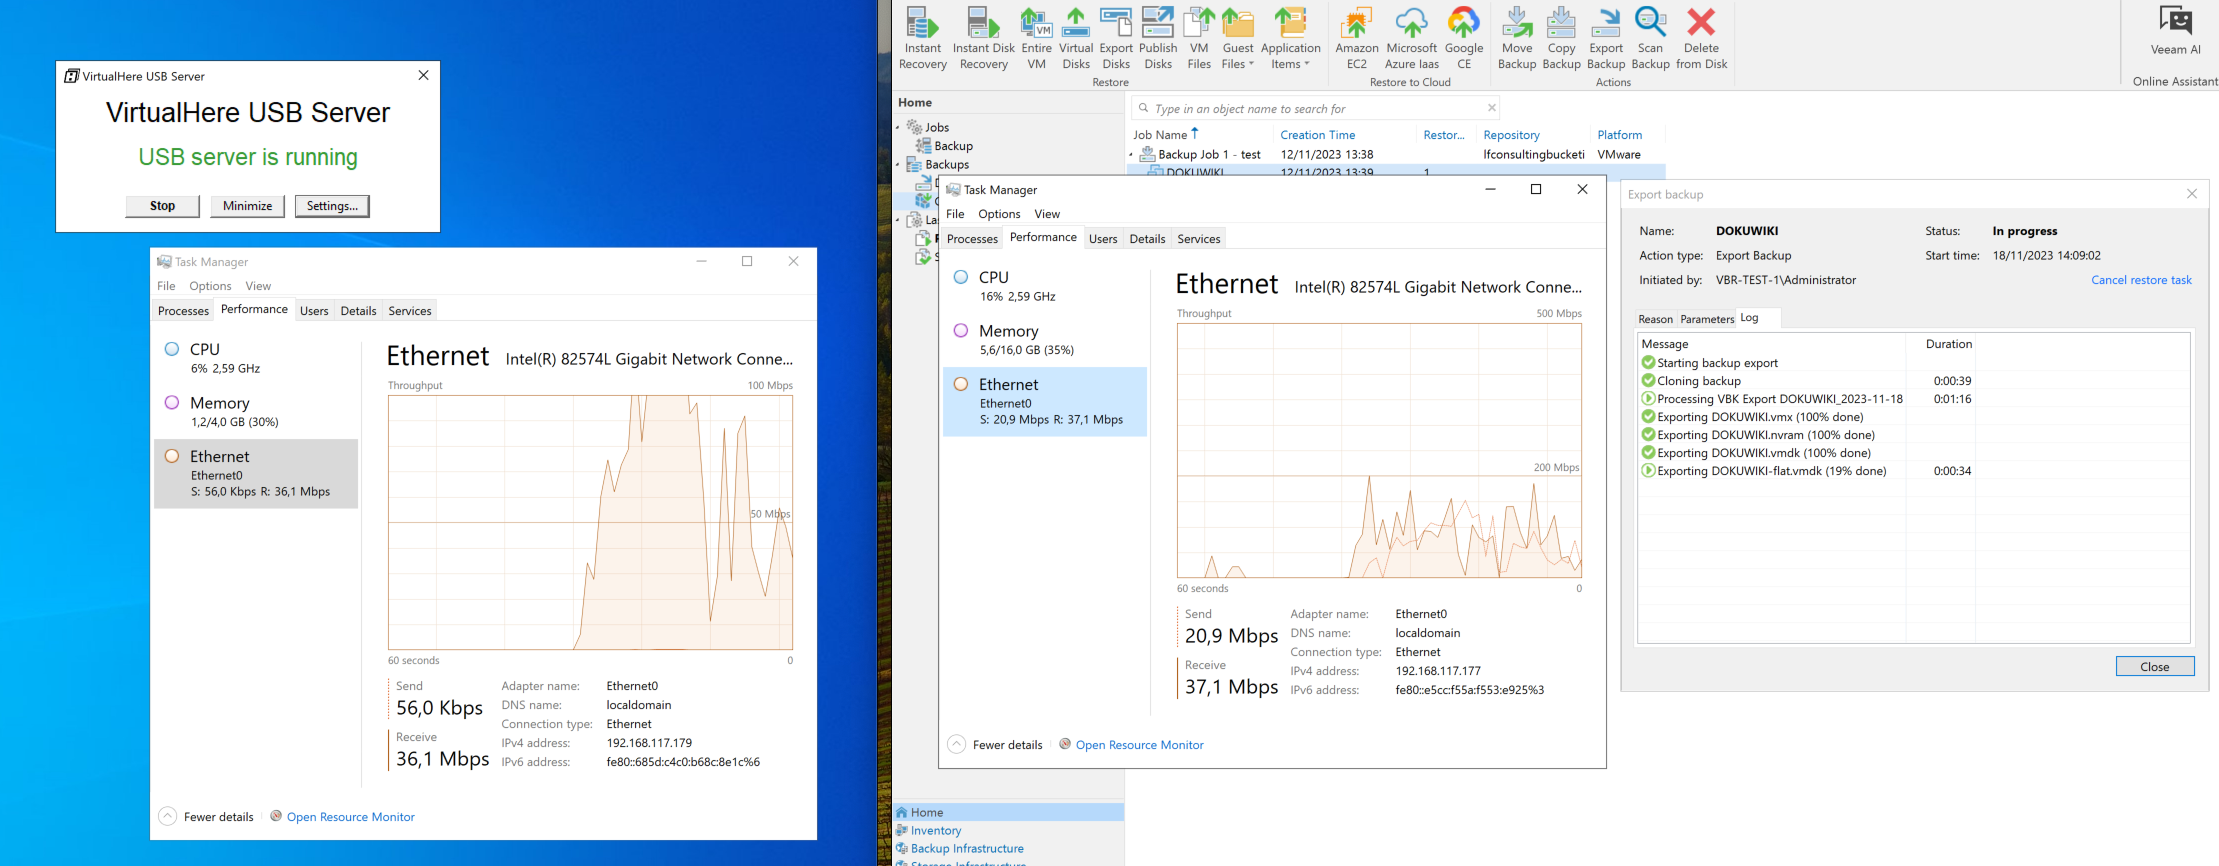
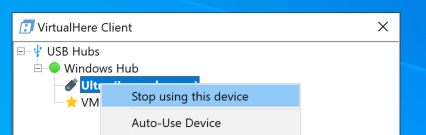
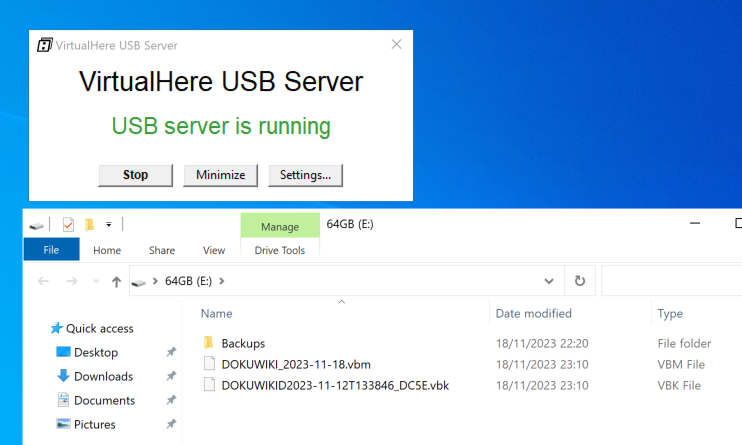
VirtualHere Server running in the workstation out of the Vsphere environment.Client running in the VBR ServerWe right click into the device we would like to mount remotely – locally.Boom! now shows the USB Drive like being plugged locally, its not!VBR Sees the unit from the system, so now we are good to export the backup to it.Some networking traffic going on, sending the files to the USB drive.After the usage, we unmount the unit by right clicking and stop using the device.Now we can see here at the “Server” that the unit has the files into it! worked perfectly.Finally, you can see that the USB Drive is unmounted in the VBR server, all the files copied ok.
Hope you liked this little workaround,
now, planning and thinking in future usages for this great tool.
Just wanted to highlight that I used the “Free” Version, which only allows to mount one USB Device at a time, there is a licensed version, but not used for now. Also wanted to tell you that I have no relationship at all with them, just found it and wanted to share it with all of you.
He tenido la suerte de poder tener un NAS de Terramaster para hacer unas pruebas en mi laboratorio.
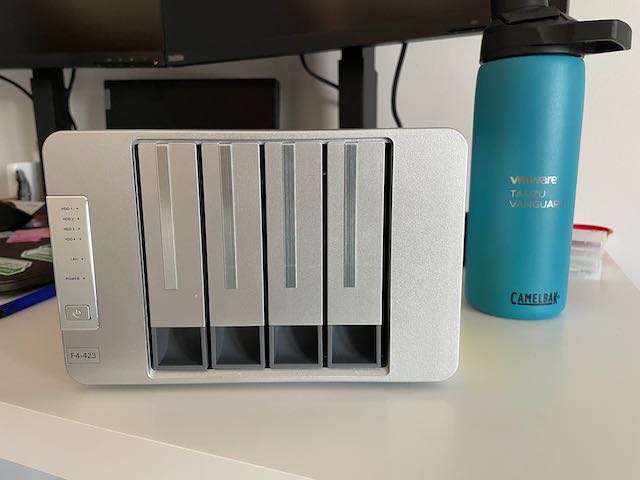
En esta entrada, os voy a mostrar unas imágenes de cómo llegó, como es por fuera y por dentro y sus características base, por último, unas fotos de cómo lo tengo ahora mismo, y mis impresiones.
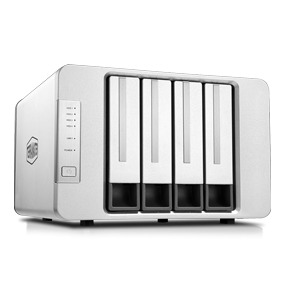
El F4-423 de 4 bahías es adecuado para usuarios que necesitan soluciones de almacenamiento de alto rendimiento. Alto rendimiento significa que los usuarios pueden manejar fácilmente flujos de trabajo de alta carga, mientras múltiples soluciones de respaldo de nivel empresarial garantizan la seguridad de los datos y protegen contra el riesgo de pérdida de datos.
Se trata de una solución de almacenamiento de alto rendimiento que proporciona almacenamiento virtual ampliado y base de datos para usuarios de SMB. Utiliza un procesador Intel Celeron N5095 de cuatro núcleos con 2,0 GHz y frecuencia turbo máxima de 2,9 GHz. Está integrado con una tarjeta gráfica GPU y cifrado de hardware AES-NI. Además, está equipado con dos interfaces de Internet de 2,5 GbE y memoria de doble canal DDR4 de 4 GB (ampliable a 32 GB). Además, esta solución de almacenamiento se instala internamente con 2 ranuras M.2 NVMe, que aceleran el almacenamiento en caché de SSD y duplican la eficiencia de almacenamiento de su RAID.
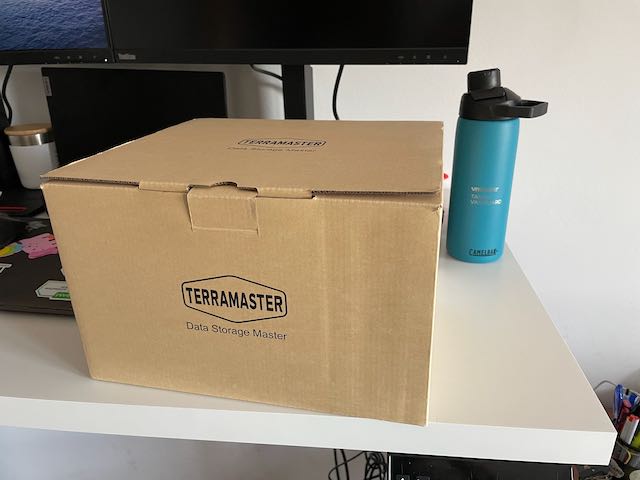
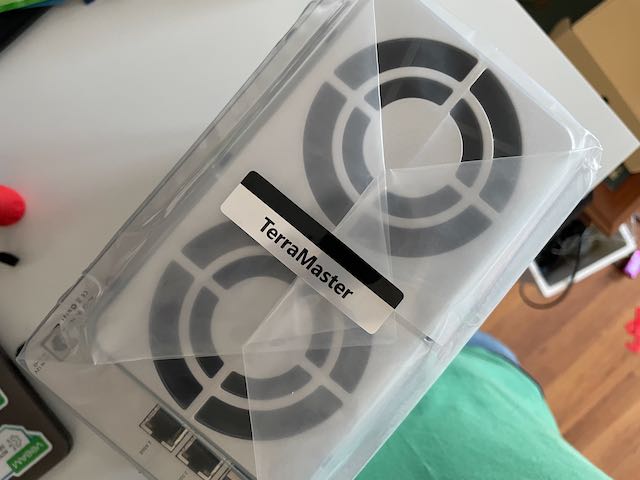
Vamos a ver una foto de la caja, y de como sale:
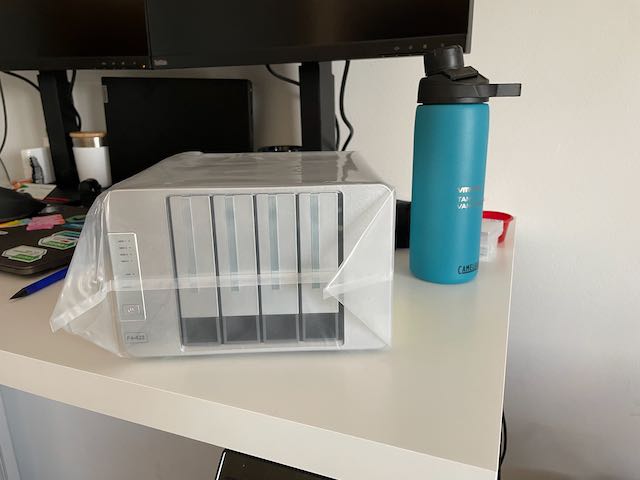
Empaquetado sencillo y limpioProtegido con plasticoSelladoAqui ya apreciamos sus puertos, dos 2,5GB ethernet, 😍Sencillamente bonito, limpio, elegante.
Mi primera impresión es muy buena, un producto robusto, limpio y con un acabado sencillo y elegante.
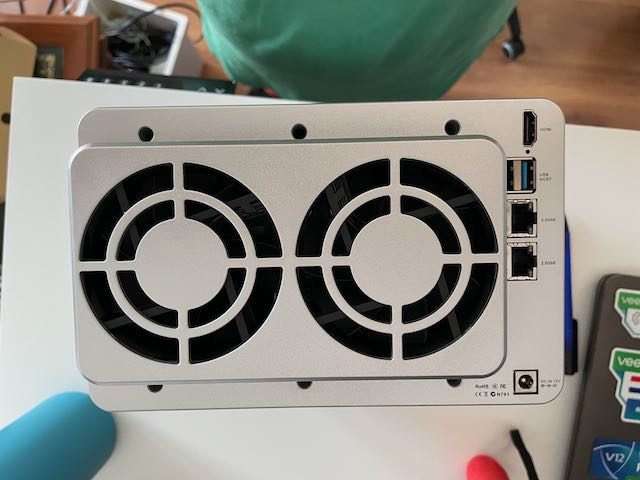
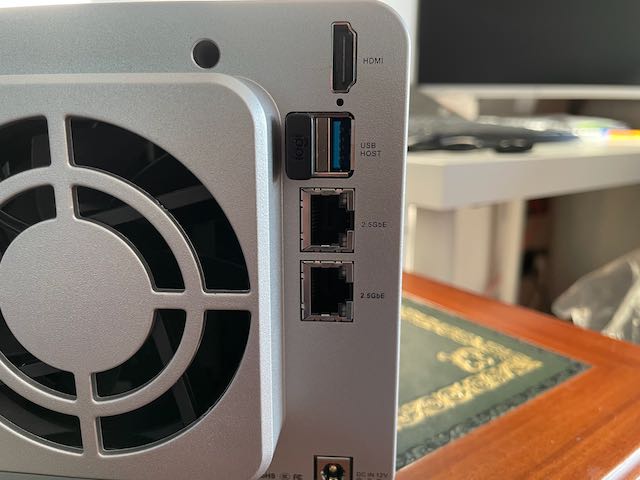
Me ha sorprendido gratamente la conectividad que trae, los USB 3.0, los dos puertos 2.5GB Ethernet y el HDMI, el cual más adelante lo usaremos para ver el sistema y las tripas de este juguete.
Os dejo a continuación una foto inicial del interior, en el cual podremos apreciar en su placa la expansion de discos con 2 M2 NVMEs, y una foto más en detalle de los puertos traseros del mismo.
Con esta capacidad de red, sumado a sus 4 bahías de 3,5 u 2,5, las dos ranuras de expansion M2 NVMe, y su RAM ampliable hasta 2 SODIMM DDR4 de 16GB, lo hacen una unidad muy completa y de fácil crecimiento.
Si te interesa echar un vistazo y adquirir uno, puedes entrar aquí.
Seguiremos haciendo pruebas a esta fantástica unidad, desde su sistema operativo propio TOS, a la instalación de otros sistemas y la integración de la misma en el Home Lab.
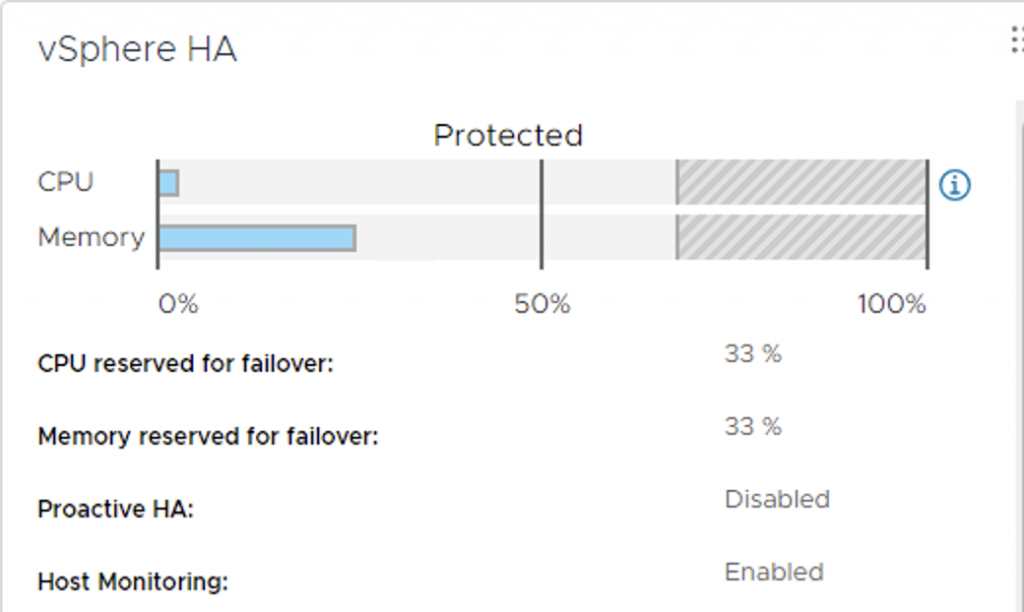
Hi Folks, recently I wanted to «upgrade» my home lab, and I was thinking the best way to have an affordable, low consumption usable home lab for a ESXi Cluster, nothing fancy, just to be able to deploy a couple of little VMS, play with HA, DRS, shared storage and so on.
I started checking out the Intel NUCs, but then I realized that it comes «empty», so it becomes costly at the end.
Then, what about HPE Gen 8-9 Servers, «the wife would kill me» They are noisy, expensive and consumes tons of electricity!
So, looking over the hardware I have, I looked into my Workstation, a Lenovo P320 which it has 64GB of ram, more than sufficient to run a Nested lab, but I wanted something more realistic, with wires and lights, you know, Im a hardware and wires lover!
I kept the Workstation as base Server, Planning tu run there the base or foundational vms I normally run like: vCenter, DNS, AD, a Storage Appliance and a Veeam Server.
lets keep it «low profile», so, Nowadays normally we do have a laptop or workstation capable enough to run a vmware workstation or a ESXi to place a vcenter instance and a Windows Server machine, pretty basic.
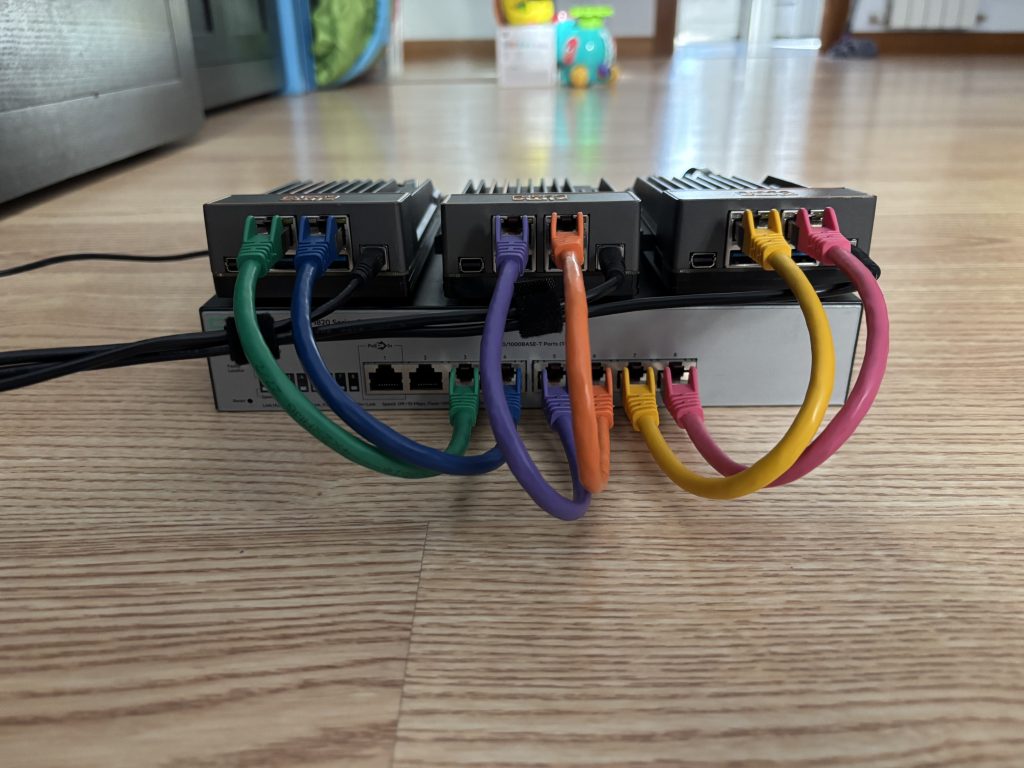
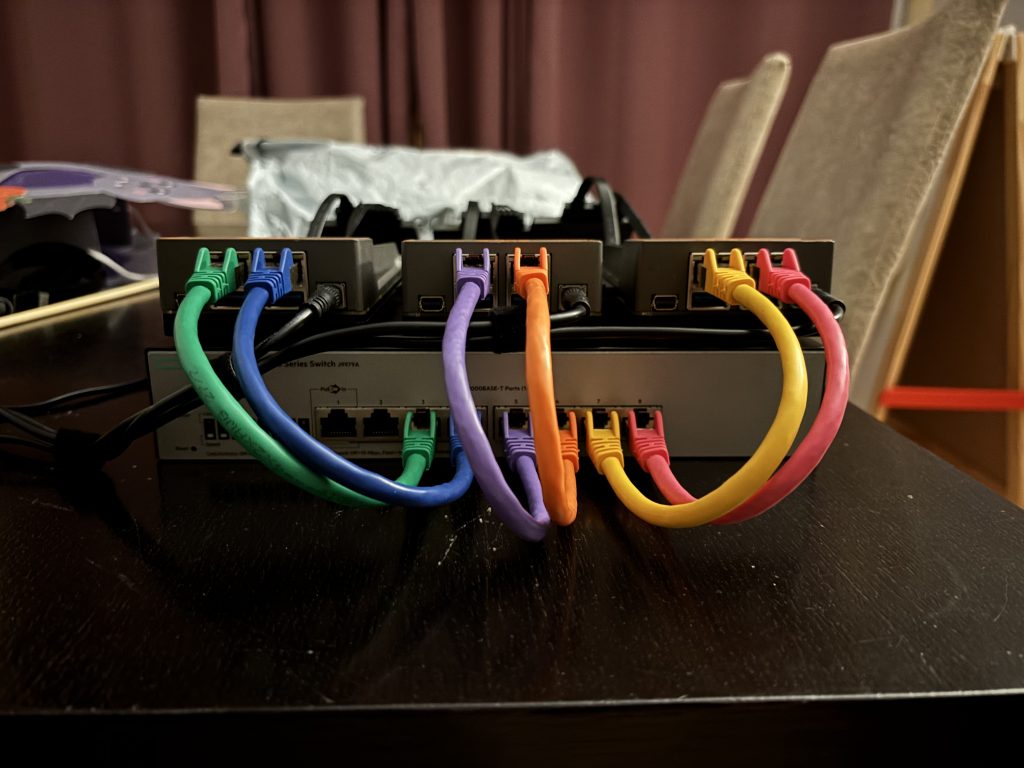
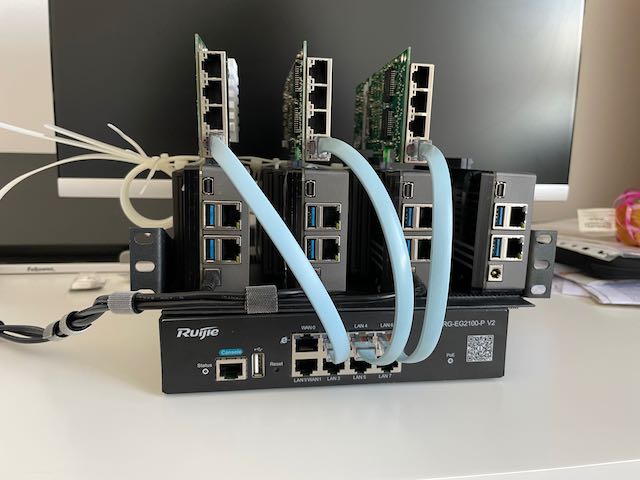
Then, I though, I need a switch, and I had an «old» 1Gbps Router – switch capable of Vlans, so perfect for this task.
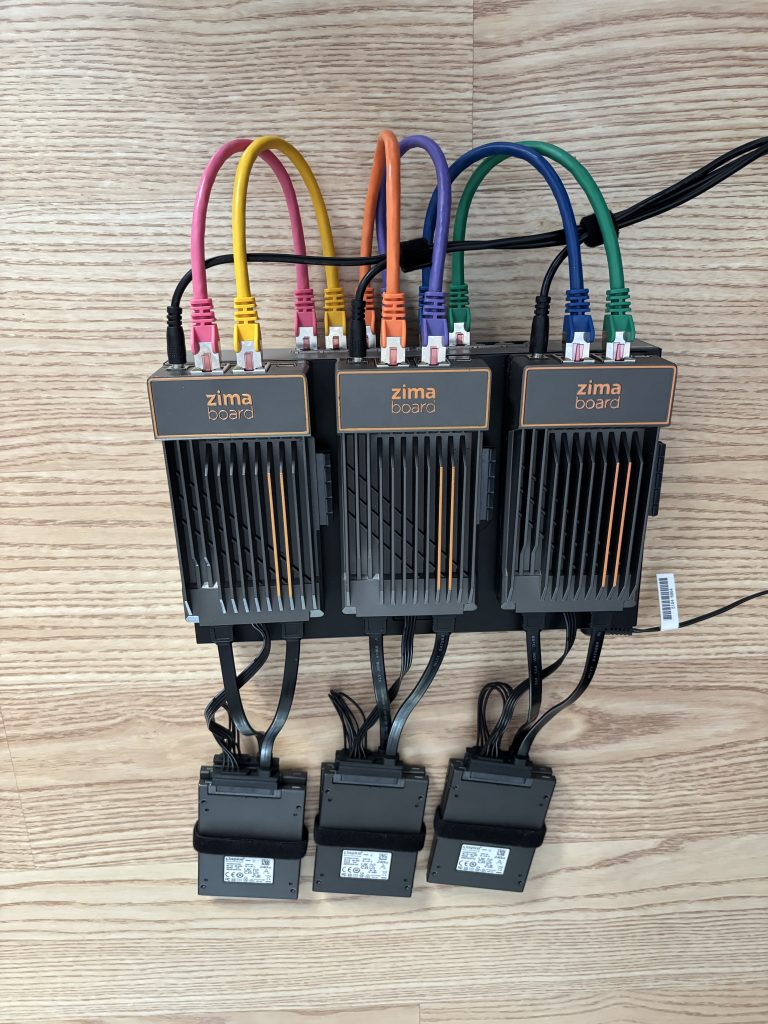
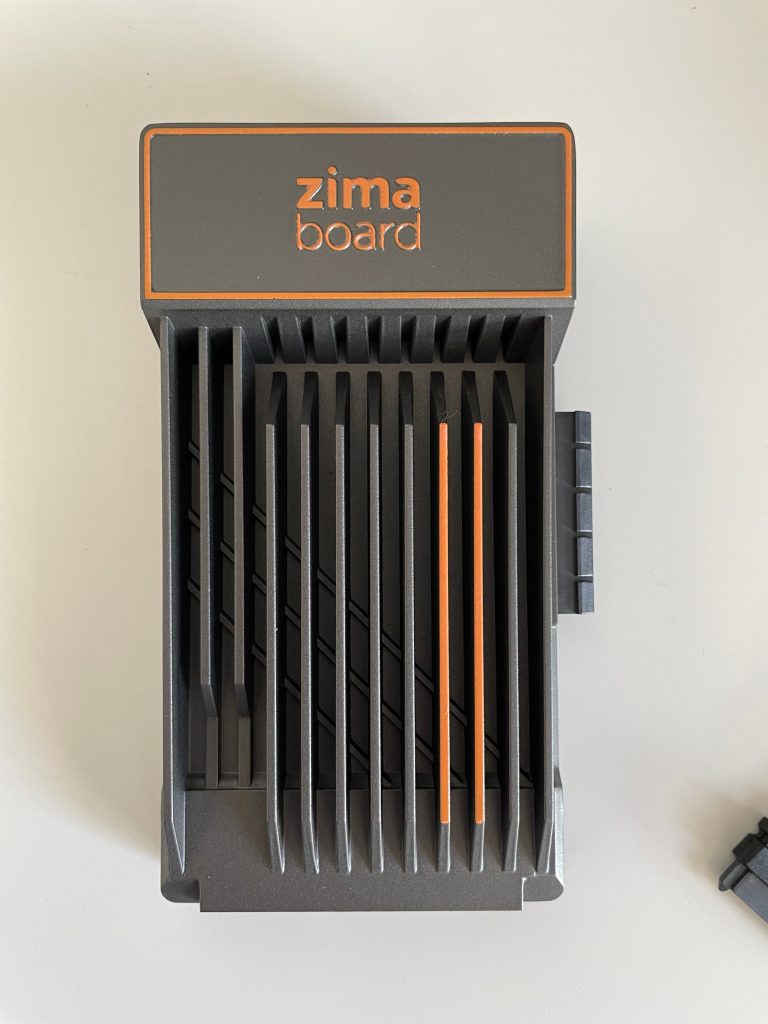
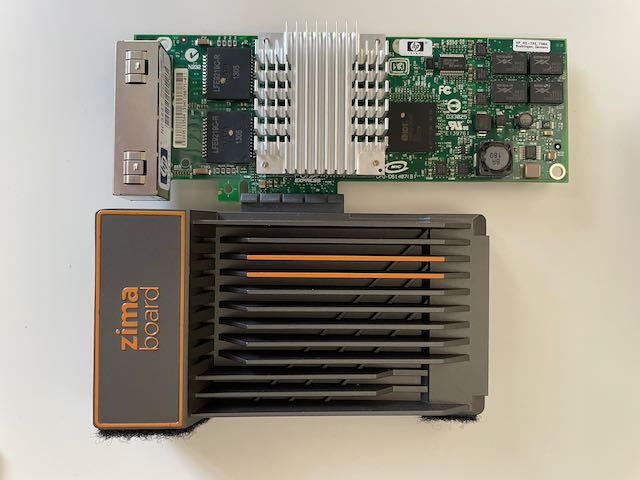
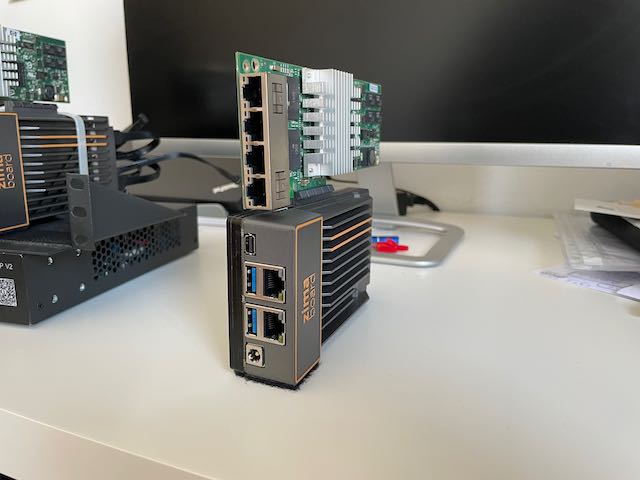
Now Im just missing some hosts to add to the picture, and I found these little guys:
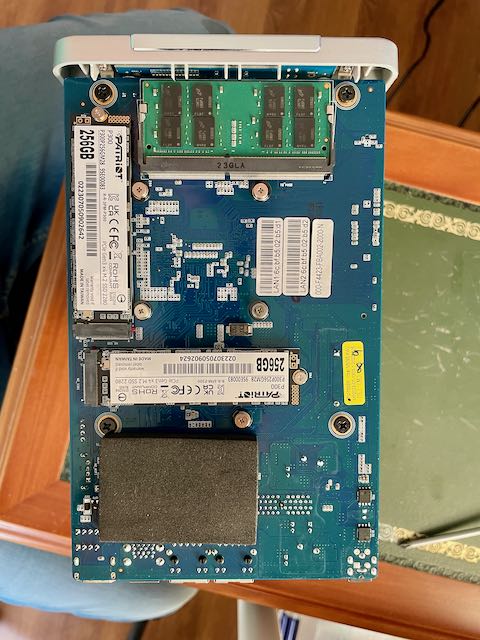
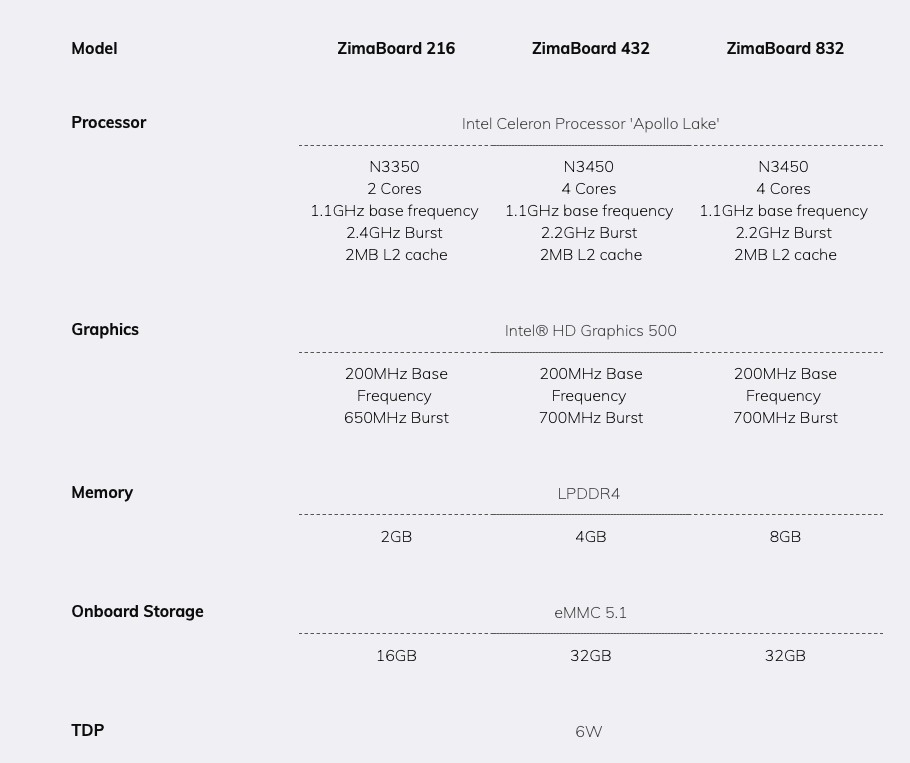
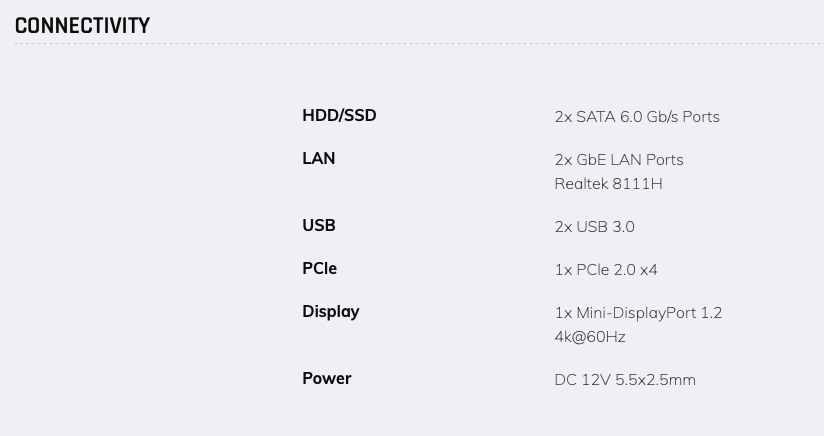
Looking at them, they were quite perfect, the top performing setup has a 4C processor, 8GB of RAM, and a local NVME 32GB, so perfect for a ESXi mini server. Ah! forgot to say: it has a 4x PCI-E and 2 SATA Ports!! Amazing!!
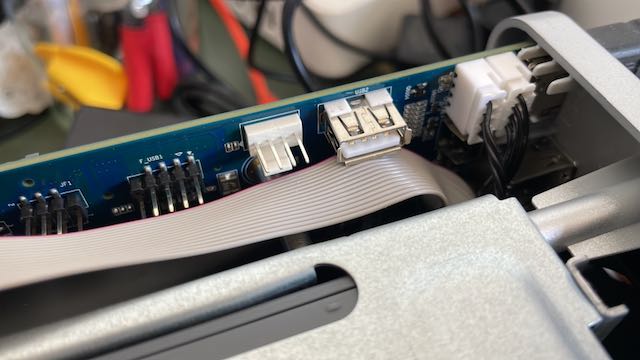
Everything was going soooo good, until the tragedy came, Realtek Gigabit Ethernet, not supported by vmware vsphere…. nooo! but wait a second, I told you already they’ve got a PCI-E port?
Exacly, I looked over into my warehouse, and there you go! a 4 Ports Intel NIC card! Fully compatible and ready to be installed!!
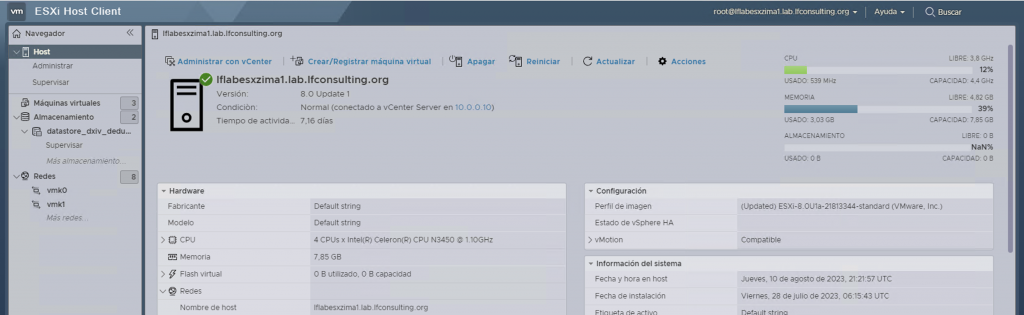
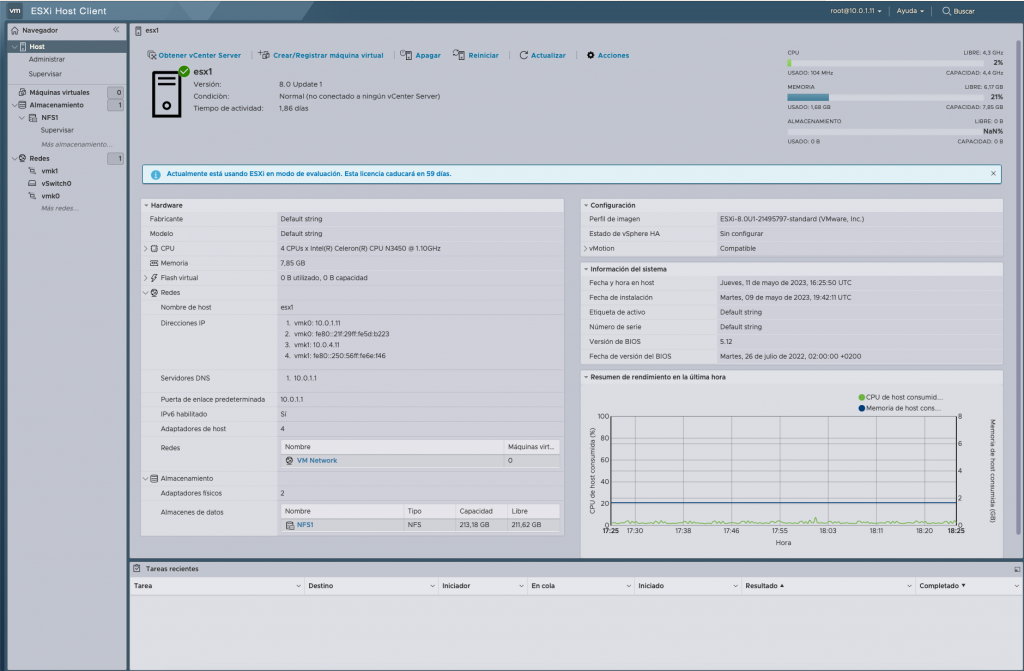
Now, with all setup, lets get into it, installing Vsphere 8, no problem!!
NIC Card, OK, system ready and first boot OK!
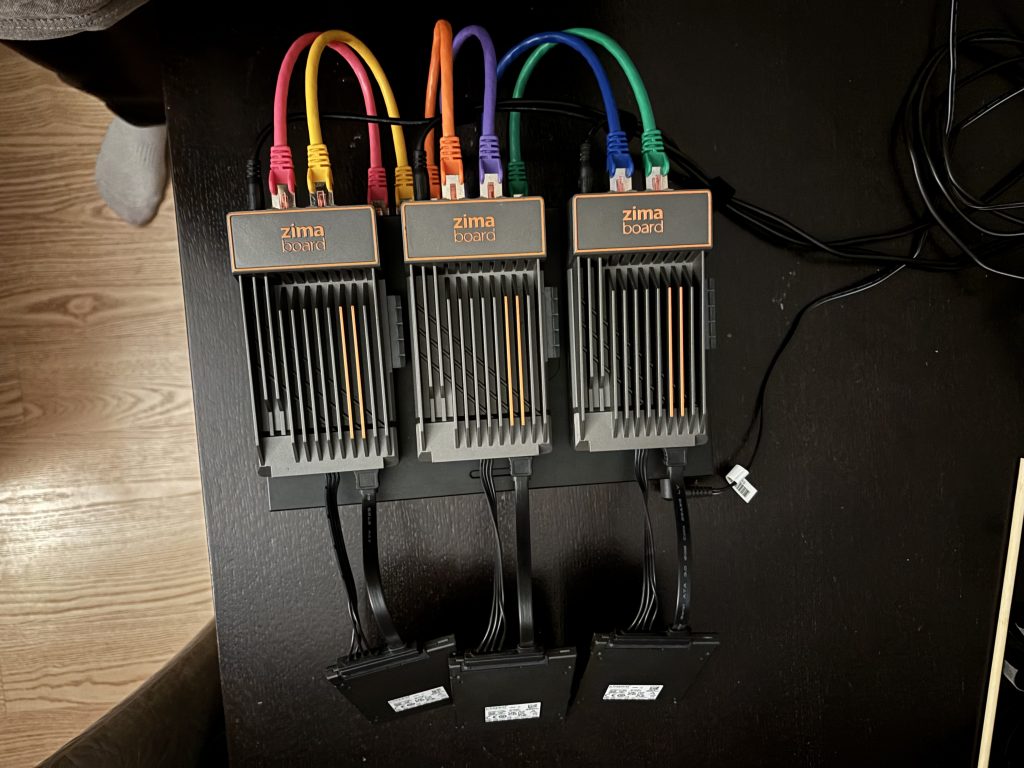
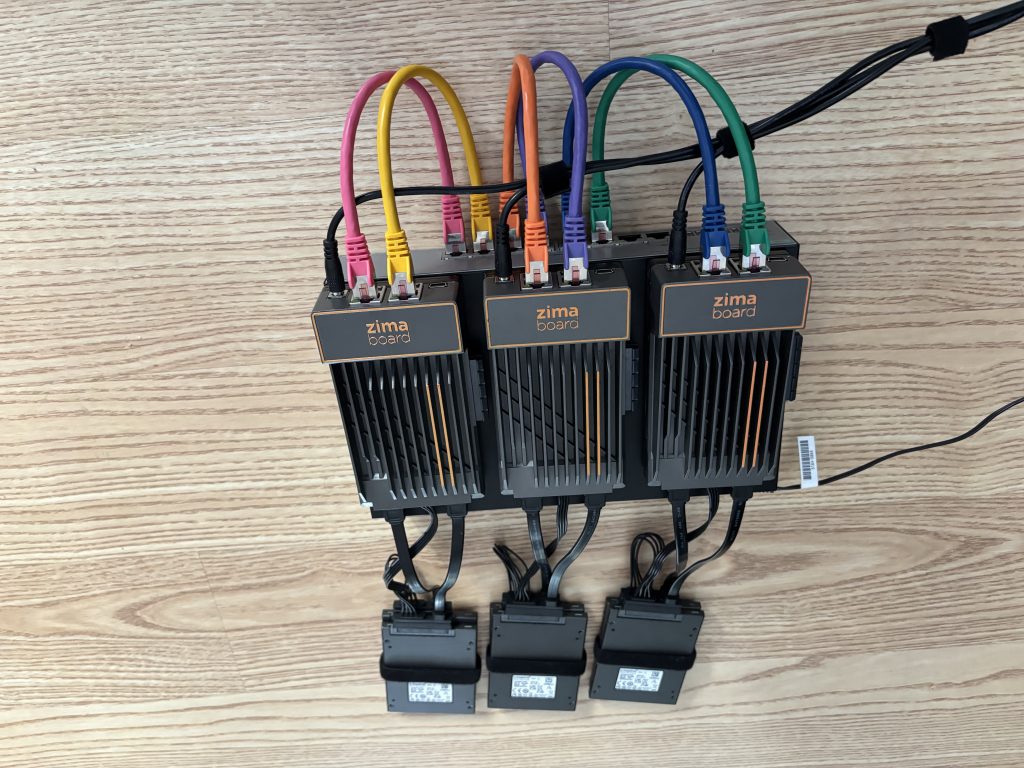
Then I did the same operation with the other two Zima mini CPUs I’ve got! Configured the initial parameters, IPs, Hostnames, DNSs, etc. and ready for next steps!
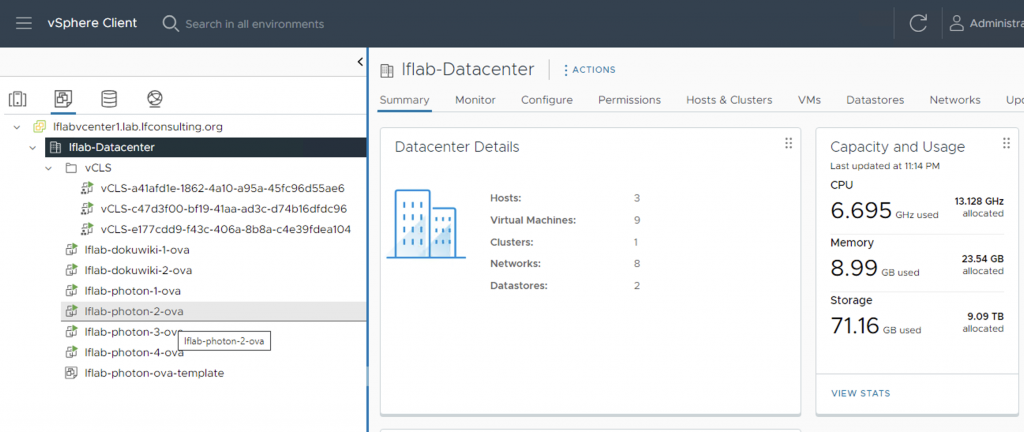
By the time, I setup a vCenter instance and a Software Appliance for Storage, Simple NFS datastore for home lab experiments, a Quantum DXiv Community Edition.
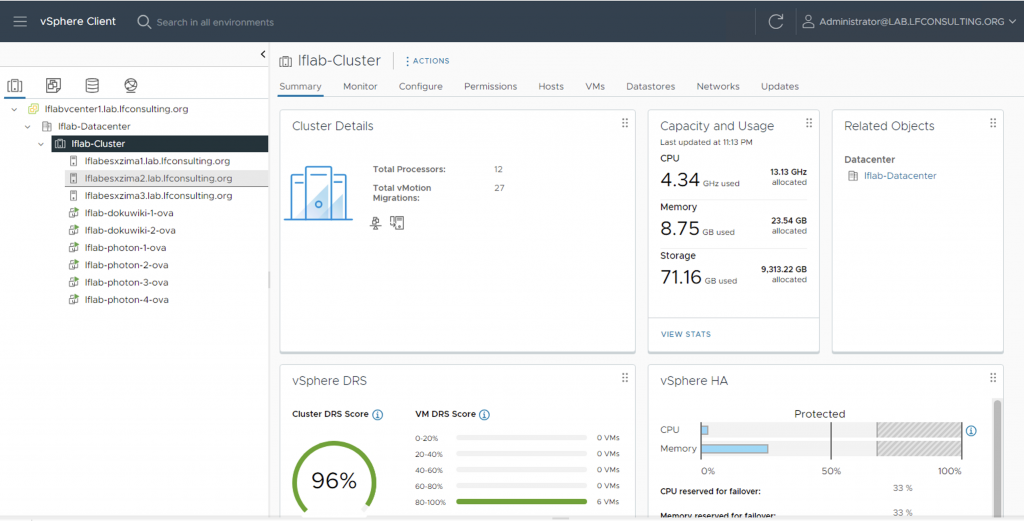
After a few configurations, added those three ESXi hosts into my vcenter instance, create the cluster, and let it build, and…. Voila!
The cluster was up and ready to be used!
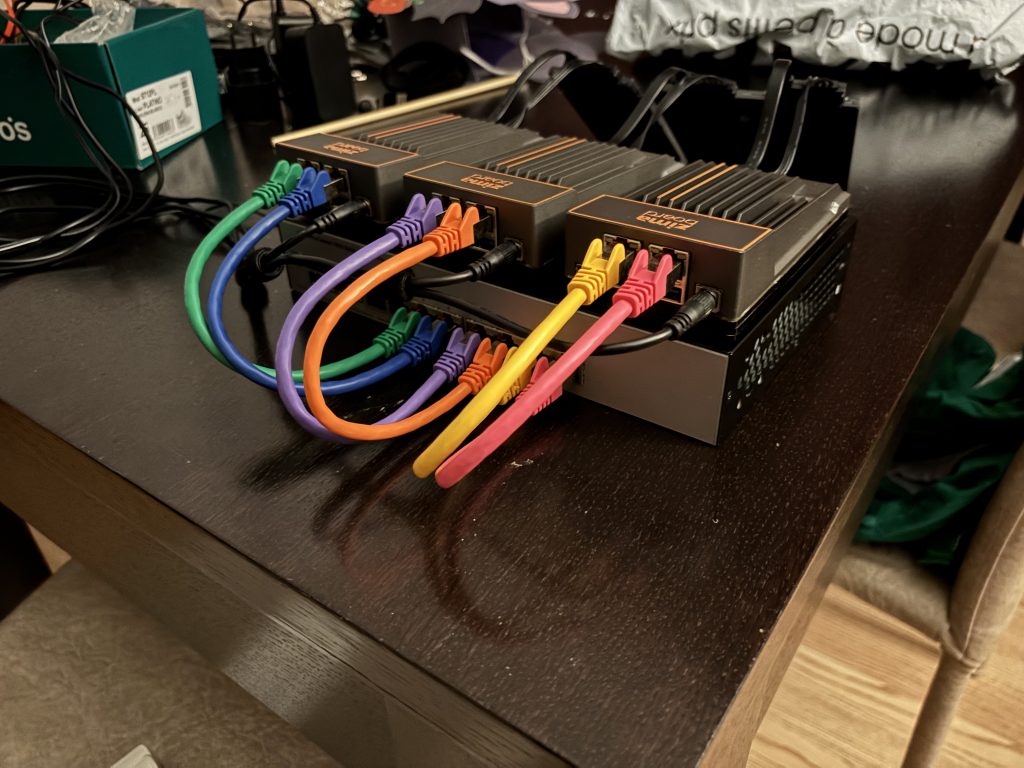
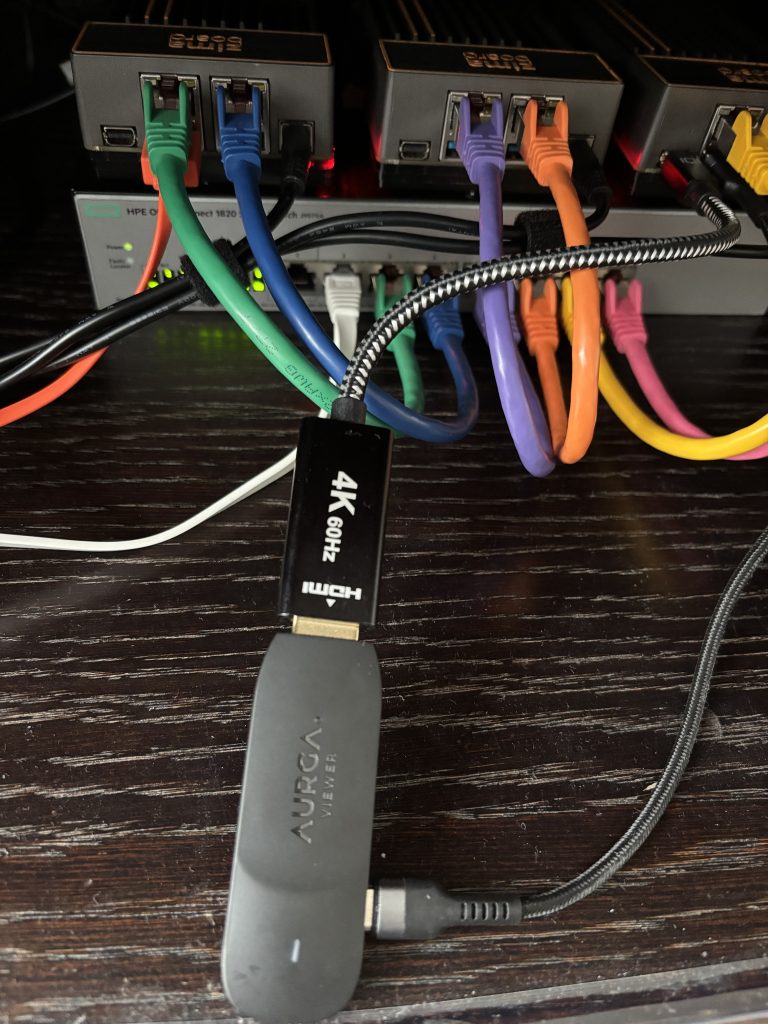
Let me show you a few pics of how it looks now, externally and from the vCenter perspective!
The normal electrical consumption for this little guys is around 6W each, pretty low, a little more with the Ethernet PCI-E card, but nothing overkilling like a full server, and not counting noise and hit!
My overall cost, taking into count that I do own the workstation, switch and I made the Ethernet cables, around 200$ per Zima Server, so around 600$.
if you plan to start low, you can do it with only two Systems, so around 400$ + shipping.
Hope you enjoy it, and don’t hesitate to give them a try and have some fun! will try to follow this up, and upload some future info, tests and ideas.
Vamos a revisar un «juguete» que ha llamado mi atención, y he querido probarlo para poder mejorar / ampliar mi home lab!
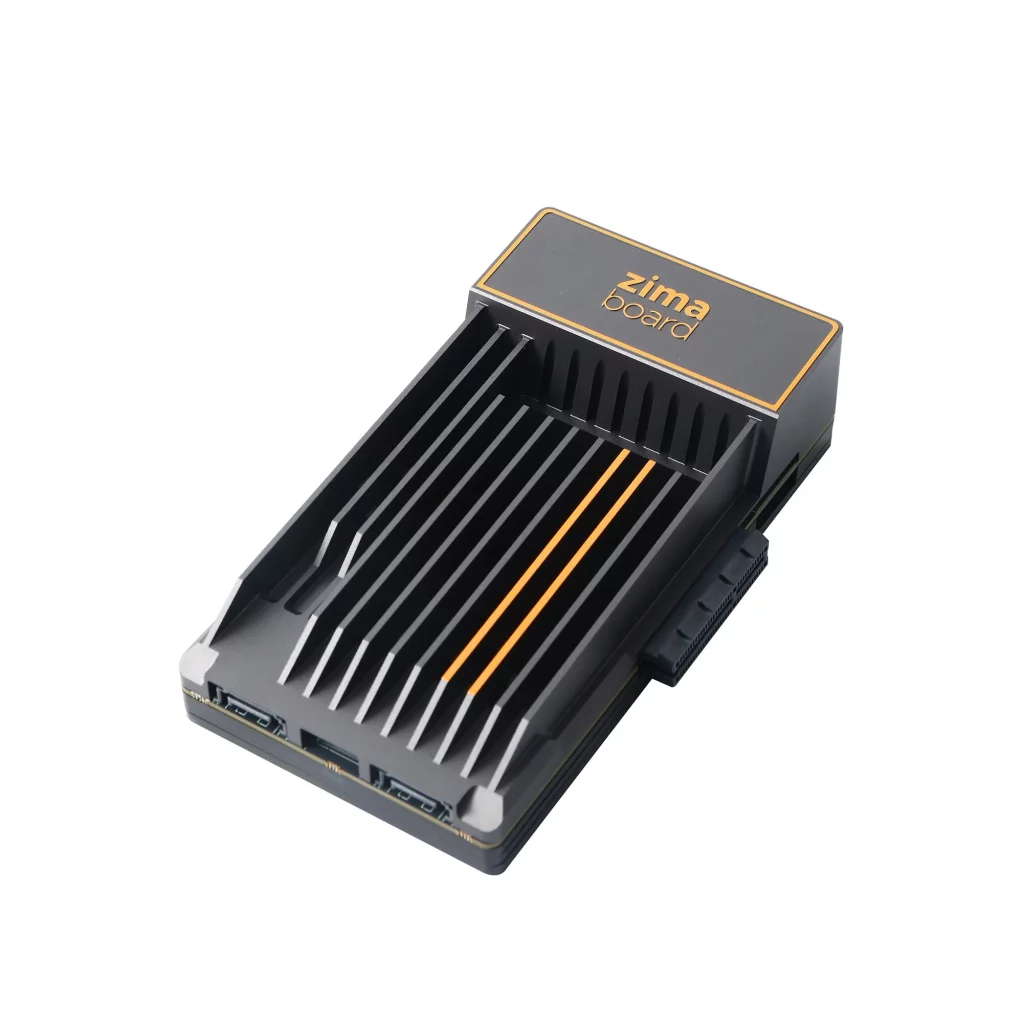
Este pequeño amigo viene en varias opciones, en mi caso, es el modelo «más alto» con un procesador Celeron de 4 núcleos, 8GB de RAM y almacenamiento interno de 32GB! Una maravilla para mi home lab!
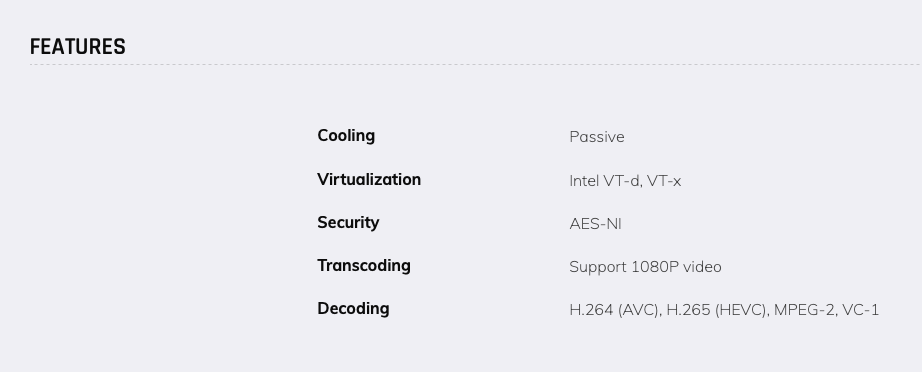
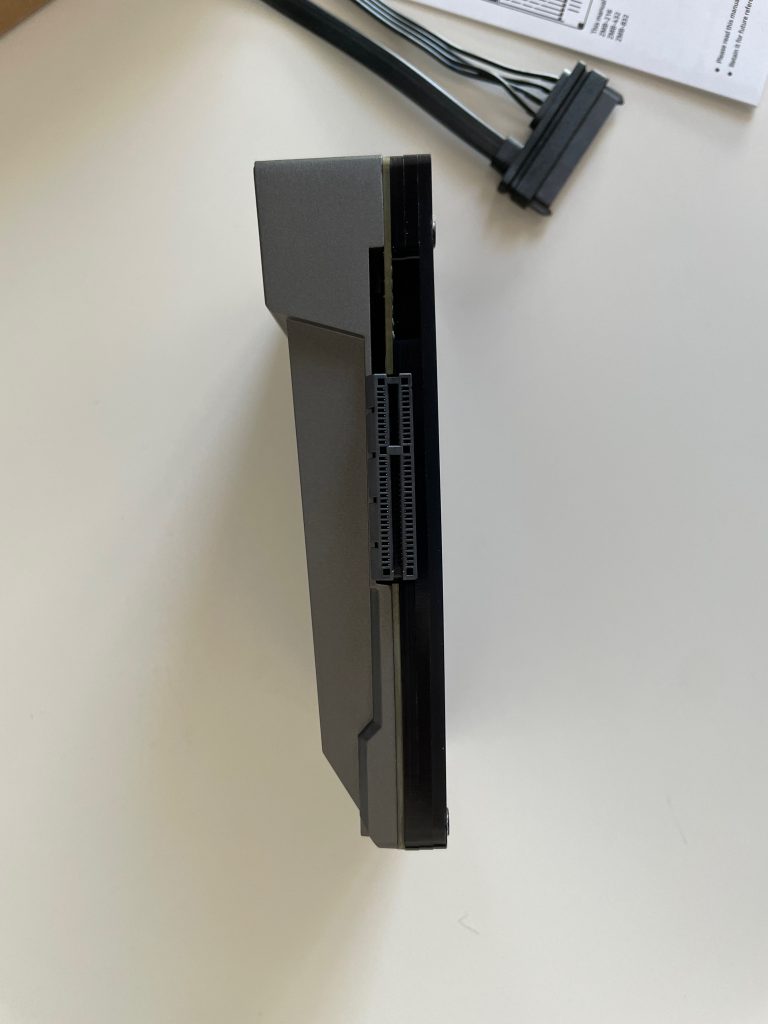
Viene con conectividad ya «puesta» , por tanto muy flexible para múltiples aplicaciones! Viene genial tener 2 tarjetas de red y 2 puertos SATA! PCI-e (x4), USB 3.0 y un disipador que la hace muy pasiva y silenciosa! NAS, Firewall, Servidor, etc. Las posibilidades son infinitas!!
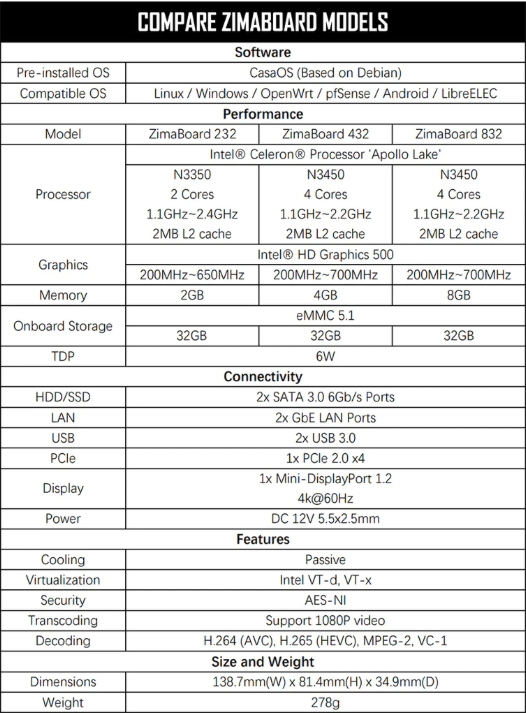
Veréis en las specs. que es muy pequeña, y potente!!
El coste es muy bueno, 120$ ; 160$; 200$
Para tener todo lo que trae, me ha parecido una maravilla que quería compartir con todos vosotros!
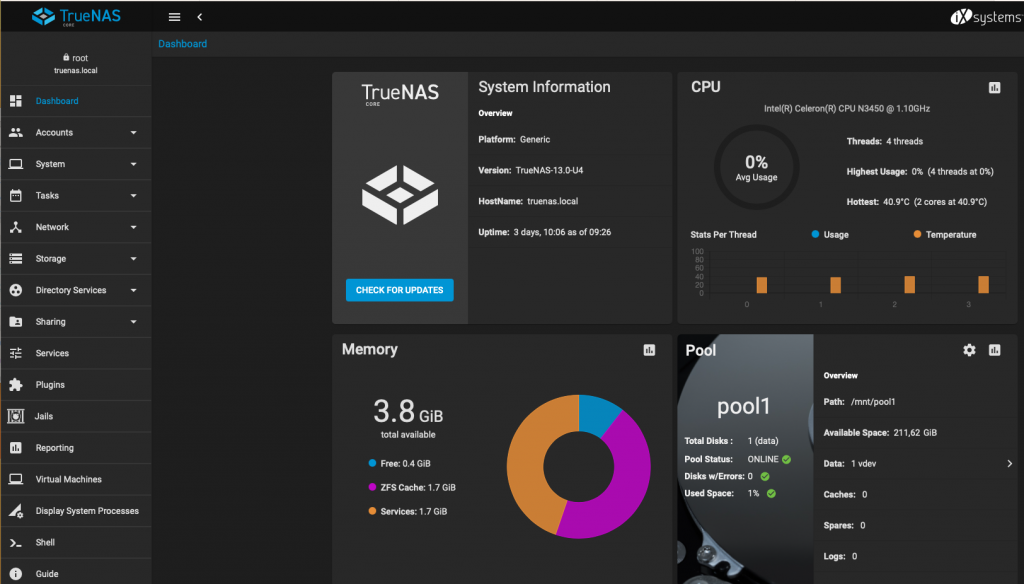
Aquí os dejo el pantallazo de los dos usos en los que estoy empleando a estos amiguitos:
ESXi 8 (añadida tarjeta de red en PCIe x4True Nas con disco SATA conectados directamente al ZIMA
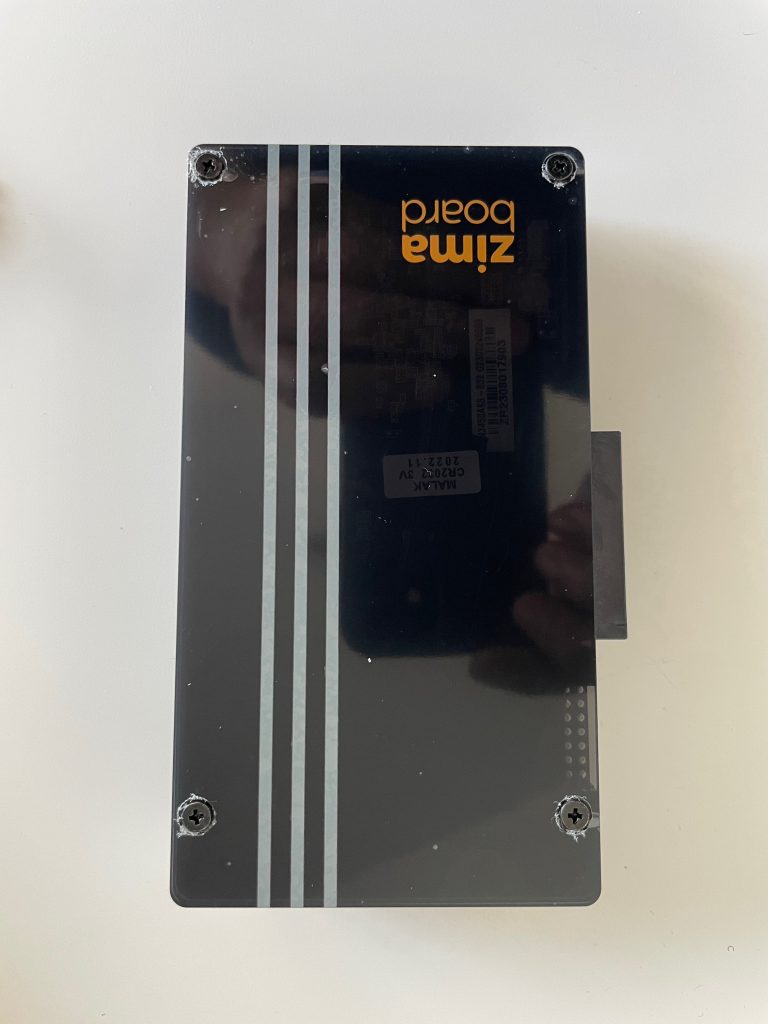
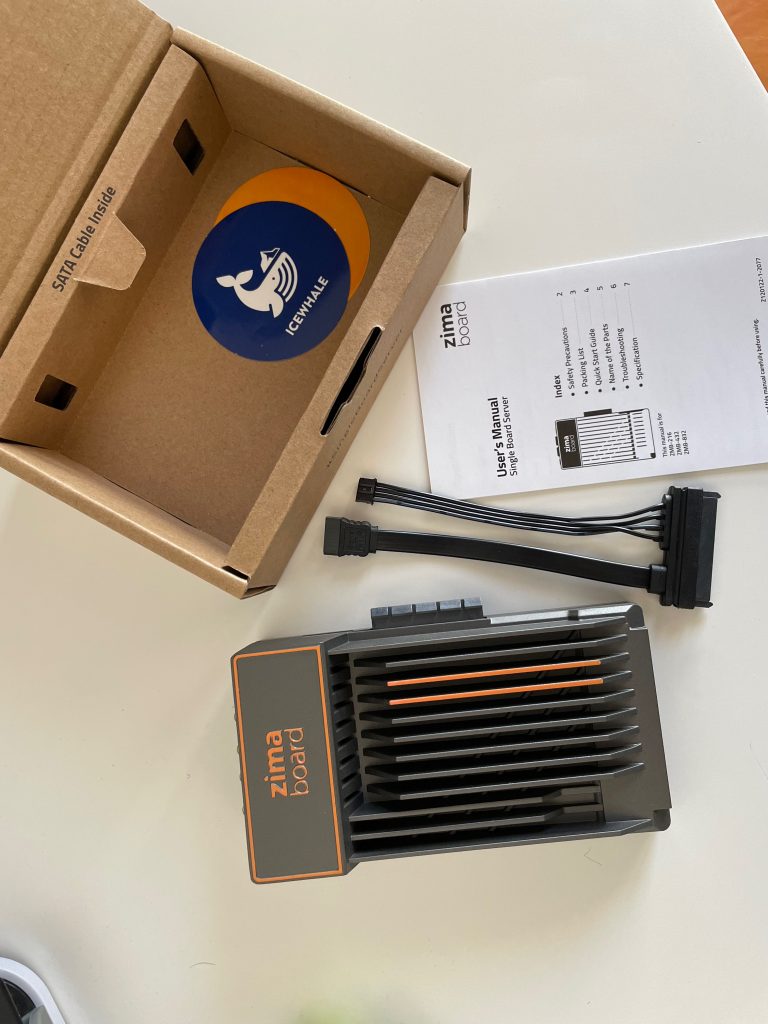
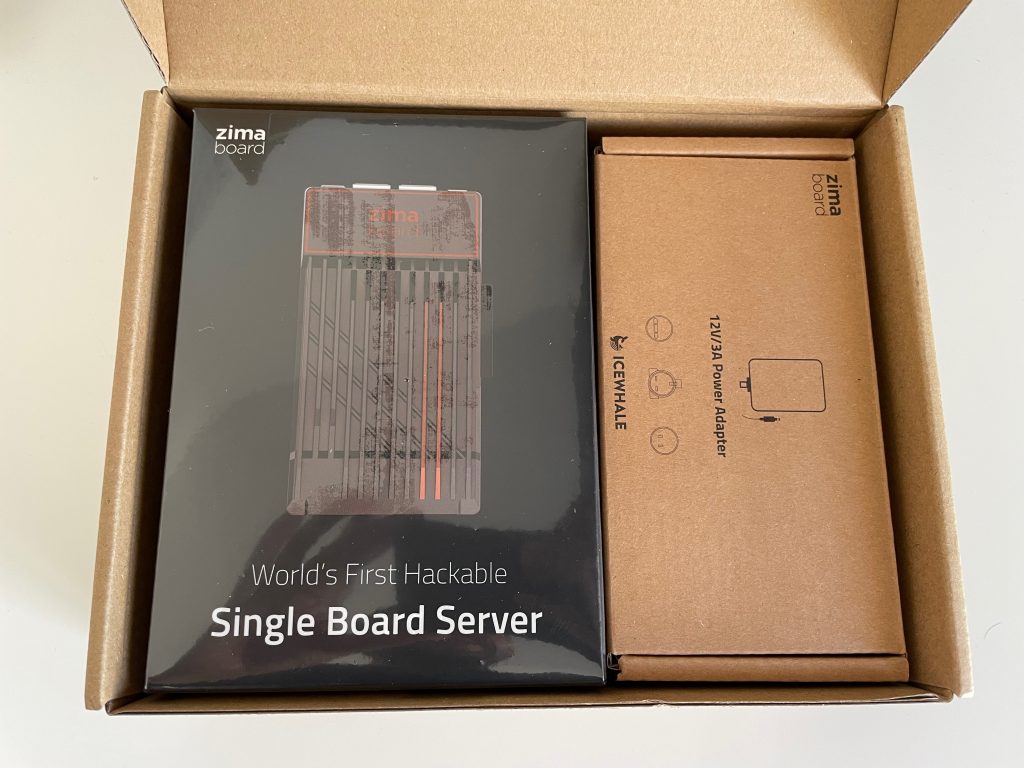
Aquí podéis ver unas fotos del producto recién sacado de su caja! Viene con un cable SATA + Power para 1 disco, FA con diferentes enchufes (según país) Manual, y pegatinas!!!!
Seguiremos jugado con estos «juguetes» ya que tener un servidor de bajo consumo, con poder suficiente de poder correr nuestros laboratorios, PFSense firewalls en casa, etc… es una auténtica maravilla!!
Olvídate de ruidosos Servidores, PCs grandes, o micro ordenadores con CPUs que no siempre tienen la universalidad de un procesador Intel Celeron Processor ‘Apollo Lake’ x86!